Scratch Built Media Player Channels 1980s Design

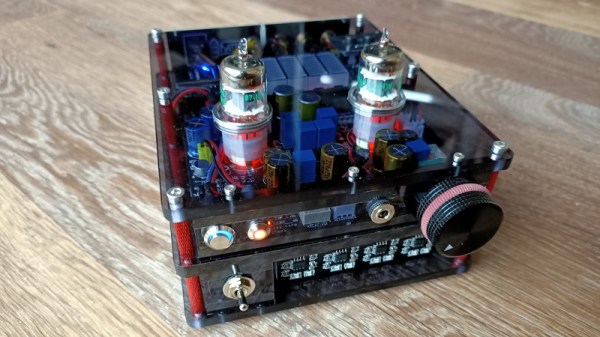
No, you aren’t looking at a 30 year old Teac graphic equalizer that somebody modified. The MWA-002 Network Music Player created by [GuzziGuy] is built entirely from new components, and easily ranks up there with some of the most gorgeous pieces of homebrew audio gear we’ve ever seen. Combining modular hardware with modern manufacturing techniques, this 1980s inspired build is a testament to how far we’ve come in terms of what’s possible for the dedicated hacker and maker.

The enclosure, though it looks all the world like a repurposed piece of vintage hardware, was built with the help of a CNC router. It’s constructed from pieces of solid oak, plywood, and veneered MDF that have all been meticulously routed out and cut. Even the front panel text was engraved with the CNC and then filled in with black paint to make the letters pop.

Internally, the MWA-002 is powered by a Raspberry Pi 3 running Mopidy to play both local tracks and streaming audio. Not satisfied with the Pi’s built-in capabilities, [GuzziGuy] is using a Behringer UCA202 to produce CD-quality audio, which is then fed into a TPA3116 amplifier. In turn, the output from the amplifier is terminated in a set of female jacks on the player. Just like the stereo equipment of yore, this player is designed to be connected to a larger audio system and doesn’t have any internal speakers.

The primary display is a 256×64 Futaba GP1212A02A FVD which has that era-appropriate glow while still delivering modern features. [GuzziGuy] says it was more difficult to interface with this I2C display than the LCDs he used in the past due to the lack of available libraries, but we think the final product is proof it was worth the effort. He bought both the VFD spectrum analyzer and LED VU meter as turn-key modules, but the center equalizer controls are completely custom; with dual MCP3008 ADCs to read the state of the sliders and the Linux Audio Developer’s Simple Plugin API (LADSPA) to tweak the Pi’s audio output accordingly.

We’re no strangers to beautiful pieces of audio gear here at Hackaday, but generally speaking, most projects involve modernizing or augmenting an existing device. While those projects are to be admired, the engineering that goes into creating something of this caliber from modular components and raw building materials is really an accomplishment on a whole different level.

C++ Reverbs From A Matlab Design

The guitar ‘Toing’ sound from the ’70s was epic, and for the first time listener it was enough to get a bunch of people hooked to the likes of Aerosmith. Reverb units were all the rage back then, and for his DSP class project, [nebk] creates a reverb filter using Matlab and ports it to C++.

Digital reverb was introduced around the 1960s by Manfred Schroeder and Ben Logan. The system consists of essentially all pass filters that simply add a delay element to the input signal and by clubbing a bunch together and then feeding them to a mixer. The output is then that echoing ‘toing’ that made the ’80s love the guitar so much. [Nebk]’s take on it enlists the help of the Raspberry Pi and C++ to implement the very same thing.

In his writeup, [nebk] goes through the explaining the essentials of a filter implementation in the digital domain and how the cascaded delay units accumulate the delay to become a better sounding system. He also goes on to add an FIR low pass filter to cut off the ringing which was consequent of adding a feedback loop. [nebk] uses Matlab’s filter generation tool for the LP filter which he includes the code for. After testing the design in Simulink, he moves to writing the whole thing in C++ complete with the filter classes that allows reading of audio files and then spitting out ‘reverbed’ audio files out.

The best thing about this project is the fact that [nebk] creates filter class templates for others to play with. It allows those who are playing/working with Matlab to transition to the C++ side with a learning curve that is not as steep as the Himalayas. The project has a lot to learn from and is great for beginners to get their feet wet. The code is available on [GitHub] for those who want to give it a shot and if you are just interested in audio effects on the cheap, be sure to check out the Ikea Reverb Plate that is big and looks awesome.

“Vintage” Radio Gets A Modern Makeover

Taking an old piece of gear and cramming it full of modern hardware is a very popular project. In fact, it’s one of the most common things we see here at Hackaday, especially in the Raspberry Pi era. The appeal is obvious: somebody has already done the hard work of designing and building an attractive enclosure, all you need to do is shoehorn your own gear into it. That being said, we know some of our beloved readers get upset when a vintage piece of gear gets sacrificed in the name of progress.

Thankfully, you can put your pitchforks down for this one. The vintage radio [Freshanator] cannibalized to build this Bluetooth speaker is actually a replica made to invoke the classic “cathedral” look. Granted it may still have been older than most of the people reading this right now, but at least it wasn’t actually from the 1930’s.

To start the process, [Freshanator] created a 3D model of the inside of the radio so all the components could be laid out virtually before anything was cut or fabricated. This included the design for the speaker box, which was ultimately 3D printed and then coated with a spray-on “liquid rubber” to seal it up. The upfront effort and time to design like this might be high, but it’s an excellent way to help ensure you don’t run into some roadblock halfway through the build.

Driving the speakers is a TPA3116-based amplifier board with integrated Bluetooth receiver, which has all of its buttons broken out to the front for easy access. [Freshanator] even went the extra mile and designed some labels for the front panel buttons to be made on a vinyl cutter. Unfortunately the cutter lacked the precision to make them small enough to actually go on the buttons, so they ended up getting placed above or next to them as space allowed.

The build was wrapped up with a fan installed at the peak of the front speaker grille to keep things cool. Oh, and there are lights. Because there’s always lights. In this case, some blue LEDs and strategically placed EL wire give the whole build an otherworldly glow.

If you’re interested in a having a frustrating quasi-conversation with your vintage looking audio equipment, you could always cram an Echo Dot in there instead. Though if you go that route, you can just 3D print a classic styled enclosure without incurring the wrath of the purists.

Bone Conducting Headphones Built Into Eye Glasses

There are times when being seen to listen to music through headphones might get you into trouble. For these moments, reach for a handy solution: bone conduction speakers that discreetly pipe the music to your eardrums through the bone of your skull. [Samuel] wanted just such a covert music listening device, so created his own in a set of 3D-printed glasses.

He first tried using an Adafruit bone-conducting transducer but found that to be too bulky. What you see here is a smaller module that [Samuel] found on AliExpress (search for bone conduction module). The GD-02 is much smaller and thus more suitable for hiding in the arm of a pair of glasses. For the rest of the electronics he used a PCB and battery from a donated set of broken Bluetooth headphones, a space for which he was able to conceal easily in the 3D-printed frame of the glasses. The battery is in one arm and the board in the other, and he says the wiring was extremely fiddly.

The result is a surprisingly svelte set of specs that you might not immediately think concealed some electronics. His choice of bright yellow filament might give the game away, but overall he’s done a great job. This certainly isn’t the first bone conduction project we’ve shown you, some of the others have used motors instead of bone conduction transducers.

Squeezebox Comes To The ESP

Streaming music may now come from somewhere in the cloud to an app on your phone and be sent to the client built in to almost every entertainment device you own, but there was a time when the bleeding edge lay in dedicated streaming device that connected to your existing set-up. One of the players in this market was Logitech with their Squeezebox line of products, and while the original hardware may have been discontinued it remains very much alive among its dedicated userbase due to the free nature of the Logitech Media Server software and implementations of the slimproto streaming protocol in players. Now you can create a network player on about as cheap hardware as it is possible to find, because [Bgiraut] has produced a client for the ESP32 and ESP8266.

The software can be found on GitHub, and comes with the warning that it’s an early proof-of-concept rather than a polished release. It has two options for playback that both require a little bit of extra hardware, an I2S DAC for uncompressed streams or a VS1053 codec module for compressed ones, but neither of those need be expensive.

You can find Logitech Media Server from its download page, and give this device a try. Meanwhile we’ve covered many Squeezebox implementations, including ones on the Raspberry Pi, and the PogoPlug.

Thanks [joyofdivisions] for the tip.

The CD Is 40, The CD Is Dead

The Compact Disc is 40 years old, and for those of us who remember its introduction it still has that sparkle of a high-tech item even as it slides into oblivion at the hands of streaming music services.

There was a time when a rainbow motif was extremely futuristic. Bill Bertram (CC BY-SA 2.5)

If we could define a moment at which consumers moved from analogue technologies to digital ones, the announcement of the CD would be a good place to start. The public’s coolest tech to own in the 1970s was probably an analogue VCR or a CB radio, yet almost overnight they switched at the start of the ’80s to a CD player and a home computer. The CD player was the first place most consumers encountered a laser of their own, which gave it an impossibly futuristic slant, and the rainbow effect of the pits on a CD became a motif that wove its way into the design language of the era. Very few new technologies since have generated this level of excitement at their mere sight, instead today’s consumers accept new developments as merely incremental to the tech they already own while simultaneously not expecting them to have longevity.
Continue reading “The CD Is 40, The CD Is Dead”

Python Script Sends Each Speaker Its Own Sound File

When it comes to audio, the number of speakers you want is usually governed by the number of tracks or channels your signal has. One for mono, two for stereo, four for quadrophonic, five or more for surround sound and so on. But all of those speakers are essentially playing different tracks from a “single” audio signal. What if you wanted a single audio device to play eight different songs simultaneously, with each song being piped to its own speaker? That’s the job [Devon Bray] was tasked with by interdisciplinary artist [Sara Dittrich] for one of her “Giant Talking Ear” installation project. He built a device to play multiple sound files on multiple output devices using off the shelf hardware and software.

But maybe a hack like this could be useful in many applications other than just art installations. It could be used in an Escape room, where you may want the various audio streams to start in synchronicity at the same time, or as part of a DJ console, sending one stream to the speakers and another to the head phones, or a game where you have to run around a room full of speakers in the right sequence and speed to listen to a full sentence for clues.

His blog post lists links for the various pieces of hardware required, although all of it is pretty generic, and the github repository hosts the code. At the heart of the project is the Sounddevice library for python. The documentation for the library is sparse, so [Bray]’s instructions are handy. His code lets you “take a directory with .wav files named in numeric order and play them over USB sound devices attached to the host computer over and over forever, looping all files once the longest one finishes”. As a bonus, he shows how to load and play sound files automatically from an attached USB drive. This lets you swap out your playlist on the Raspberry Pi without having a use a keyboard/mouse, SSH or RDP.

Check the video after the break for a quick roundup of the project.

Continue reading “Python Script Sends Each Speaker Its Own Sound File”