If you’ve ever wondered what lies beneath the barely visible hole in the can of a MEMS microphone, you’re in luck, because [Zach Tong] has a $10 pair of earbuds to sacrifice for the cause and an electron microscope.
For the uninitiated, MEMS stands for microelectromechanical systems, the tiny silicon machines that power some of the more miraculous functions of smartphones and other modern electronics. The most familiar MEMS device might be the accelerometer that gives your phone a sense of where it is in space; [Zach] has a deep dive into MEMS accelerometers that we covered a while back.
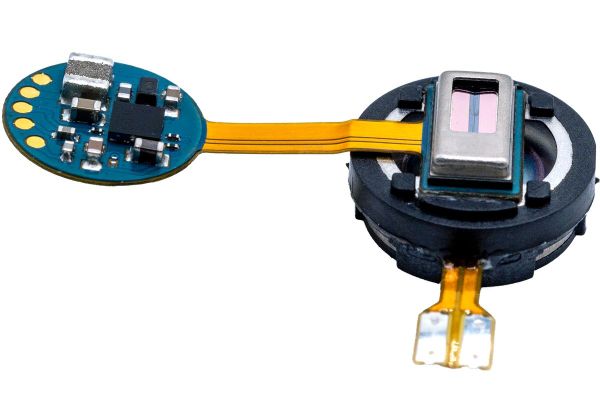
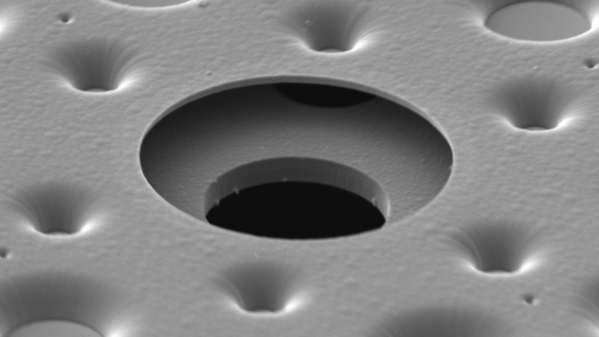
MEMS microphones seem a little bit easier to understand mechanically, since all they have to do is change vibrations in air into an electrical signal. The microphone that [Zach] tore down for this video is ridiculously small; the SMD device is only about 3 mm long, with the MEMS chip under the can a fraction of a millimeter on a side. After some overall views with the optical microscope, [Zach] opened the can and put the guts under his scanning electron microscope. The SEM shots are pretty amazing, revealing a dimpled silicon diaphragm over a second layer with holes etched right through it. The dimples on the diaphragm nest into the holes, forming an air-dielectric capacitor whose capacitance varies as sound waves vibrate the diaphragm.
The most visually interesting feature, though, might be the deep cavity lying behind the two upper surfaces. The cavity, which [Zach] says bears evidence of having been etched by the deep reactive ion etching method, has cool-looking corrugations in its walls. The enormity of the cavity relative to the thin layers covering it suggests it’s a resonating cavity for the sound waves.
Thanks to [Zach] for this in-depth look at a device that’s amazingly complex yet remarkably simple.
Continue reading “Up Close And Personal With A MEMS Microphone”