A Hot Printer For Cool Selfies

Randomly buying some hackable gadgets just because they are cheap and seem potentially interesting for future projects is something that most of us can relate to. It also happened to [fruchti] when he bought five thermal printer modules without any specific purpose for them in mind. It was not until several years later that he put them to good use for his inverse thermal camera project.

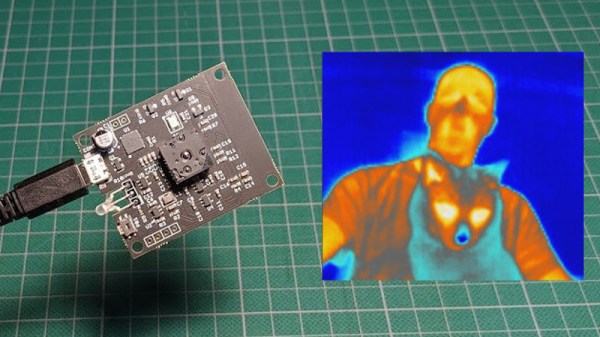
The name perfectly summarizes the device’s function which is to convert images to heat instead of the other way around. To put it in a less cryptic manner, [fruchti] built a selfie camera that instantly prints out pictures on thermochromic paper. The project would have been easy to implement on a Raspberry Pi but instead, he chose a more minimalist approach by using an STM32 microcontroller. This involved some challenges because the MCU didn’t have enough RAM to store an entire frame and the camera module came without a FIFO buffer. To capture and store the image data [fruchti] applied a line-by-line dithering algorithm which is described in detail in his accompanying blog post while the corresponding code is available on GitHub. Even though the case was improvised from scrap PCB materials the finished device still looks great. In particular, the fuse holders that are being used to hold the paper roll make it almost steampunk.

Naturally, this is not the first time we have seen thermal printers being used for instant picture taking and it probably won’t be the last.

Start Printing From Film For Around £100

For the vast majority of readers, the act of taking a photograph will mean reaching for a mobile phone, or for a subset of you picking up a digital camera. A very small number of you will still use chemical film for its versatility and resolution, and we’re guessing that more would join those ranks if some of the cost barriers to doing so could be reduced.

It would be near-impossible to reduce the cost of a chemical photograph to the infinitely repeatable click of a digital camera shutter, but at least if the cost of a darkroom is intimidating then [Sroyon Mukherjee] has an interesting post over at 35mmc about how a darkroom for black-and-white printing from negatives can be equipped for less than £100 ($123). It’s a fascinating read even if your photography remains firmly in the digital, because along the way it explains some of the mysteries of the process. Few people had this type of equipment at home even in the days when most of us took our films to the drugstore, so as time passes this knowledge is concentrated among an ever narrower group.

The guide is full of useful hacks. Finding a second-hand enlarger takes an element of patience, but once it has been secured there are a variety of other essential items. The red safe light can be as simple as a mobile phone flashlight with a red filter, but we learn the trick of exposing a sheet of photographic paper with a coin laid on it to check that no white light is sneaking in. One of the main points of the piece is that there is no need for a special room to make a darkroom, and we take a tour of a few photographers’ set-ups in hallways, bathrooms, and basements.

So if you spot an unloved enlarger just waiting for a hacker to pass by, this might inspire you to do something with it. He doesn’t cover the development process, but if you throw caution to the winds you could always try coffee and vitamin C.

[via Hacker News]

New Part Day: Raspberry Pi Camera Gets Serious With 12 Megapixels & Proper Lenses

The Raspberry Pi Foundation have slipped out a new product, a $50 camera module with a larger sensor that increases the resolution from the 8 megapixels of its predecessor to a Sony IMX477R stacked, back-illuminated 12.3 megapixel sensor, and most interestingly adds a mounting ring for a C mount lens (the kind used with CCTV equipment) in place of the tiny fixed focus lenses of past Pi cameras. In addition there is a standard threaded tripod mount on the module, and an adapter ring for CS mount lens types. The camera cannot be used without a lens, but there are a few options available when ordering, like 16mm telephoto or 6mm wide angle lenses, if you do not already have a suitable lens on hand.

It’s an exciting move for photography experimenters, because for the first time it offers an affordable way into building custom cameras with both a higher quality sensor and a comprehensive selection of interchangeable lenses. We can imagine that the astronomers and microscopists among us will be enthusiastic about this development, as will those building automated wildlife cameras. For us though the excitement comes in the prospect of building decent quality cameras with custom form factors that break away from the conventional, because aside from a period when consumer digital cameras were in their infancy they have stuck rigidly to the same form factor dictated by a 35mm film canister. It’s clear that this module will be made into many different projects, and we are looking forward to featuring them.

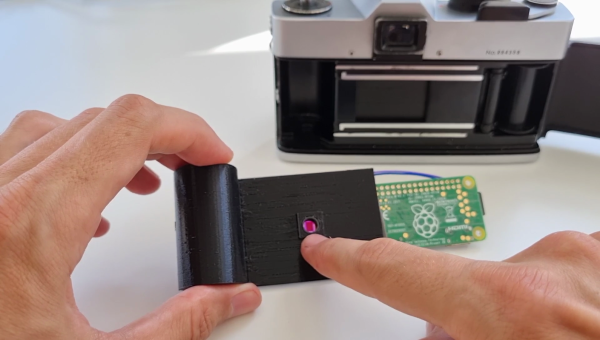
At the time of writing the camera is sold out from all the usual suppliers, which follows the trend for Raspberry Pi products on their launch day. We didn’t manage to snag one, but perhaps with such an expensive module it’s best to step back for a moment and consider the project it will become part of rather than risking it joining the unfinished pile. While waiting for stock then perhaps the next best thing is to 3D print a C mount adapter for your existing Pi camera, or maybe even hook it up to a full-sized SLR lens.

Pi Cam Replaces Pinhole And Film For Digital Solargraphy

Solargraph from a one-year exposure on film. Elekes Andor / CC BY-SA

Have you ever heard of solargraphy? The name tells you much of what you need to know, but the images created with a homemade pinhole camera and a piece of photographic film can be visually arresting, showing as they do the cumulative tracks of the sun’s daily journey across the sky over many months. But what if you don’t want to use film? Is solargraphy out of reach to the digital photographers of the world?

Not at all, thanks to this digital solargraphy setup. [volzo] searched for a way to make a digital camera perform like a film-based solargraphic camera, first thinking to take a series of images during the day and average them together. He found that this just averaged out the sun from the final image. His solution was to take a pair of photos at each timepoint — one correctly exposed to capture the scene, and one stopped way down to just capture the position of the sun as a pinprick of light. All the foreground images are averaged, while the stopped-down sun images are overlaid upon each other, producing the track of the sun across the sky. Add the two resulting images and you’ve got a solargraph.

To automate the process, [volzo] used a Raspberry Pi and a Pi-Cam fitted in a weatherproof 3D-printed box. A custom hat powers up the Pi every few minutes, which boots up and takes the two pictures. Sadly, the batteries only last for a couple of days, so those long six-month exposures aren’t possible yet. But [volzo] has made all the sources available, so feel free to build on his work. If you prefer to use a DSLR for the job, this Bluetooth intervalometer might help.

This Camera Captures Piezo Inkjet Micro-Drops For DIY Microfluidics

In microfluidics, there are “drop on demand” instruments to precisely deposit extremely small volumes (pico- or nano-liters) of fluid. These devices are prohibitively expensive, so [Kyle] set out to design a system using hobbyist-level parts for under $1000. As part of this, he has a fascinating use case for a specialized camera: capturing the formation and shape of a micro-drop as it is made.

There are so many different parts to this effort that it’s all worth a read, but the two big design elements come down to:

  1. Making the microdrop using a piezo element
  2. Ensuring the drop is made correctly, and visually troubleshooting
Working prototype. The piezo tube is inside the blue piece at the top. The camera is to the right, and the LED strobe is on the left.

It’s one thing to make an inkjet element in a printer work, but it’s quite another to make a piezoelectric element dispense arbitrary liquids in a controlled, repeatable, and predictable way. Because piezoelectric elements force liquid out with a mechanical motion, different liquids require different drive signals and that kind of experimentation requires a way to see what is going on, hence the need for a drop observation camera.

[Kyle] ended up taking the lens assembly from a cheap USB microscope and mating it to his Korukesu C1 USB Camera with a 3D printed assembly. Another 3D printed enclosure doubles as a lightbox, holding the piezo tube in the center with the LED strobe and camera on opposite sides. The whole assembly had a few false starts, but in the end [Kyle] seems pretty happy with his results. The device is briefly described at a high level here. There are some rough edges, but it’s a working system.

Inkjet technology has been around for a long time (you can see a thirty-plus year old inkjet printer in action here) but it’s worth mentioning that not all inkjet heads are alike. Most inkjet printer heads operate thermally, which means a flash of heat vaporizes some ink to expel a micro-drop. These heads aren’t very suitable for microfluidics because not only do they rely on vaporizing the liquid, but they also don’t work well with anything other than the ink they’re designed for. Piezoelectric print heads are less common, but are more suited to the kind of work [Kyle] is doing.

8mm Film Scanner Grows Into A Masterpiece

Digitizing film is a tedious process that becomes a lot more fun if you spend more of your time building a digitizer and less time actually working working with old film. [Heikki Hietala] has been at it for years and his Kotokino Mark IV film scanner is a masterpiece of simple machine building.

Since we first saw the film scanner four years ago it’s undergone a number of excellent improvements. Most notably, the point-and-shoot camera has been swapped out for a DSLR. With the use of a macro reversing ring a normal lens is flipped around to blow up the 8-millimeter-wide film to take advantage of all the megapixels available on the camera sensor.

The key to the setup is the film advancer mechanism which takes care of both advancing the film and triggering the camera. As you can see, a servo motor rotating an axle provides the locomotion. The mechanism keys into the perforations in the film to pull it along on the down stroke and closes a switch to trigger the camera on the upstroke. Directly under the lens, the alignment jig uses lens cleaning fabric to avoid scratching the film, while perfectly positioning it over the light source.

Previous versions have placed the camera on the horizontal plane but it seems some vibrations in the system caused alignment problems between captured frames. This latest version places the camera pointed straight down to solve that issue, and brings the entire thing together into one beautiful finished project. Having gathered numerous fans of the build along the way, [Heikki] has made the design files available so that you may build your own version.

Classic Leica Film Camera Turns Digital

While there’s still a market for older analog devices such as vinyl records, clocks, and vacuum-tube-powered radio transmitters, a large fraction of these things have become largely digital over the years. There is a certain feel to older devices though which some prefer over their newer, digital counterparts. This is true of the camera world as well, where some still take pictures on film and develop in darkrooms, but if this is too much of a hassle, yet you still appreciate older analog cameras, then this Leica film camera converted to digital might just attract your focus.

This modification comes in two varieties for users with slightly different preferences. One uses a Sony NEX-5 sensor which clips onto the camera and preserves almost all of the inner workings, and the aesthetic, of the original. This sensor isn’t full-frame though, so if that’s a requirement the second option is one with an A7 sensor which requires extensive camera modification (but still preserves the original rangefinder, an almost $700 part even today). Each one has taken care of all of the new digital workings without a screen, with the original film advance, shutters, and other HIDs of their time modified for the new digital world.

The finish of these cameras is exceptional, with every detail considered. The plans aren’t open source, but we have a hard time taking issue with that for the artistry this particular build. This is a modification done to a lot of cameras, but seldom with so much attention paid to the “feel” of the original camera.

Thanks to [Johannes] for the tip!