Hackaday Prize Entry: A Printer For Alternative Photography

Film photography began with a mercury-silver amalgam, and ended with strips of nitrocellulose, silver iodide, and dyes. Along the way, there were some very odd chemistries going on in the world of photography, from ferric and silver salts to the prussian blue found in Cyanotypes and blueprints.

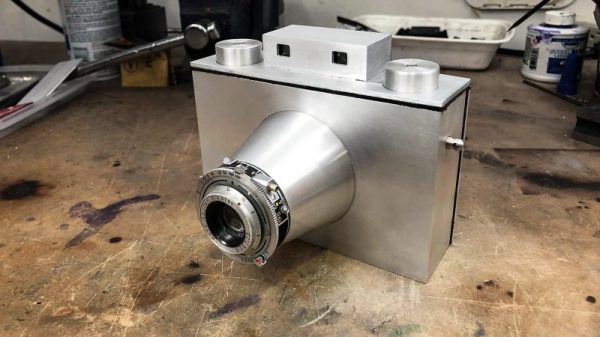
Metal salts are fun, and for his Hackaday Prize entry, [David Brown] is building a printer for these alternative photographic processes. It’s not a dark room — it’s a laser printer designed to reproduce images with weird, strange chemistries.

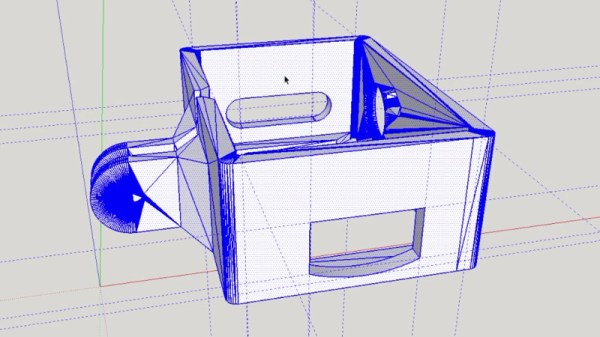
Cyanotypes are made by applying potassium ferricyanide and ferric ammonium citrate to some sort of medium, usually paper or cloth. This is then exposed via UV light (i.e. the sun), and whatever isn’t exposed is washed off. Instead of the sun, [David] is using a common UV laser diode to expose his photographs. he already has the mechanics of this printer designed, and he should be able to reach his goal of 750 dpi resolution and 8-bit monochrome.

Digital photography will never go away, but there will always be a few people experimenting with light sensitive chemicals. We haven’t seen many people experiment with these strange alternative photographic processes, and anything that gets these really cool prints out into the world is great news for us.

Using Robotics To Film The Perfect Hamburger Shot

It’s no secret that a lot of time, money, and effort goes into photographing and filming all that delicious food you see in advertisements. Mashed potatoes in place of ice cream, carefully arranged ingredients on subs, and perfectly golden french fries are all things you’ve seen so often that they’re taken for granted. But, those are static shots – the food is almost always just sitting on a plate. At most, you might see a chef turning a steak or searing a fillet in a commercial for a restaurant. What takes real skill – both artistic and technical – is assembling a hamburger in mid-air and getting it all in stunning 4k video.

That’s what [Steve Giralt] set out to do, and to accomplish it he had to get creative. Each component of the hamburger was suspended by rubber bands, and an Arduino timed and controlled servo system cut each rubber band just before that ingredient entered the frame. There’s even a 3D printed dual-catapult system to fling the condiments, causing them to collide in the perfect place to land in place on the burger.

Continue reading “Using Robotics To Film The Perfect Hamburger Shot”

Capacitive Imaging With A Raspberry Pi Touch Screen

We use touch screens all the time these days, and though we all know they support multiple touch events it is easy for us to take them for granted and forget that they are a rather accomplished sensor array in their own right.

[Optismon] has long held an interest in capacitive touch screen sensors, and has recently turned his attention to the official Raspberry Pi 7-inch touchscreen display. He set out to read its raw capacitance values, and ended up with a fully functional 2D capacitive imaging device able to sense hidden nails and woodwork in his drywall.

Reading the capacitance values is not a job for the faint-hearted though. There is an I2C bus which is handled by the Pi GPU rather than the processor, and to read it in software would require a change to the Pi’s infamous Broadcom binary blob. His solution which he agrees is non-optimal was to take another of the Pi’s I2C lines that he could talk to and connect it in parallel with the display line. As a result he can catch the readings from the screen’s sensors and with a bit of scripting make a 2D display on the screen. The outlines of hands and objects on his desk can clearly be seen when he places them on the screen, and when he runs the device over his wall it shows the position of the studding and nails behind the drywall.

He’s posted his code in a GitHub repository, and put up the YouTube video of his capacitive imaging in action which you can watch below the break.

Continue reading “Capacitive Imaging With A Raspberry Pi Touch Screen”

Building A Full-Spectrum Digital Camera On The Cheap

The sensor on your digital camera picks up a lot more than just the light that’s visible to the human eye. Camera manufacturers go out of their way to reduce this to just the visible spectrum in order to produce photos that look right to us. But, what if you want your camera to take photos of the full light spectrum? This is particularly useful for astrophotography, where infrared light dramatically adds to the effect.

Generally, accomplishing this is just a matter of removing the internal IR-blocking filter from your camera. However, most of us are a little squeamish about tearing into our expensive DSLRs. This was the dilemma that [Gavin] faced until a couple of years ago when he discovered the Canon EOS-M.

Now, it’s important to point out that one could do a similar conversion with just about any cheap digital camera and save themselves a lot of money (the practically give those things away now). But, as any photography enthusiast knows, lenses are just as important as the camera itself (maybe even more so).

photo-31So, if you’re interested in taking nice pictures, you’ve got to have a camera with an interchangeable lens. Of course, if you’re already into photography, you probably already have a DSLR with some lenses. This was the case for [Gavin], and so he needed a cheap digital camera that used Canon interchangeable lenses like the ones he already had. After finding the EOS-M, the teardown and IR-blocking filter removal was straightforward with just a couple of hiccups.

When [Gavin] wrote his post in 2014, the EOS-M was about $350. Now you can buy them for less than $150 used, so a conversion like this is definitely into the “cheap enough to tinker” realm. Have a Nikon camera? The Nikon 1 J3 is roughly equivalent to the original EOS-M, and is about the same price. Want to save even more money, and aren’t concerned with fancy lenses? You can do a full-spectrum camera build with a Raspberry Pi, with the added benefit of being able to adjust what light is let in.

DIY Motion Control Camera Rig Produces Money Shots On A Budget

Motion control photography allows for stunning imagery, although commercial robotic MoCo rigs are hardly affordable. But what is money? Scratch-built from what used to be mechatronic junk and a hacked Canon EF-S lens, [Howard’s] DIY motion control camera rig produces cinematic footage that just blows us away.

moco_movinghead[Howard] started this project about a year ago by carrying out some targeted experiments. These would not only assess the suitability of components he gathered together from all directions, but also his own capacity in picking up enough knowledge on mechatronics to make the whole thing work. After making himself accustomed to stepper motors, Teensies and Arduinos, he converted an old moving-head disco light into a pan and tilt mount for the camera. A linear axis was added, and with more degrees of freedom, more sophisticated means of control became necessary.

Continue reading “DIY Motion Control Camera Rig Produces Money Shots On A Budget”

Seeing The Truly Invisible With DIY Shortwave UV Imaging

We’ve all seen how to peel IR filters off digital cameras so they can see a little better in the dark, but there’s so much more to this next project than that. How about being able to see things normally completely outside the visual spectrum, like hydrogen combustion or electrical discharges?

UV Electrical Discharge

[David Prutchi] has just shared his incredible work on making his own shortwave ultraviolet viewers for imaging entirely outside of the normal visible spectrum – in other words, seeing the truly invisible. The project has not only fascinating application examples, but provides detailed information about how to build two different imagers – complete with exact part numbers and sources.

UV-Viewer-SmallIf you’re thinking UV is a broad brush, you’re right. [David Prutchi] says he is most interested in Solar Blind UV (SBUV):

Solar radiation in the 240 nm to 280 nm range is completely absorbed by the ozone in the atmosphere and cannot reach Earth’s surface…

Without interference from background light, even very weak levels of UV are detectable. This allows ultraviolet-emitting phenomena (e.g. electrical discharges, hydrogen combustion, etc.) to be detectable in full daylight.

There is more to the process than simply slapping a UV filter onto a camera, but happily he addresses all the details and the information is also available as a PDF whitepaper. [David Prutchi] has been working with imaging for a long time, and with his sharing of detailed build plans and exact part numbers maybe others will get in on the fun. He’s also previously shared full build plans for a Raspberry Pi based multispectral imager, [David’s] DOLPHi Polarization Camera was a finalist in the 2015 Hackaday Prize, and he spoke at the Hackaday SuperConference about the usefulness of advanced imaging techniques for things like tissue analysis in medical procedures, and landmine detection for the purposes of cleaning up hazardous areas.

IPhone Polarizing Camera Solves Filter Orientation Problem Using Flash

One of last year’s Hackaday Prize finalists was the DOLPi, [Dave Prutchi]’s polarimetric camera which used an LCD sheet from a welder’s mask placed in front of a Raspberry Pi camera. Multiple images were taken by the DOLPi at different polarizations and used to compute images designed to show the polarization of the light in each pixel and convey it to the viewer through color.

The polarizer and phototransistor taped to the iPhone.

[Dave] wrote to tip us off about [Paul Wallace]’s take on the same idea, a DOLPi-inspired polarimetric camera using an iPhone with an ingenious solution to the problem of calibrating the device to the correct polarization angle for each image that does not require any electrical connection between phone and camera hardware. [Paul]’s camera is calibrated using the iPhone’s flash. The light coming from the flash through the LCD is measured by a phototransistor and Arduino Mini which sets the LCD to the correct polarization. The whole setup is taped to the back of the iPhone, though we suspect a 3D-printed holder could be made without too many problems. He provides full details as well as code for the iPhone app that controls the camera and computes the images on his blog post.

We covered the DOLPi in detail last year as part of our 2015 Hackaday Prize finalist coverage. You can also find its page on Hackaday.io, and [Dave]’s own write-up on his blog.