It’s great to pick [Dave’s] brain a bit. He’s seen a lot during his career, with insights on professional engineering from the point of view of job seeker, employer, job interviewer, and more. His time with the EEVblog and Amp Hour have furthered his experience with looks inside of all manner of equipment, adventures in crowd funding, and interactions with a multitude of hardware start-ups. Check out his video, as well as a list of the questions with timestamps, after the jump.
We’re sure you know by now, he’s judging The Hackaday Prize which will award a trip to space and hundreds of other prizes for showing off your connected device built using Open Design.
What did you do over the weekend? I spent both days at Maker Faire Kansas City and it was awesome. This is the fourth year the Faire has been held in Union Station, a stunning Kansas City landmark that celebrates its centennial this fall.
The Things
As you might imagine, there were 3D printers galore. One of my favorites was the One Up family from Q3D. These acrylic beauties start at $199 and offer a heated bed plate option.
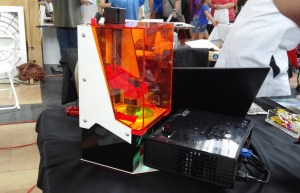
Maker Juice Labs, purveyors of 3D printing inks for SLA brought a LittleSLA printer which they demonstrated by making some very nice key chains.
Little SLA does it stereolithographically.
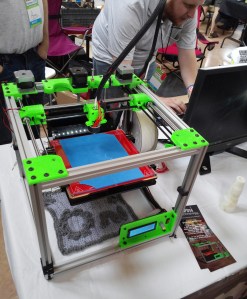
SeeMeCNC had their Rostock Max V2 printer cooking up some huge prints, and Oni Technology, a local KC company, had their H Bot cranking.
Locally-made Oni H Bot.
At the Modio booth, my companion and I constructed heroes and monsters from a rainbow-colored pile of 3D-printed body parts and weapons. With Modio’s iPad app, you can create characters from the existing parts library, modify those parts, and print them on any 3D printer. All of the parts are designed to snap together. Modio recently teamed up with MakerBot and hopes to port their app from the iPad to the iPhone and Android in the near future.
I managed to resist the inexplicable Hostess booth and their free piles of Twinkies, Cup Cakes, and Coffee Cakes. They had a display that promised banana Twinkies and some Greek yogurt oddities, but only had the regular stuff on hand. On Sunday, I saw many people lugging around entire boxes of free Donettes and other goodies.
It seems like I’m constantly having the same discussions with different people about the Open Design aspect of The Hackaday Prize. I get arguments from both sides; some attest that there should be no “openness” requirement, and others think we didn’t set the bar nearly high enough. Time to climb onto my soap box and throe down some sense on this argument.
Open Design is Important
When you talk about hardware there is almost always some software that goes into making a finished product work. Making the information about how a product works and how it is manufactured available to everyone is called Open Design; it encompasses both Open Hardware and Open Source Software. Open Design matters!
First of all, sharing how something is designed and built goes much further than just allowing others to build their own. It becomes an educational tool and an innovation accelerator (others don’t need to solve the same problems over and over again). When using a new chip, protocol, or mechanical part you can learn a lot by seeing how someone else already did it. This means faster prototyping, and improvements on the design that weren’t apparent to the original creator. And if it breaks, you have a far easier time trying to diagnose and repair the darn thing! We all benefit from this whether we’re creating something or just using an end product because it will work better, last longer, and has the potential to be less buggy or to have the bugs squashed after the fact.
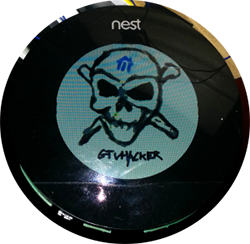
Nest thermostat rooted by [cj]There is also peace-of-mind that comes with using Open Design products. The entries in The Hackaday Prize need to be “connected devices”. With open design you can look at the code and see what is being done with your information. Can you say that about Nest? They won’t even allow you to use the thermostat in a country that hasn’t been pre-approved by decree from on high (we saw it hacked to work in Europe a few years back). Now it has been rooted so that you can do with it what you please.
But I contest that it would have been better to have shipped with options like this in the first place. Don’t want to use Nest’s online platform? Fine, let the consumer own the hardware they pay for! My wager since the day they announced Google’s acquisition of Nest is that this will become the “router” for all the connected devices in your home. I don’t want the data from my appliances, entertainment devices, exercise equipment, etc., being harvested, aggregated, and broadcast without having the ability to look at how the data is collected, packaged, and where it is being sent. Open Design would allow for this and still leave plenty of room for the big G’s business model.
I find it ironic that I rant about Google yet it would be pretty hard to deny that I’m a fanboy.
Decentralize the Gatekeeper
I’m going to beat up on Google/Nest a bit more. This is just an easy example since the hardware has the highest profile in the field right now.
If Nest controls the interface and they retain the power to decide whose devices can participate the users lose. Imagine if every WiFi device had to be blessed by a single company before it would be allowed to connect to any access points? I’m not talking about licensing technology or registering a MAC address for a chip. I’m talking about the power, whether abused or not, to shut any item out of the ecosystem based on one entity’s decisions.
If connected devices use a known standard that isn’t property of one corporation it unlocks so many good things. The barrier for new companies to put hardware in the hands of users is very low.
Let’s consider one altruistic part of this; Open Design would make small run and single unit design a possibility. Think about connected devices specialized for the physically challenged; the controller project makes specialized controls for your Xbox, what about the same for your oven, dishwasher, the clock on your wall, or your smart thermostat?
The benefits really show themselves when a “gatekeeper” goes out of business or decides to discontinue the product line. This happened when the Boxee servers were shut down. If the source code and schematics are available, you can alter the code to use a different service, build up your own procotol-compliant home server, or even manufacture new devices that work with the system for years to come. There are already pleas for belly-up manufacturers to open-source as the last death throw. Hacking this stuff back into existence is fun, but isn’t it ridiculous that you have to go to those lengths to make sure equipment you purchased isn’t turned into a doorstop when they shut the company lights off?
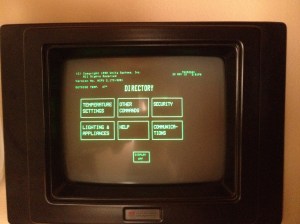
To drive the point home, consider this Home Automation System from 1985 [via Reddit]. It’s awesome, outdated, and totally impossible to maintain into the future. I’m not saying we should keep 30-year-old hardware in use indefinitely. But your choices with this are to source equally old components when it breaks, or trash everything for a new system. Open Design could allow you to develop new interfaces to replace the most used parts of the system while still allowing the rest of the hardware to remain.
Why not disqualify entries that aren’t Open Hardware and Open Source Software?
Openness isn’t a digital value
Judging preferences are much better than disqualifying requirements. This is because ‘openness’ isn’t really a digital value. If you publish your schematic but not your board artwork is that open? What if you’re using parts from a manufacturer that requires a Non-Disclosure Agreement to view the datasheet and other pertinent info about the hardware?
In addition to deciding exactly where the threshold of Open or Not-Open lies, we want to encourage hackers and companies to try Open Design if they never have before. I believe that 1% open is better than 0% open, and I believe that there is a “try it, you’ll like it” experience with openness. If this is the case, The Hackaday Prize can help pollinate the virtue of Open Hardware far and wide. But only if we act inclusively and let people work their way toward open at their own pace.
There are more benefits to Open than there are drawbacks.
The biggest worry I hear about open sourcing a product is that it’ll get picked up, manufactured, and sold at a cut-throat rate.
If you build something worth using this is going to happen either way. The goal should be to make a connection with your target users and to act ethically. Open Design allows the user to see how your product works, and to add their own features to it. Most of the time these features will appeal to a very small subset of users, but once in a while the community will develop an awesome addition to your original idea. You can always work out a way to include that in the next revision. That right there is community; the true power of open.
So yeah, we’re giving away a trip to space and hundreds of other prizes. But these are really just a carrot to entice hackers, designers, and engineers to feed the hungry world of Open Hardware and Open Source Software.
Last week we rolled out Astronaut or Not, where Hackaday readers vote on aspects of the project entries of The Hackaday Prize. But why save all the prizes for the entries? What about the voters?
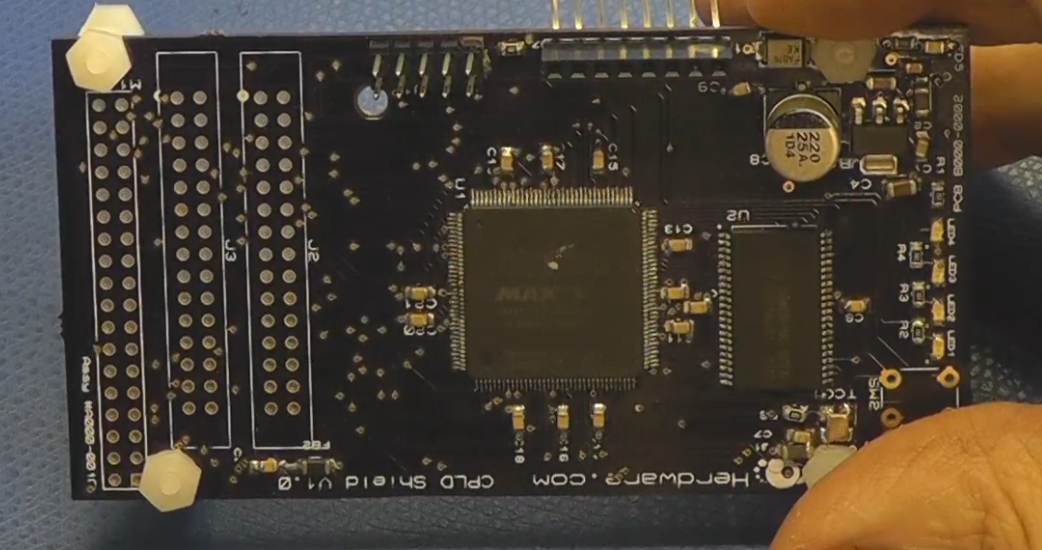
There is a wide assortment of cheap development (dev) boards for Complex Programmable Logic Devices (CPLD), the smaller cousin of the Field Programmable Logic Array (FPLA)
Using an inexpensive board and the development software that’s free to download from the major programmable companies such as Xilinx and Altera, the only additional thing needed is a programmer module. Cheap ones are available on Ebay but I am hoping that someone takes the time to teach an ARM/Arduino to step in as a programmer.
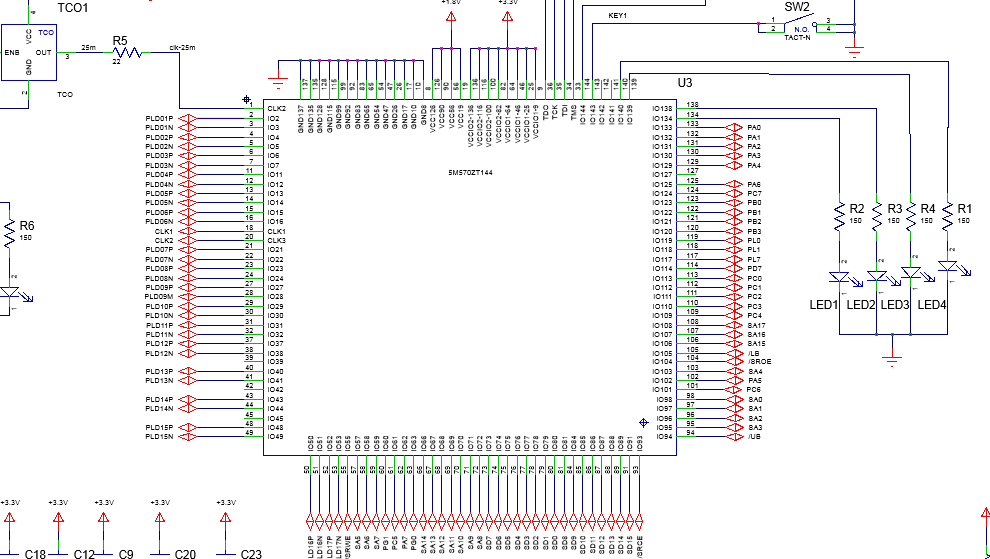
I have a small collection of dev boards including some Ebay specials and also designs I did a few years ago to choose from. For today I am grabbing a newer board that has not been fully checked out yet; an Altera Max V device. I have stuffed the CPLD, the clock oscillator, some LED’s and part of the onboard power supply along with the JTAG header needed to program the CPLD and that’s about it.
Yeah I am still a little pissed that the competition is still around and we aren’t, and by “we” I mean Commodore Business Machines (CBM). It was Commodore that had the most popular home computer ever in the C64 (27 Million) and it was a team of MOS engineers after all, that had the idea to make a “micro” processor out of a 12 square inch PCB.
MOS Technology in King of Prussia/Norristown
Of course they did work at Motorola at the time and “Mot” did not want anything to do with a reduction of the profit margin on the pie-plate size processor. Of course MOS got sued by Motorola but that was an average Tuesday at MOS/CBM. I absolutely credit CBM with buying the MOS Technologies chip foundry, as together we could make our own processors, graphics chips, sound chips, memory controllers, and programmable logic.
With this arsenal at our call we didn’t have to make compromises the way other companies did such as conforming to the bus spec of an industrial standard 6845 or having to add extra logic when a custom extra pin would work. We could also make sprites.
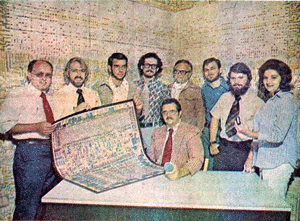
6502 Design Team (EE Times 1975, archive.archaeology.org)
The compromise we did have to make when designing was cost, and I mean the kind of cost reduction where finding a way to save a dollar ($1USD) saved millions in the production run. I knocked $.90USD out of a transformer one day and I couldn’t focus the rest of the day due to elation.
Cost reduction is a harsh mistress however as you can’t just do it a little some of the time or only when you want to. The mental exercise of multiplying anything times a million was always there, it made it hard to buy lunch — I’d be blocking the lunch line while figuring the cost of a million tuna sandwiches FOB Tokyo Continue reading “Programmable Logic I – PLA/PAL”→
We sent off a list of questions, just like every week, and [Ladyada] offered to do a video response. How awesome is that? Not only did she answer our questions, but she talked at length for several of them. We’re biased, but her explanation about Adafruit’s manufacturing processes and options for home hackers to get boards spun was a real treat.
Perhaps we should step back for a minute though. In case you don’t know [Limor Fried], aka [Ladyada], is a judge for The Hackaday Prize which will award a trip into space and hundreds of other prizes for hackers who build connected devices that use Open Design (Open Hardware and Open Source Software). She’s the founder of Adafruit Industries, an MIT double-grad, and all around an awesome engineer!
Check out the video after the break. We’ve included a list of the questions and the timestamps at which they are answered.



 To drive the point home, consider
  The biggest worry I hear about open sourcing a product is that it’ll get picked up, manufactured, and sold at a cut-throat rate.
 Last week we rolled out