Filament Thickness Sensors, What Are They And What Are They Good For?

I keep up with the trends in 3D printing reasonably well. The other day my friend mentioned that filament thickness sensing had been added to the latest version of the Marlin firmware. I had no idea what it was, but it certainly sounded cool. I had to find out more.

In industrial settings, filament is made by pulling extruding molten plastic at a certain speed into a cooling bath. The nozzle for 2.85mm filament and 1.75 mm filament is actually the same size, but the filament is stretched more or less as it leaves the nozzle. By balancing these three variables the extrusion machine can produce any size filament desired. Like any mechanical system, it needs constant adjustment to maintain that balance. This is usually done by measuring the filament with a laser after it has cooled, and then feeding this information back into the system. The better filament manufacturers have multiple lasers and very fast feedback loops. Some of the best offer +-0.04mm or less variation in thickness between any two points on the filament. Some of the worst have larger errors such as +-.10mm. Because the plastic is fed into the extruder at a fixed linear speed, this makes a variation in the volume of the plastic coming out of the nozzle per second. With the best we see a 4.41% variation in the volume of plastic extruded. With the worst we start to see 10.51% or more.
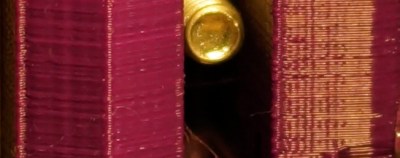
FIlament variation showing up as a cosmetic defect.
Filament variation showing up as a cosmetic defect.

A printer is dumb. It works under the assumption that it is getting absolutely perfect filament. So when it gets 10.51% more plastic, it simply pushes it out and continues with its life. However, if the filament is off enough, this can actually show up as a visible defect on the print. Or in worse cases, cause the print to fail by over or under extrusion of plastic.

So, what does a filament thickness sensor do to correct this issue? To start to understand, we need to look at how the filament is dealt with by the software. When the slicer is compiling the G-code for a 3D print, it calculates the volume of plastic it needs in order to deposit a bead of plastic of a certain width and of a certain height per mm of movement. That was a mouthful. For example, when a printer printing 0.2mm layers moves 1mm it wants to put down a volume that’s 1.0mm long x 0.4mm wide x 0.2mm high. The filament being pushed into the nozzle has a volume per mm determined by the diameter of the filament.

(\pi (radius_{filament})^{2}*length_{filament extruded})=volume

The volume out per mm of filament in.

(layer_{height}*layer_{width}*length_{move}) = volume

The equation we are trying to balance.

Our goal is to integrate the thickness sensor into these functions to see what the thickness sensor is doing. This is a linear equation, so there’s nothing fancy here. Now, the layer height, layer width, and length of the move are determined by settings and model geometry respectively. These are fixed numbers so we don’t care about them. That leaves us the diameter of the filament and the length of filament extruded. As we mentioned before, typically the filament is assumed to be a fixed diameter. So all the software has to calculate is the length of filament that needs to be extruded per mm of combined movement in the x and y so that our volumes match.

But, we know that one of these variables is actually changing per millimeter as well. The filament diameter! So now we have a problem. If the filament diameter is changing all the time, our equation will never balance! In order to fix this we can add a multiplier to our equation. Since we have no control over the width of the filament we can’t modify that value. However, if we know the width of the filament, and we know the value its supposed to be, we can change the length of the filament extruded. This is because unlike the filament, we have control over the stepper motor that drives the extruder. This value is called the extrusion multiplier, and its determination is what the thickness sensor is all about.

So all the filament sensor does is measure the filament’s current diameter. It takes expected diameter and divides it by the value it just measured to get a simple percentage. It feeds that number back into our system as the extruder multiplier and slows or speeds up the stepper motor as needed. Pretty simple.

2016-01-26_00h08_00
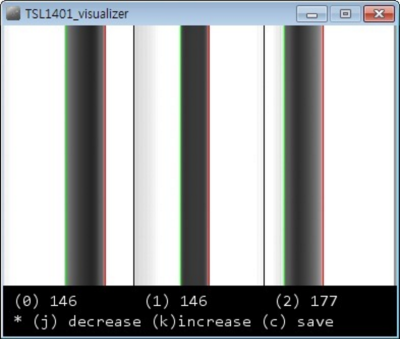
Shadows on the sensor from [inornate]’s variation.
There are a few thickness sensors being toyed with right now. The first, as far as I can tell; let me know if I am wrong in the comments, was by [flipper] on thingiverse. He is in his third version now. The sensor works by casting a shadow of the filament as it passes by onto an optical sensor. The firmware then counts the pixels and works backwards to get the diameter. This value is sent to the Marlin firmware on the printer which does the rest. As is usual and wonderful in the open source community, it wasn’t long before others started working on the problem too. [inoranate] improved on the idea by casting more shadows on the sensor. The technique is still brand new, but it will be interesting to see what benefits it reaps.

Now comes the next question,”Is it worth upgrading my printer with a thickness sensor?” If you typically run poor filament, or if you extrude your own, yes. The current sensors can only measure +- .02mm. So for the best filament, you won’t really see a difference, but for worse stuff, you might. The latest firmware of the Lyman filament extruder, for making your own filament, also supports these sensors, letting you feed back into your production system like the industrial machines. All in all a very interesting development in the world of 3D printers.

Grandma’s Phone, DSL, And The Copper They Share

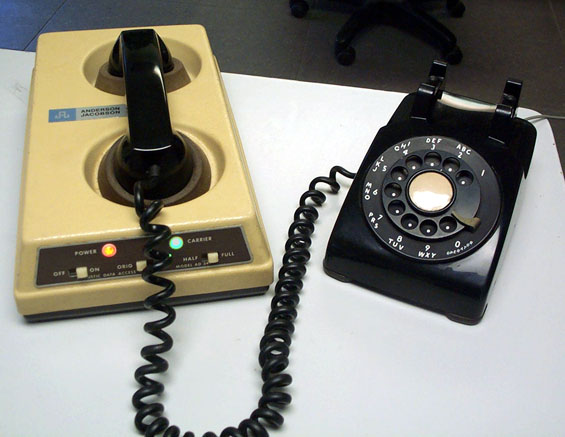
My DSL line downloads at 6 megabits per second. I just ran the test. This is over a pair of copper twisted wires, the same Plain Old Telephone Service (POTS) twisted pair that connected your Grandmother’s phone to the rest of the world. In fact, if you had that phone you could connect and use it today.

18zbmki8n3xgkjpgI can remember the old 110 bps acoustic coupler modems. Maybe some of you can also. Do you remember upgrading to 300 bps? Wow! Triple the speed. Gradually the speed increased through 1200 to 2400, and then finally, 56.6k. All over the same  of wires. Now we feel short changed if were not getting multiple megabits from DSL over that same POTS line. How can we get such speeds over a system that still allows your grandmother’s phone to be connected and dialed? How did the engineers know these increased speeds were possible?


shannon_maze_hr
Claude Shannon with his maze running mechanical mouse

The answer lies back in 1948 with Dr. Claude Shannon who wrote a seminal paper, “A Mathematical Theory of Communication”. In that paper he laid the groundwork for Information Theory. Shannon also is recognized for applying Boolean algebra, developed by George Boole, to electrical circuits. Shannon recognized that switches, at that time, and today’s logic circuits followed the rules of Boolean Algebra. This was his Master’s Thesis written in 1937.

Shannon’s Theory of Communications explains how much information you can send through a communications channel at a specified error rate. In summary, the theory says:

  • There is a maximum channel capacity, C,
  • If the rate of transmission, R, is less than C, information can be transferred at a selected small error probability using smart coding techniques,
  • The coding techniques require intelligent encoding techniques with longer blocks of signal data.

What the theory doesn’t provide is information on the smart coding techniques. The theory says you can do it, but not how.

In this article I’m going to describe this work without getting into the mathematics of the derivations. In another article I’ll discuss some of the smart coding techniques used to approach channel capacity. If you can understand the mathematics, here is the first part of the paper as published in the Bell System Technical Journal in July 1948 and the remainder published later that year. To walk though the system used to fit so much information on a twisted copper pair, keep reading.

Continue reading “Grandma’s Phone, DSL, And The Copper They Share” →

Tinijet — Affordable Waterjet Cutting At Home

While laser cutting remains the dominant force for rapid prototyping anything made of plastic, MDF or wood, the real holy grail is the ability to cut metal — something most laser cutters are just not capable of.

In the industry, this is done using extremely high-powered laser cutters, plasma cutters, or water jet cutters. All of which are very pricey equipment for a hacker. Until now anyway. Introducing the Tinijet, the missing tool for affordable water jet cutting.

We first covered this project a few years ago when it was just a university research project called Hydro — it’s since evolved immensely, and will be available for sale very soon.

Continue reading “Tinijet — Affordable Waterjet Cutting At Home” →

The USB Type-C Cable That Will Break Your Computer

USB has been on our desktops and laptops since about 1997 or so, and since then it has been the mainstay of computer peripherals. No other connector is as useful for connecting mice, keyboards, webcams, microcontroller development boards, and everything else; it’s even the standard power connector for phones. The latest advance to come out of the USB Implementers Forum is the USB Type-C connector, a device with gigabits of bandwidth and can handle enough current to power a laptop. It’s the future, even if Apple’s one-port wonder isn’t.

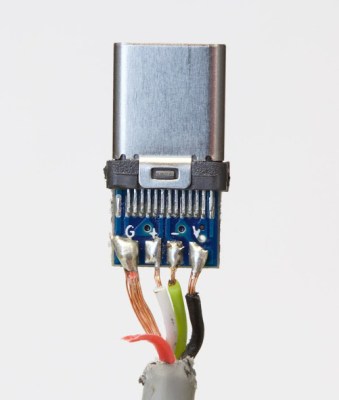
Ground is red, V is Black. Photo: Benson Leung
Ground is red, V is black. Photo: Benson Leung

The cable of the future is, by default, new. This means manufacturers are still figuring out the port, and how to wire it up. You would think remembering ‘red = power, black = ground’ is easy, but some manufacturers get it so terribly wrong.

[Benson Leung] is a Google engineer who works on the Chromebook Pixel products, a huge proponent of the USB Type-C connector, and a very prolific reviewer of USB Type-C connectors on Amazon. The latest cable he tested destroyed his test equipment, including a $1500 Chromebook Pixel 2 (link dead, try Internet Archive). How did a cable manage to do this? The manufacturer switched black and red.

The cable in question was a SurjTech 3M cable that has thankfully been taken down from Amazon. Swapping GND and Vbus weren’t the only problem – the SuperSpeed wires were missing, meaning this was effectively only a USB 2 cable with a Type-C connector. The resistor required by USB spec was the wrong value, and was configured as a pull-down instead of a pull-up.

This isn’t an issue of a cable not meeting a design spec. Ethernet cables, specifically Cat6 cables, have been shown to work but fail to meet the specs for Cat6 cables. That’s shady manufacturing, but it won’t break a computer. This is a new low in the world of computer cables, but at least the cable has disappeared from Amazon.

A Better Way To Plug A CPLD Into A Breadboard

If you read my first post about a simple CPLD do-it-yourself project you may remember that I seriously wiffed when I made the footprint 1” wide, which was a bit too wide for common solderless breadboards. Since then I started over, having fixed the width problem, and ended up with a module that looks decidedly… cuter.

To back up a little bit, a Complex Programmable Logic Device (CPLD) is a cool piece of hardware to have in your repertoire and it can be used to learn logic or a high level design language or replace obsolete functions or chips. But a CPLD needs a little bit of support infrastructure to become usable, and that’s what I’ll be walking you through here. So if you’re interested in learning CPLDs, or just designing boards for them, read on!

Continue reading “A Better Way To Plug A CPLD Into A Breadboard” →

This File Will Self-Destruct In 24 Hours

[menkveldj] built a service that encrypts files which self destruct in 24 hours. The download link can only be used once. If the wrong people were to get the link and download the file, they’d need many years on a pretty powerful computer to crack the 256AES encryption.

The sender shares a file that is encrypted client side using a password generated Pbkdf2 key to encrypt the data before uploading it to the s3 storage service. The sender is then provided the one-time-use link to share with the recipient. After the first download, or 24 hours, the link and the encrypted file are both deleted. The receiver must enter the same password to decrypt and recover the file. No one but the sharer and receiver know what the actual file is.

It’s still work in progress, so chime in with your comments and suggestions. To dig into the code, check out his repository on Github, which also has instructions to build and run it if you’d like to do your own version.

Oh, and you’ll like this. If want to thumb your nose at the powers that be, the site has a redirect for the whimsical domain: NSAfu.com.

Hard Drive Disassembly Is Easy And Rewarding

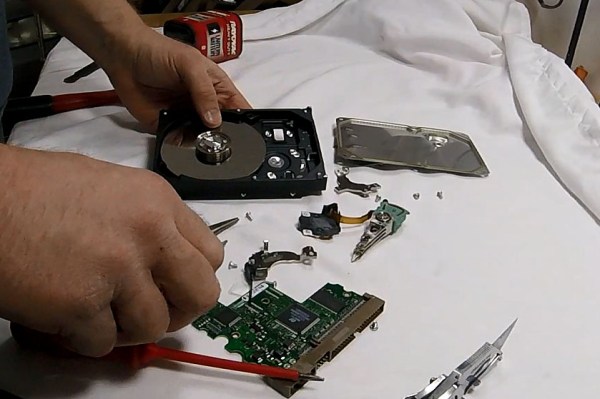
Have any dead hard drives kicking around? Hackaday alum [Jeremy Cook] shows how easy it is to disassemble a hard drive to scavenge its goodies. The hardest part is having the patience and the tools to get past all those screws that stand between you and the treasure inside.

The case screws are frequently of the Torx variety. Any self-respecting hacker probably has one or two of these already, but if you’re in the market, [Jeremy] recommends a nice set that looks way better than ours. Once the case is open, you can find rare earth magnets, bearings, and one or more platters.

Those terrifically strong magnets are good for all kinds of projects. Glue a couple of them to the back of an attractive piece of wood, mount it on the kitchen wall, and you have yourself a knife block. Keep a couple on the bench to temporarily magnetize tools. Use them to build a pickup to amplify a cigar box guitar or thumb piano. Or run the pickup into a small amplified speaker and wave it like a stethoscope near your electronics to hear them hum. As far as liberating the magnets goes, [Jeremy] resorted to clamping his in a vise and using a hammer and chisel to pry it away from the actuator hardware.

You’ve no doubt seen clocks made from old hard drives that were kept mostly intact. Many makers including [Jeremy] will extract the shiny platters to use as bases for clock faces and engrave the numbers, etch them, or glue them on. Those platters also make excellent chimes. Even if you just hang one platter off of a finger and tap it with a fingernail, it sounds really nice.

If simple chimes don’t really butter your muffin, there are all kinds of sonic projects for dead hard drives. How about making a microphone or speakers? Maybe an HDD MIDI controller or a synthesizer is more your speed. Speaking of synths, watch [Jeremy] take a hard drive apart to some sweet sounds after the break.

Continue reading “Hard Drive Disassembly Is Easy And Rewarding” →