We’ve all been there. You left your Walkman at home and only have your trusty Game Boy. You want to take a break and just listen to some tunes. What to do? [orangeglo] has the answer now with the Orange FM cartridge.
This prototype cart features an onboard antenna or can also use the 3.5 mm headphone/antenna port on the cartridge to boost reception with either a dedicated antenna or a set of headphones. Frequencies supported are 64 – 108 Mhz, and spacing can be set for 100 or 200 kHz to accomodate most FM broadcasts setups around the world.
Older Game Boys can support audio through the device itself, but Advances will need to use the audio port on the cartridge. The Super Game Boy can pipe audio to your TV though, which seems like a delightfully Rube Goldberg-ian way to listen to the radio. Did we mention it also supports RDS, so you’ll know what that catchy tune is? Try that FM Walkman!
Can’t decide between this and your other carts? Try this revolving multi-cart solution. Have a Game Boy that needs some restoration? If it’s due to electrolyte damage, maybe start here?
Over the past few years a number of teams have been putting a lot of effort into taking beloved Nintendo 64 games, decompiling them, and lovingly crafting them into highly portable C code. This allows for these games to not only run natively on PCs, but also for improvements to be made to the rendering engine and other components.
Yet this artisan approach to porting these games means a massive time investment, something which static binary translation (static recompilation) may conceivably speed up. Enter the N64: Recompiled project, which provides a binary translation tool to ease the translation of the N64’s binaries into C code.
This is effectively quite similar to what an emulator does in real-time, just with the goal of creating a permanent copy of the translated instructions. After this static binary translation, the C code can be compiled again, but as noted by the project’s documentation, a suitable runtime is needed to get a functional game. An example of this is the Zelda 64: Recompiled project, which uses the N64: Recompiled project at its core, while providing the necessary scaffolding and wrappers to create a working copy of The Legend of Zelda: Majora’s Mask as output.
In the video below, [Modern Vintage Gamer] takes the software for a test drive and comes away very excited about the potential it has to completely change the state of N64 emulation. To be clear, this isn’t a one-button-press solution — it still requires capable developers to roll up their sleeves and get the plumbing in. It’s going to take some time before you favorite game is supported, but the idea of breathing new life into some of the best games from the 1990s and early 2000s certainly has us eager to see where this technology goes
We are big fans of programmed texts for education. You know, the kind where you answer a question and go to a new page based on your answer. But they can also be entertaining “choose your own adventure” stories. You might say, “You are standing in front of an oak door, two meters high, with an iron handle. Do you a) open it? b) knock on it? c) ignore it?” Then, based on your answer, you go to a different part of the story. These are tough to write, but you can get some help using Yarn Spinner and the Yarn scripting language.
The original purpose of Yarn is to produce conversations for games. There’s a tutorial for that. The difference is to produce a book, you get a choose your own adventure PDF at the end. For the tutorial, you can try to read the text on the left-hand side of the editor or just press Test (at the top) and let it “read” the tutorial to you, which is a little more fluid.
The port looks fantastic, with all the fast-moving arrows and lovely sprite-based graphics you could dream of. But more than that, [Rodrigo’s] port is very fully featured. It doesn’t rely on tracked or sampled music, instead using actual GSM audio files for the songs.
It can also accept input from a PS/2 keyboard, and you can even do multiplayer over the GBA’s Wireless Adapter. What’s even cooler is that some of the game’s neat features have been broken out into separate libraries so other developers can use them. If you need a Serial Port library for the GBA, or a way to read the SD card on flash carts, [Rodrigo] has put the code on GitHub.
Usually when we see arcade cabinet builds, they’re your standard single-player stand up variety. Even one of them takes up quite a bit of room, so as appealing as it might be to link up two or more cabinets together for the occasional multiplayer session, the space required makes it a non-starter for most of us.
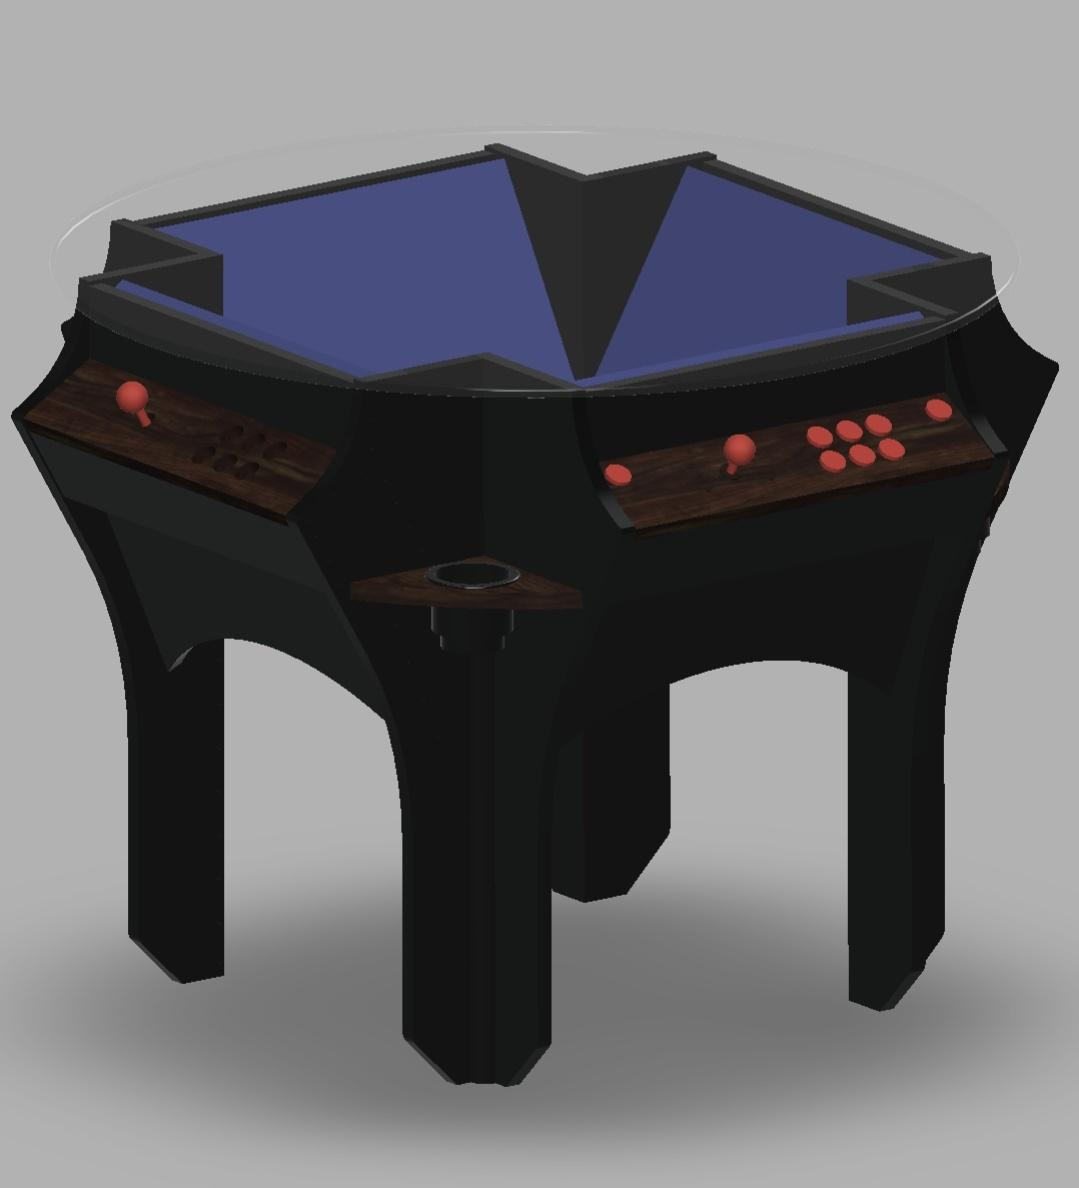
But this cleverly designed 4-player cocktail cabinet from [OgrishGadgeteer] goes a long way towards solving that problem. The circular design of the cabinet gives each player a clear view of their respective display in a much smaller footprint than would otherwise be possible, and the glass top allows the whole thing to double as an actual cocktail table when it’s not game time.
The cabinet was modelled in 3D before construction.
According to a post on r/cade, it took [OgrishGadgeteer] three months to go from paper sketches of the cabinet’s basic shape to the final product. Most of the components were picked up on the second hand market, which brought the total cost of the build to around $350. That wouldn’t have been a surprising price for a traditional full-size cabinet build, so for this, it seems like an absolute steal.
A Dell OptiPlex 7060 small form factor PC provides the power for this build, with the video output passing through a 4-way VGA distribution amplifier into 20 inch monitors. At $75, the four player control kit ended up being the single most expensive component of the build, though you could make do with some parts bin buttons and a Pi Pico if you wanted to really bring this one in on a budget.
Perhaps the most surprising element of the whole build is that, despite the cabinet’s complex design, [OgrishGadgeteer] pulled it off without a CNC to cut the plywood panels. Instead, a vinyl cutter was used to make full-size templates of the cuts and holes that needed to be made, which were attached directly to the wood. After that, it was just a matter of following the lines with a jigsaw. Not the fastest or most convenient solution, but it’s hard to argue with the final results.
A few weeks ago we brought you news of a project to recreate the flowing lines of the first computerised arcade game, Computer Space, as a full-size 3D printed replica. We left the project with all the parts put together to make a complete but unfinished shell that was very recognizable as a Computer Space cabinet but had neither finishing nor internals. Now we’re very pleased to bring you the conclusion of the project, as it moves from unfinished 3D print to playable cabinet.
The video below the break is a journey of print finishing to a very high standard with that lustrous blue glitter resin, but oddly it’s most interesting to find out about the manufacturing quirks of the original. How the rear door was imprecisely cut from plywood and fixed on with gate hinges, how the ventilation holes differ from cabinet to cabinet, and how the collection vessel for those quarters was an old tin. The monitor is a newer broadcast CRT in this version and the electronics are naturally modern, but if you didn’t know, you’d be hard pressed to spot that you weren’t playing the real thing.
Finally we see the gameplay which is admittedly frustrating, and a little bit of punditry as to why this wasn’t the commercial success of the following Pong. It’s a fascinating look at the early computer game industry.
The Asus ROG Ally is a handheld that, to our pleasant surprise, has attracted a decently sized modding community. Recently, we’ve stumbled upon a Reddit post investigating a somewhat common failure mode of this handheld — the microSD card slot going out of order, where an inserted card fails to be recognized, pretty irritating to encounter. Now, it turns out, this is down to a certain model of PTC fuses being failure-prone.
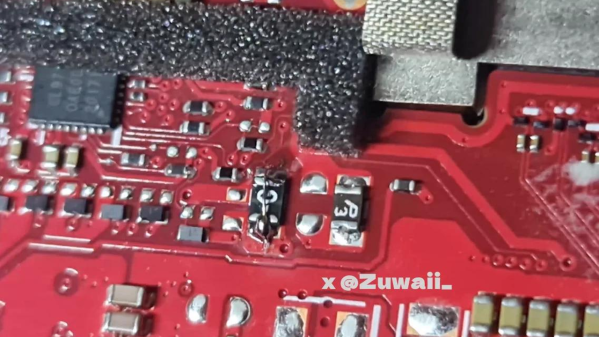
It makes sense to fuse the SD card slot. The cards are dense pieces of technology that are subject to some wear and tear in daily use. As such, it’s not unheard of that a microSD card can short-circuit internally — heating up to the point of melting plastic and giving people severe burns. Given that such a card is typically connected to a beefy 3.3 V rail, any mass-manufactured device designer could want to put a fuse between the 3.3 V rail and the card. However, on some ROG Ally batches, a certain make of the fuse is used, that appears to be likely to develop faults: the fuse’s resistance increasing dramatically during the card’s normal operation, with the SD card being supplied subpar power as a result.
There’s a fair bit of investigating happening in the comment section, with people posting oscilloscope captures, using breakouts to tap the SD card, and figuring out the fuse part numbers for the affected models. As for Reddit’s solution, it’s short-circuiting the fuse with a piece of thin wire — we would probably source a suitable fuse and solder it on top of the faulty one.


 The port looks fantastic, with all the fast-moving arrows and lovely sprite-based graphics you could dream of. But more than that, [Rodrigo’s] port is very fully featured. It doesn’t rely on tracked or sampled music, instead using actual GSM audio files for the songs.