Fail Of The Week: Never Assume All Crystals Are Born Equal

You should be used to our posting the hacks that didn’t quite go according to plan under our Fail Of The Week heading, things that should have worked, but due to unexpected factors, didn’t. They are the fault, if that’s not too strong a term, of the person making whatever the project is, and we feature them not in a spirit of mockery but one of commiseration and enlightenment.

This FOTW is a little different, because it reveals itself to have nothing to do with its originator. [Grogster] was using the widely-available HC-12 serial wireless modules, or clones or even possibly fakes thereof, and found that the modules would not talk to each other. Closer inspection found that the modules with the lack of intercommunication came from different batches, and possibly different manufacturers. Their circuits and components appeared identical, so what could possibly be up?

The problem was traced to the two batches of modules having different frequencies, one being 37 kHz ahead of the other. This was in turn traced to the crystal on board the off-frequency module, the 30 MHz component providing the frequency reference for the Si4463 radio chip was significantly out of spec. The manufacturer had used a cheap source of the component, resulting in modules which would talk to each other but not to the rest of the world’s HC-12s.

If there is a lesson to be extracted from this, it is to be reminded that even when cheap components or modules look as they should, and indeed even when they appear to work as they should, there can still be unexpected ways in which they can let you down. It has given us an interesting opportunity to learn about the HC-12, with its onboard STM8 CPU and one of the always-fascinating Silicon Labs radio chips. If you want to know more about the HC-12 module, we linked to a more in-depth look at it a couple of years ago.

Thanks [Manuka] for the tip.

Fail Of The Week: The Spot Welder Upgrade That Wasn’t

Even when you build something really, really nice, there’s always room for improvement, right? As it turns out for this attempted upgrade to a DIY spot welder, not so much.

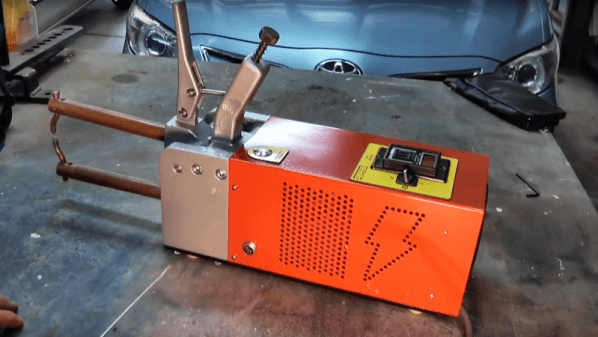
You’ll no doubt recall [Mark Presling]’s remarkably polished and professional spot welder build that we featured some time ago. It’s a beauty, with a lot of thought and effort put into not only the fit and finish but the function as well. Still, [Mark] was not satisfied; he felt that the welder was a little underpowered, and the rewound microwave oven transformer was too noisy. Taking inspiration from an old industrial spot welder, he decided to rebuild the transformer by swapping the double loop of battery cable typically used as a secondary with a single loop of thick copper stock. Lacking the proper sized bar, though, he laminated multiple thin copper sheets together before forming the loop. On paper, the new secondary’s higher cross-sectional area should carry more current, but in practice, he saw no difference in the weld current or his results. It wasn’t all bad news, though — the welder is nearly silent now, and the replaced secondary windings were probably a safety issue anyway, since the cable insulation had started to melt.

Given [Mark]’s obvious attention to detail, we have no doubt he’ll be tackling this again, and that he’ll eventually solve the problem. What suggestions would you make? Where did the upgrade go wrong? Was it the use of a laminated secondary rather than solid bar stock? Or perhaps this is the best this MOT can do? Sound off in the comments section.

Continue reading “Fail Of The Week: The Spot Welder Upgrade That Wasn’t”

Fail Of The Week: An Electric Bicycle, Powered By AA Batteries

Very slowly, some very cool parts are coming out on the market that will make for some awesome builds. Supercapacitors are becoming a thing, and every year, the price of these high power supercaps go a little lower, and the capacity gets a little higher. It’s really only a matter of time before someone hacks some supercaps into an application that’s never been seen before. The Navy is doing it with railguns, and [David] is building an electric bike, powered by AA batteries. While [David]’s bike technically works with the most liberal interpretation of ‘technically’, it’s the journey that counts here.

This project began as an investigation into using supercapacitors in an electric bicycle. Supercaps have an energy density very much above regular capacitors, but far behind lithium cells. Like lithium cells, they need a charge balancer, but if you manage to get everything right you can trickle charge them while still being able to dump all that power in seconds. It’s the perfect application for a rail gun, or for slightly more pedestrian applications, an electric bike with a hill assist button. The idea for this build would be to charge supercaps from a bank of regular ‘ol batteries, and zoom up a hill with about fifteen seconds of assistance.

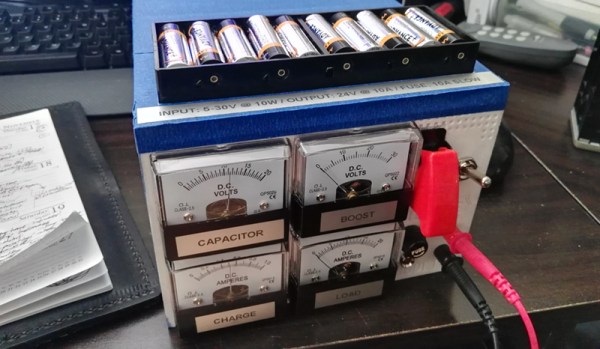
The design of the pulsed power DC supply is fairly straightforward, with a mouthful of batteries feeding the supercap array through boost regulators, and finally going out to the motor through another set of regulators. Unfortunately, this project never quite worked out. Everything worked; it’s just this isn’t the application for the current generation of supercapacitors. There’s not enough energy density in [David]’s 100F supercaps, and the charging speed from a bunch of AA batteries is slow. For fifteen minutes of charging, [David] gets about fifteen seconds of boost on his bike. That’s great if you only ever have one hill to climb, but really useless in the real world.

That doesn’t mean this project was a complete failure. [David] now has a handy, extremely resilient array of supercaps that will charge off of anything and provide a steady 24V for a surprising amount of time. Right now, he’s using this scrapped project as a backup power supply for his 3D printer. That 100 Watt heated bed slurps down the electrons, but with this repurposed supercap bank, it can survive a 20 second power outage.

It’s a great project, and even if the technology behind supercaps isn’t quite ready to be used as a boost button on an electric bike, it’s still a great example of DIY ingenuity. You can check out [David]’s demo of the supercap bank in action below.

Continue reading “Fail Of The Week: An Electric Bicycle, Powered By AA Batteries”

Fail Of The Week: Casting A Bolt In A 3D-Printed Mold

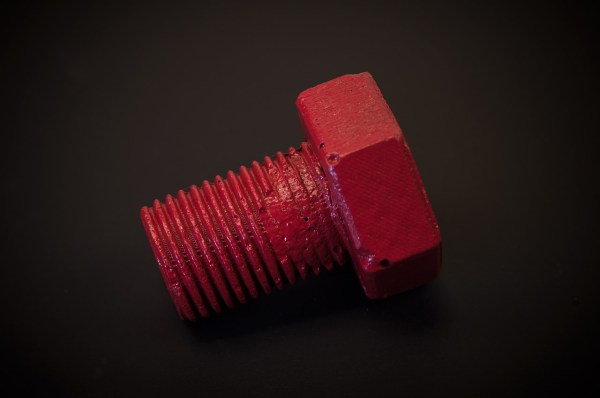
Here’s a weird topic as a Fail of the Week. [Pete Prodoehl] set out to make a bolt the wrong way just to see if he could. Good for you [Pete]! This is a great way to learn non-obvious lessons and a wonderful conversation starter which is why we’re featuring it here.

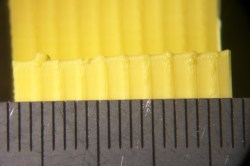
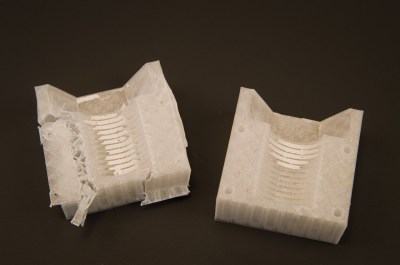
The project starts off great with a model of the bolt being drawn up in OpenSCAD. That’s used to create a void in a block which then becomes two parts with pegs that index the two halves perfectly. Now it’s time to do the casting process and this is where it goes off the rail. [Pete] didn’t have any flexible filament on hand, nor did he have proper mold release compound. Considering those limitations, he still did pretty well, arriving at the plaster bold seen above after a nice coat of red spray paint.

One side of the mold didn’t make it

He lost part of the threads getting the two molds apart, and then needed to sacrifice one half of the mold to extract the thoroughly stuck casting. We’ve seen quite a bit of 3D printed molds here, but they are usually not directly printed. For instance, here’s a beautiful mold for casting metal but it was made using traditional silicon to create molds of the 3D printed prototype.

Thinking back on it, directly 3D printed molds are often sacrificial. This method of pewter casting is a great example. It turns out gorgeous and detailed parts from resin molds that can stand up to the heat but must be destroyed to remove the parts.

So we put it to you: Has anyone out there perfected a method of reusable 3D printed molds? What printing process and materials do you use? How about release agents — we have a guide on resin casting the extols the virtues of release agent but doesn’t have any DIY alternatives. What has worked as a release agent for you? Let us know in the comments below.

Fail Of The Week: How Not To Build Your Own DGPS Base Station

GPS is the modern answer to the ancient question about one’s place in the world yet it has its limitations. It depends on the time of flight of radio signals emitted by satellites twenty thousand kilometers above you. Like any system involving large distances and high velocities, this is bound to offer some challenges to precise measurements which result in a limit to achievable accuracy. In other words: The fact that GPS locations tend to be off by a few meters is rooted in the underlying principle of operation.

Today’s level of precision was virtually unattainable just decades ago, and we’re getting that precision with a handheld device in mere seconds. Incredible! Yet the goal posts continue to move and people are working to get rid of the remaining error. The solution is called Differential GPS or ‘DGPS’ and its concept looks surprisingly simple.

What’s fascinating is that you can use one GPS to precisely measure the error of another GPS. This is because the inherent error of a GPS fix is known to be locally constant. Two receivers next to each other pick up signals that have been affected in the same way and thus can be expected to calculate identical wrong positions. This holds true for distances up to several kilometers between individual receivers. So in order to remove the error, all you need is a GPS receiver in a known location to measure the current deviation and a way to transmit correction information to other units. DGPS does just that, using either terrestrial radio in some regions and satellites in others. Mobile solutions exist as well.

So a raspi with a USB GPS dongle in a known location should be able to act as a DGPS over IP base station, right? In theory, yes. In practice… fail.

Continue reading “Fail Of The Week: How Not To Build Your Own DGPS Base Station”

Fail Of The Week: The Little Ultrasonic Knife That Couldn’t

We all know the feeling of an idea that sounded great when it was rattling around in our head, only to disappoint when we actually build the thing. It’s a natural consequence of trying new stuff, and when it happens, we salvage what we can and move on, hopefully in wisdom.

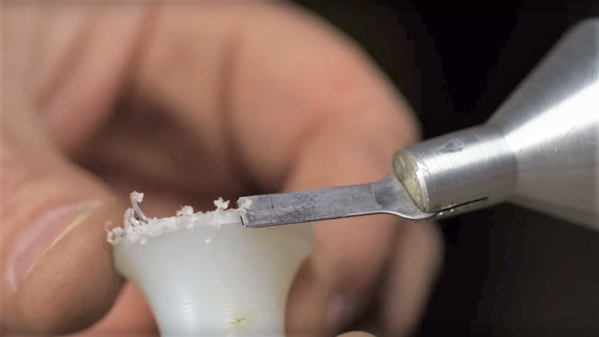
The thing that at least semi-defeated [This Old Tony] was an attempt to build an ultrasonic cutter, and it didn’t go well. Not that any blood was shed in the video below, although there seemed like there would be the way [Old Tony] was handling those X-Acto blades. His basic approach was to harvest the transducer and driver from a cheap ultrasonic cleaner and retask the lot into a tool to vibrate a knife rapidly enough to power it through tough materials with ease.

Spoiler alert: it didn’t work very well. We think the primary issue was using a transducer that was vastly underpowered compared to commercial (and expensive) ultrasonic cutters, but we suspect the horn he machined was probably not optimized either. To be fair, modeling the acoustic performance of something like that isn’t easy, so we can’t expect much. But still, it seems like the cutter could have worked better. Share your thoughts on how to make version 2.0 better in the comments.

The video is longish, but it’s as entertaining as any of [Old Tony]’s videos, and packed full of incidental gems, like the details of cavitation. We enjoyed it, even if the results were suboptimal. If you want to see a [This Old Tony] project that really delivers, check out his beautiful boring head build.

Continue reading “Fail Of The Week: The Little Ultrasonic Knife That Couldn’t”

Fail Of The Week: Engine Flips Out

A few weeks ago an incredible video of an engine exploding started making the rounds on Facebook. This particular engine was thankfully in a dyno room, rather than sitting a couple of feet away from a driver on a track. We’ve all seen engine carnage videos before, but this one stands out. This diesel engine literally rips itself apart, with the top half of the engine flipping and landing on one side of the room while the bottom half sits still spinning on the dyno frame.

Building performance engines is part science, part engineering, and part hacking. While F1 racing teams have millions of dollars of test and measurement equipment at their disposal, smaller shops have to operate on a much lower budget. In this case, the company makes their modifications, then tests things out in the dyno room. Usually, the tests work out fine. Sometimes though, things end spectacularly, as you can see with this diesel engine.

The engine in question belongs to Firepunk diesel, a racing team. It started life as a 6.7 liter Cummins diesel: the same engine you can find in Dodge Ram pickup trucks. This little engine wasn’t content to chug around town, though. The Firepunk team builds performance engines — drag racing and tractor pulling performance in this case. Little more than the engine block itself was original on this engine. Let’s take a deeper look.

Continue reading “Fail Of The Week: Engine Flips Out”