Developed On Hackaday : HaDge Update – It’s A HACK

Work on HaDge – the Hackaday con badge, continues in bits and spurts, and we’ve had some good progress in recent weeks. HaDge will be one conference badge to use at all conferences, capable of communicating between badges.

Picking up from where we left off last time, we had agreed to base it around the Atmel D21, a 32-bit ARM Cortex M0+ processor. To get some prototype boards built to help with software development, we decided to finish designing the HACK before tackling HaDge. HACK is a project that [Michele Perla] started that we have sort of assimilated to act as the prototyping platform for HaDge. We wanted a compact micro-controller board and hence opted for the SAM D21E – a 32 pin package with 26 IO’s.

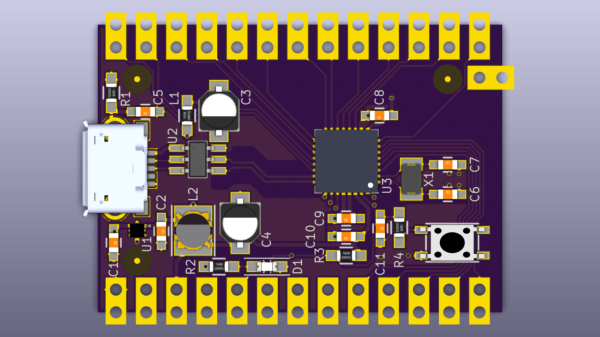
[Michele Perla] had earlier designed HACK based on the larger 32 pin SAM D21G and used Eagle to hack-brddraw the schematic and layout. Using the Eagle to KiCad script, he quickly converted the project and got on to making the board layout. I took up the rear guard, and worked on making his schematic (pdf) “pretty” and building up a schematic library of symbols. While [Michele] finished off the board layout, I worked on collecting STEP models for the various footprints we would be using, most of which I could get via 3dcontentcentral.com. The few I couldn’t were built from scratch using FreeCAD. The STEP models were converted to VRML using FreeCAD. Using [Maurice]’s KiCad Stepup script, we were able to obtain a complete STEP model of the HACK board.
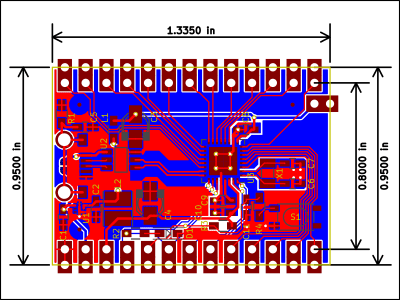
HACK is now ready to go for board fabrication and assembly. We plan to get about 20 boards made and hand them out to developers for working on the software. The GitHub repository has all the current files for those who’d like to take a look – it includes the KiCad source files, PDFs, gerbers, data sheets and images. The board will be breadboard compatible and also have castellated pads to allow it to be soldered directly as a module. Let us know via group messaging on the HACK project page if you’d like to get involved with either the software or hardware development of HaDge.

In a forthcoming post, we’ll put out ideas on how we plan to take forward HaDge now that HACK is complete. Stay tuned.


Running Calculus On An Arduino

It was Stardate 2267. A mysterious life form known as Redjac possessed the computer system of the USS Enterprise. Being well versed in both computer operations and mathematics, [Spock] instructed the computer to compute pi to the last digit. “…the value of pi is a transcendental figure without resolution” he would say. The task of computing pi presents to the computer an infinite process. The computer would have to work on the task forever, eventually forcing the Redjac out.

Calculus relies on infinite processes. And the Arduino is a (single thread) computer. So the idea of zeno_03running a calculus function on an Arduino presents a seemingly impossible scenario. In this article, we’re going to explore the idea of using derivative like techniques with a microcontroller. Let us be reminded that the derivative provides an instantaneous rate of change. Getting an instantaneous rate of change when the function is known is easy. However, when you’re working with a microcontroller and varying analog data without a known function, it’s not so easy. Our goal will be to get an average rate of change of the data. And since a microcontroller is many orders of magnitude faster than the rate of change of the incoming data, we can calculate the average rate of change over very small time intervals. Our work will be based on the fact that the average rate of change and instantaneous rate of change are the same over short time intervals.


Continue reading “Running Calculus On An Arduino” →

Hackaday Links: January 17, 2016

The BBC has commissioned a new series of Robot Wars. This is not Battlebots; that show was revived last year, and a second season will air again this summer. Robot Wars is the one with the ‘house’ robots. We would like to take this opportunity to remind the BBC that Robot Wars is neither Scrapheap Challenge nor Junkyard Wars, and by virtue of that fact alone is an inferior show.

[Fran] is a favorite around these parts. She’s taken apart a Saturn V Launch Vehicle Digital Computer, visited the Smithsonian Air and Space Museum warehouse, and is the occasional host of the Dinosaur Den with [Bil Herd]. Now, she’s relaunching her line of guitar pedals. ‘Boutique’ pedals are a weird market, but with the help of a few manufacturers, [Fran] is bringing her Peachfuzz pedal back to life through Kickstarter.

Want to be an astronaut? Here’s the application.

Here’s your monthly, ‘WTF is this thing on eBay’ link. It’s a clamshell/toilet seat iBook (c.2000), loaded up with an Intel i5 Broadwell CPU, 128 GB of Flash storage, 4 GB of RAM, a 12″ 1024×768 LCD, Gigabit Ethernet, WiFi, Bluetooth, and runs OS X El Capitan. I might be mistaken, but it looks like someone took the motherboard out of a 2015 MacBook Air, crammed it into a sixteen year old computer, and put it up on eBay. I’m not saying that’s what it is; this is from China, and there are people over there making new improved motherboards for a Thinkpad x61. Weirder stuff has already happened.

In the last installment of the Travelling Hacker Box, I asked if anyone can receive mail in Antarctica. A person with friends in the British survey team emailed me, but nothing came of that. It’s summer, so if Antarctica is going to happen, it needs to happen soon.

Hacklet 91: Ultrasonic Projects

Ultrasound refers to any audio signal above the range of human hearing. Generally that’s accepted as 20 kHz and up. Unlike electromagnetic signals, ultrasonics are still operating in a medium – generally the air around us. Plenty of animals take advantage of ultrasonics every day. So do hackers, makers, and engineers who have built thousands of projects based upon these high frequency signals. This weeks Hacklet is all about the best ultrasonic projects on Hackaday.io!

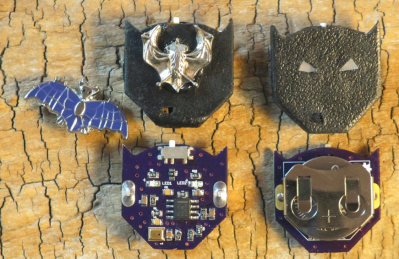
spambakeWe start with [spambake] and World’s Smallest Bat Detector. [Spambake] is interested in bats. These amazing creatures have poor eyesight, but that doesn’t slow them down. Bats use echolocation to determine their surroundings. Ultrasonic chirps bounce off obstacles. The bat listens to the echos and changes its flight path accordingly. While we can’t hear most of the sounds bats make, electronics can. [Spambake] cooked this circuit up starting with a MEMs microphone. These microphones pick up human sounds, but unlike our ears, they can hear plenty above the 20 kHz range. The audio signal is passed through an amplifier which boosts the it up around 10,000 times. The signal is filtered and then used to trigger LEDs that indicate a bat is present. The final circuit works quite well! Check out [spambake’s] video to see the bat detector in action!

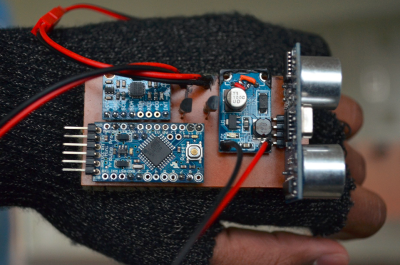
movvaNext up is [Neil Movva] with Pathfinder – Haptic Navigation. Pathfinder uses ultrasonic transducers to perform echolocation similar to bats. The received data is then passed on to a human wearer. [Neil’s] idea is to use Pathfinder to help the visually disabled and blind navigate the world around them. Pathfinder was a 2015 Hackaday Prize finalist. The ultrasonic portion of Pathfinder uses the ubiquitous HC-SR04 distance sensor, which can be found for as little as $2 USD on eBay and Alibaba. These sensors send out a 60 kHz signal and listen for the echos. A microcontroller can then measure the time delay and determine the distance from the sensor to an obstacle. Finally the data is passed on to the user by a vibrating pager motor. [Neal] was kind enough to give a talk about Pathfinder at the 2015 Hackaday SuperCon.

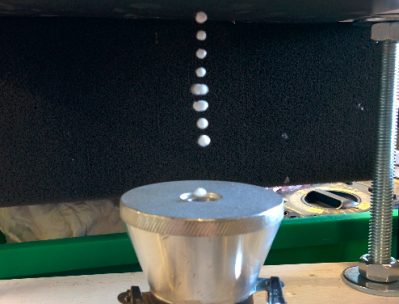
levitate[HoboMunching] likes his ultrasonic devices ultra powerful, and that’s just what he’s got with Ultrasonic Levitation Rig. Inspired by a similar project from Mike, [HoboMunching] had to build his own levitation setup. Ultrasonic levitation used to be a phenomenon studied only in the laboratory. Cheap transducers designed for the industrial world have made this experiment practical for the home hackers. [HoboMunching] was able to use his rig to levitate up to 8 tiny balls on the nulls between the 28.5 kHz sound waves produced by his transducer. The speed of sound can be verified by measuring the distance between the balls. Purists will be happy to hear that [HoboMunching]’s circuit was all based upon the classic 555 timer.

speaker-arrayFinally we have [Alan Green] with Ultrasonic Directional Speaker V1. Most audio signals are not very directional, due to wavelength and practical limitations on speaker size. Ultrasonics don’t have this limitation. Couple this with the fact that ultrasonic signals can be made to demodulate in air, and you have the basis for a highly directional speaker setup. “Sound lasers” based on this system have been around for years, used in everything from targeted advertising to defensive weapons. [Alan] is just getting started on this project. Much of his research is based upon [Joe Pompei’s] work at the MIT media lab. [Alan] plans to use an array of ultrasonic transducers to produce a directional signal which will then demodulate and be heard by a human. This project has a hard deadline though:  [Alan] plans to help his son [Mitchell] with a musical performance that is scheduled for May, 2016. The pair hope to have a prototype in place by March.

If you want to see more ultrasonic projects, check out our new ultrasonic projects list! If I missed your project, don’t be shy! Just drop me a message on Hackaday.io. That’s it for this week’s Hacklet. As always, see you next week. Same hack time, same hack channel, bringing you the best of Hackaday.io!

Failaffle

Fail Of The Week: Not All Mold Releases Release All Molds.

I’m writing a series of articles on resin casting as an extension to my experiences with the instructions found in the wonderful Guerrilla Guide. However, mistakes were made. Having run out of my usual mold release I went to a back-up jar that was lying around from a casting project long, long ago in a workshop far, far away.

GLUE
Never much for readin’ the nutrition facts myself.

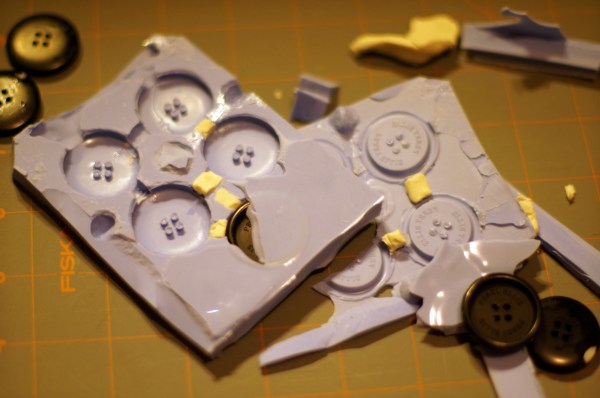
I’m refining a technique of making a mold the quick and dirty way. Everything was going well, the sprues looked good and the master released from the silicone. It was time to do the second half of the mold. As usual I applied a generous amount of mold release. Since it was the first time this mold was to be used I went ahead and did all the proper steps. Rubbing off the dried release and applying a few more coats just to be sure.

I was completely unaware that I was applying mold release designed for urethane molds only. In other words I thoroughly covered my silicone mold in silicone bonding agents. I remained unaware until trying to separate the halves of the mold and found them thoroughly joined. After going through the stages of grief I finally figured out where it all went wrong.

Oh well. I’m ordering some of my regular pick, Stoner A324, and that should do the trick. There’s also Mann- Ease Release 200. While having probably the best name a release agent can have, it doesn’t work as well and needs approximately 100 years to dry. After this setback I’d rather just, grudgingly, learn my lesson and order the correct thing.

I wonder if the smooth-on description can say URETHANE RUBBER a few more times.
Oh. Yes I see. Urethane… Urethane…

So now that we know the right way to fix this is to order the right product, is there a hack to get around it? Does anyone have a homebrew trick for release agent that can be used in a pinch? Leave your comments below.

Retrotechtacular: The Theremin Terpsitone

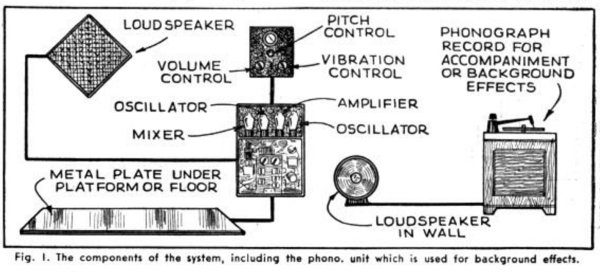
Léon Theremin built his eponymous instrument in 1920 under Soviet sponsorship to study proximity sensors. He later applied the idea of generating sounds using the human body’s capacitance to other physical forms like the theremin cello and the theremin keyboard. One of these was the terpsitone, which is kind of like a full-body theremin. It was built about twelve years after the theremin and named after Terpsichore, one of the nine muses of dance and chorus from Greek mythology.

Continue reading “Retrotechtacular: The Theremin Terpsitone” →

Oh Baby, Baby10 – Build A Classic Analog Music Sequencer

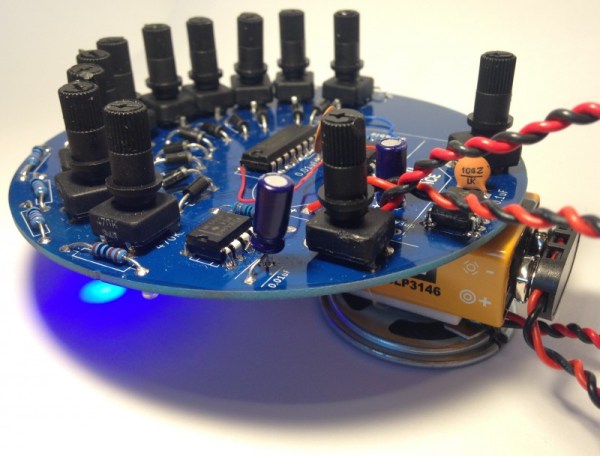
Recently I’ve been learning more about classic analog music synthesizers and sequencers. This has led me to the Baby10, a classic and simple analog sequencer design. In this article I’ll introduce its basic operation, and the builds of some awesome hackers based on this design.

Sequencers produce, a sequence of varying voltages. These control voltages (CV) can then be use to control other components. Often this is a simple tone generator. While the concept is simple, it can produce awesome results:

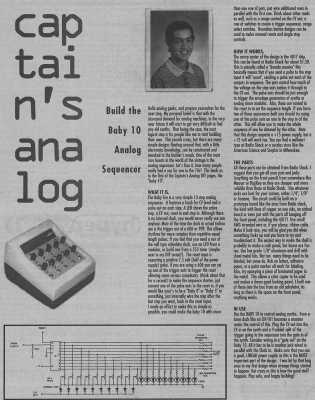
A basic sequencer is a great beginners project. It’s easy to understand the basic operation of the circuit and produces a satisfyingly entertaining result. The Baby 10 was originally published in a column called “Captain’s Analog”, but has now been widely shared online.

baby10
The original Baby10 article.

The circuit uses the 4017, a simple CMOS decade counter. The 4017 takes an input clock signal then sequentially outputs a high pulse on each of 10 output pins. As such, the 4017 does almost everything we need from a sequencer in a single IC! However, we want our sequencer to output a varying voltage which we can then use to generate differing tones.

To accomplish this variable resistors are connected to each of the output pins. A diode in series with the variable resistor stops the outputs fighting against each other (in layman’s terms).

To make the sequencer more visually attractive (and give some feedback) LEDs are often also added to the output of the 4017. A complete Baby 10 sequencer is shown in the schematic below. The original circuit used 1N917s, these are no longer available but the part has been replaced by the 1N4148.

Continue reading “Oh Baby, Baby10 – Build A Classic Analog Music Sequencer” →