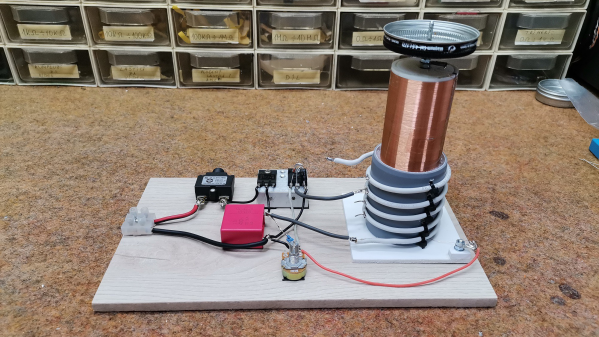
solenoid wound pickup coil next to a selection of bolts and a steel rod

The Barkhausen Effect: Hearing Magnets Being Born

The Barkhausen effect — named after German Physicist Heinrich Barkhausen — is the term given to the noise output produced by a ferromagnetic material due to the change in size and orientation of its discrete magnetic domains under the influence of an external magnetic field. The domains are small: smaller than the microcrystalline grains that form the magnetic material, but larger than the atomic scale. Barkausen discovered that as a magnetic field was brought close to a ferrous material, the local magnetic field would flip around randomly, as the magnetic domains rearranged themselves into a minimum energy configuration and that this magnetic field noise could be sensed with an appropriately arranged pickup coil and an amplifier. In the short demonstration video below, this Barkhausen noise can be fed into an audio amplifier, producing a very illustrative example of the effect.

One example of practical use for this effect is with non-destructive testing and qualification of magnetic structures which may be subject to damage in use, such as in the nuclear industry. Crystalline discontinuities or impurities within a part under examination result in increased localized mechanical stresses, which could result in unexpected failure. The Barkhausen noise effect can be easily leveraged to detect such discontinuities and give the evaluator a sense of the condition of the part in question. All in all, a useful technique to know about!

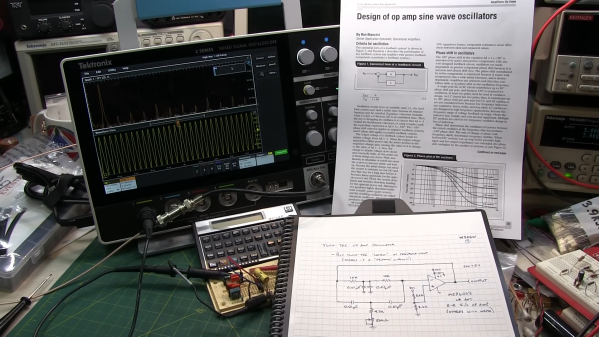
If you were thinking that the Barkhausen is a familiar name, you may well be thinking about the Barkhausen stability criterion, which is fundamental to describing some of the conditions necessary for a linear feedback circuit to oscillate. We’ve covered such circuits before, such as this dive into bridge oscillators.

Continue reading “The Barkhausen Effect: Hearing Magnets Being Born”

A 12" LCD screen sits between speakers (on lower half of bezel) and joycon controllers are attached on the upper half of the bezel.

Portable Monitor Extension For Nintendo Switch

Handheld consoles are always a tradeoff between portability and screen real estate. [Pavlo Khmel] felt that the Nintendo Switch erred too much on the side of portability, and built an extension to embiggen his Switch. (YouTube)

[Khmel] repurposed a Dell XPS 12 LCD panel for the heart of this hack and attached it to an LCD controller board to serve as an external monitor for the Switch. A 3D printed enclosure envelops the screen and also contains a battery, speakers, and a dock for the console. Along the top edges, metal rails let you slide in the official Joy-Cons or any number of third party controllers, even those that require a power connection from the Switch.

Since the Switch sees this as being docked, it allows the console to run faster and at higher resolution than if it were in handheld mode. The extension lasts about 5 hours on battery power, and the Switch inside will still be fully charged if you don’t mind being constrained to its small screen while you charge it’s bigger-screened exoskeleton.

Need more portable goodness? Be sure to check out our other handheld and Nintendo Switch hacks.

Continue reading “Portable Monitor Extension For Nintendo Switch”

An iPhone sits in a users hand open to the YouTube app. What is unusual is that the iPhone is bent in an L shape and is still functioning properly.

First Folding IPhone Doesn’t Come From Apple

Folding phones are all the rage these days, with many of the major smartphone manufacturer’s having something in this form factor. Apple has been conspicuously absent in this market segment, so [KJMX] decided to take matters into their own hands with the “iPhone V.” (YouTube – Chinese w/subtitles via MacRumors).

Instead of trying to interface an existing folding phone’s screen with the iPhone, these makers delaminated an actual iPhone X screen to use in the mod. It took 37 attempts before they had a screen with layers that properly separated to be both flexible and functional. Several different folding phones were disassembled, and [KJMX] found a Motorola Razr folding mechanism would work best with the iPhone X screen. Unfortunately, since the iPhone screen isn’t designed to fold, it still will fail after a relatively small number of folds.

Other sacrifices were made, like the removal of the Taptic Engine and a smaller battery to fit everything into the desired form factor. The “iPhone V” boasts the worst battery life of any iPhone to date. After nearly a year of work though, [KJMX] can truly claim to have made what Apple hasn’t.

Curious about other hacks to let an iPhone do more than Apple intended? Check out how to add USB-C to an iPhone, try to charge it faster, or give one a big memory upgrade.

Surface Mount Breathing Light PCB, using LM358 op-amp

Surface-Mount Light Breathes Life Into Your Project

If you’ve ever seen those gadgets with the “breathing light” LEDs on them and wondered how to do it, then [DIY GUY Chris] can show you how to design your own surface-mount version, using only analogue electronics.

Simulation trace showing the LED breathing light circuit operating. Traces for voltage and current are shown over a few seconds
The LED current tracks up and down in an approximately triangular-wave pattern

The circuit itself is built around a slow triangular-wave oscillator, that ramps the current up and down in the LEDs to make it look as if the lights are breathing in and out. The overall effect is rather pleasing, and the oscillation speed can be adjusted using the on-board potentiometer.

This project is actually an update to a previous version that used through-hole components (also shown in the video below), and goes to show that revisiting completed projects can give them a new lease of life. It also shows how easy it has become to design and order custom circuit boards these days. It’s not so long ago that a project like this would have been either made on stripboard or etched from copper-plated FR4 in a bubbling tank of acid!

If you have revisited an old project that you’re proud of and would like to show others, why not drop us a message on our tips line?

We have covered some other options for breathing LEDs in the past, such as this digital logic version, and this Arduino library that has a host of other effects to choose from, too. Continue reading “Surface-Mount Light Breathes Life Into Your Project”

Rope Core Drum Machine

One of our favorite musical hackers, [Look Mum No Computer] is getting dangerously close to building a computer. His quest was to create a unique drum machine, inspired by a Soviet auto-dialer that used rope core memory for number storage. Rope memory is the read-only sibling to magnetic core memory, the memory technology used to build some beloved computers back in the 60s and early 70s. Rope core isn’t programmed by magnetizing the ceramic donuts, but by weaving a wire through them. And when [Look Mum] saw the auto-dialer using the technology for a user-programmable interface, naturally, he just had to build a synth sequencer.
Continue reading “Rope Core Drum Machine”

"The Great Resistor" color code illumination project

The Great Resistor Embiggens The Smallest Value

With surface-mount components quickly becoming the norm, even for homebrew hardware, the resistor color-code can sometimes feel a bit old-hat. However, anybody who has ever tried to identify a random through-hole resistor from a pile of assorted values will know that it’s still a handy skill to have up your sleeve. With this in mind, [j] decided to super-size the color-code with “The Great Resistor”.

Resistor color code from Wikipedia with white background
How the resistor color-code bands work

At the heart of the project is an Arduino Nano clone and a potential divider that measures the resistance of the test resistor against a known fixed value. Using the 16-bit ADC, the range of measurable values is theoretically 0 Ω to 15 MΩ, but there are some remaining issues with electrical noise that currently limit the practical range to between 100 Ω and 2 MΩ.

[j] is measuring the supply voltage to help counteract the noise, but intends to move to an oversampling/averaging method to improve the results in the next iteration.

The measured value is shown on the OLED display at the front, and in resistor color-code on an enormous symbolic resistor lit by WS2812 RGB LEDs behind.

Inside view of the great resistor showing WS2812 LEDs and baffle plates
Inside The Great Resistor, the LEDs and baffle plates make the magic work

Precision aside, the project looks very impressive and we like the way the giant resistor has been constructed. It would look great at a science show or a demonstration. We’re sure that the noise issues can be ironed out, and we’d encourage any readers with experience in this area to offer [j] some tips in the comments below. There’s a video after the break of The Great Resistor being put through its paces!

If you want to know more about the history of the resistor color code bands, then we have you covered.  Alternatively, how about reading the color code directly with computer vision?

Continue reading “The Great Resistor Embiggens The Smallest Value”

A terminal window with a search for "Guineau Pig Olympics" is inset on a photo of an ortholinear keyboard attached by a yellow USB cable to a 70s aluminum and plastic Super 8 film editor/viewer. The device has a large screen on the right hand side, a silver grate on the left, and a tray at the bottom for slotting in film.

Super 8 Film Editor Reborn As A YouTube Terminal

We love hacks that give new life to old gadgets, and [edwardianpug]’s YouTube Terminal certainly fits the bill by putting new hardware inside a Super 8 film editor.

[edwardianpug] could have relegated this classy-looking piece of A/V history to a shelf for display, but instead she decided to refresh its components so it could display any YouTube video instead of just one strip of film at a time. The Boost-Box keeps the retrofuturistic theme going by using the terminal to search for and play videos via Ytfzf.

The original screen has been replaced by an 800×600 LCD, and the yellow USB cord gives a nice splash of color to connect the ortholinear keyboard to the device. Lest you think that this “ruined” a working piece of retro-tech, [edwardianpug] says that 20 minutes would get this device back to watching old movies.

Are you looking for more modern and retro mashups? Check out these Dice Towers Built In Beautiful Retro Cases, a Vacuum Tube and Microcontroller Ham Transmitter, or this Cyberdeck in a Retro Speaker.

Continue reading “Super 8 Film Editor Reborn As A YouTube Terminal”