When you have a bunch of 230 kV transmission lines running over your property, why not use them for some scientific experiments? This is where the [Double M Innovations] YouTube channel comes into play, including a recent video where the idea of harvesting electricity from HV transmission lines using regular fences is put to an initial test.
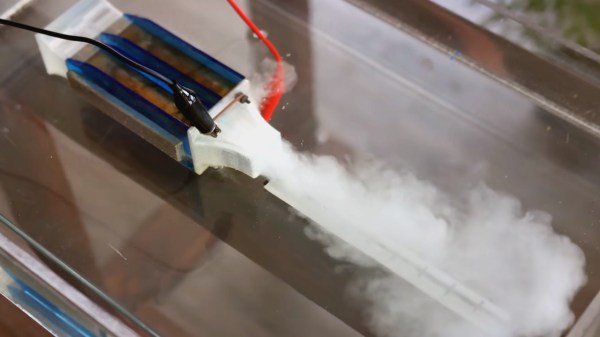
![The nearly final measurement by [Double M Innovations].](https://hackaday.com/wp-content/uploads/2024/01/hv_transmission_line_energy_harvesting_final_count.jpg)
As for the results, they were rather concerning and flashy, with the 1000 VAC-rated multimeter going out of range on the AC side of the bridge rectifier, and the capacitor slowly charging up to 1000 V before the experiment was stopped.
Based on the capacity of the capacitor and the final measured voltage of 907 VDC, roughly 36.2 Joule would have been collected, giving some idea of the power one could collect from a few kilometers of fencing wire underneath such HV lines, and why you probably want to ground them if energy collecting is not your focus.
As for whether storing the power inductively coupled on fence wire can be legally used is probably something best discussed with your local energy company.
Continue reading “Harvesting Electricity From High-Voltage Transmission Lines Using Fences”