WiFi just isn’t very good at going through buildings. It’s fine for the main living areas of an average home, but once we venture towards the periphery of our domains it starts to become less reliable. For connected devices outside the core of a home, this presents a problem, and it’s one Amazon hope to solve with their Sidewalk product.
It’s a low-bandwidth networking system that uses capability already built into some Echo and Ring devices, plus a portion of the owner’s broadband connection to the Internet. The idea is to provide basic connectivity over longer distances to compatible devices even when the WiFi network is not available, but of most interest and concern is that it will also expose itself to devices owned by other people. If your Internet connection goes down, then your Ring devices will still provide a basic version of their functionality via a local low-bandwidth wide-area wireless network provided by the Amazon devices owned by your neighbours. Continue reading “Amazon Sidewalk: Should You Be Co-Opted Into A Private Neighbourhood LoRa Network?”→
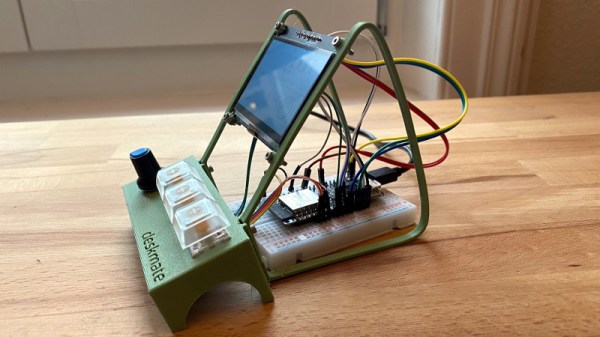
One of the more interesting display technologies of the moment comes from Sharp, their memory display devices share the low power advantages of an e-ink display with the much faster updates we would expect from an LCD or similar. We’ve not seen much of them in our community due to cost, so it’s good to see one used in an MQTT dashboard project from [Raphael Baron].
The hardware puts the display at the top of a relatively minimalist 3D printed encloseure with the LOLIN32 ESP32 development board behind it, and with a plinth containing a small rotary encoder and three clicky key switches in front. The most interesting part of the project is surprisingly not the display though, because despite being based upon an ESP32 development board he’s written its software with the aim of being as platform- and display-independent as possible. To demonstrate this he’s produced it as a desktop application as well as the standalone hardware. A simple graphical user interface allows the selection of a range of available sources to monitor, with the graphical results on the right.
All code and other assets for the project can be found in a handy GitHub repository, and to put the thing through its paces he’s even provided a video that we’ve placed below the break. User interfaces for MQTT-connected devices can talk as well as listen, for example this MQTT remote control.
The humble kitchen sink has remained relatively unchanged over the last century. While there are now fancier mixing taps and sleeker fittings available, for most of us, there’s a nozzle that squirts water of varying temperature, and a tub in which to soak dishes. Of course, this leaves plenty of room for improvement, as [Jake] found with his robot sink build.
The sink consists of a robotic nozzle, which he refers to as a “continuum manipulator”. In essence, it’s a nozzle that can be steered with a joystick to aim the flow of water throughout the sink. To move the nozzle, motors pull on steel cables attached to 3D printed collars fastened around the hose. Combined with an on/off switch for the water flow, the sink could be a useful assistive technology for those with disabilities, as demonstrated in the project’s demo video.
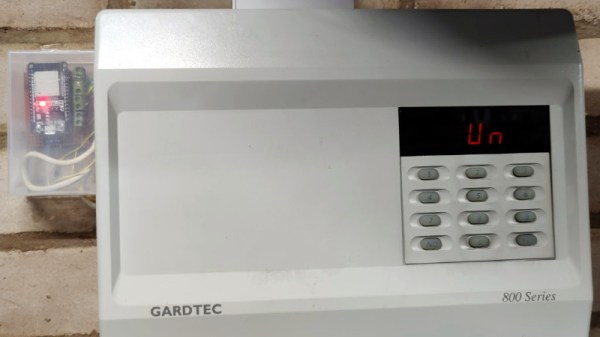
Given how fast technology is progressing, some consumer gadgets lend themselves to being replaced every few years. Mobile phones are a particularly good example of a device that you probably won’t want to hold onto for more than 4 years or so, with TVs not far behind them. On the other hand, something like a home alarm system can stay in the fight for decades. As long as it still goes off when somebody tries to pop a window, what more do you need?
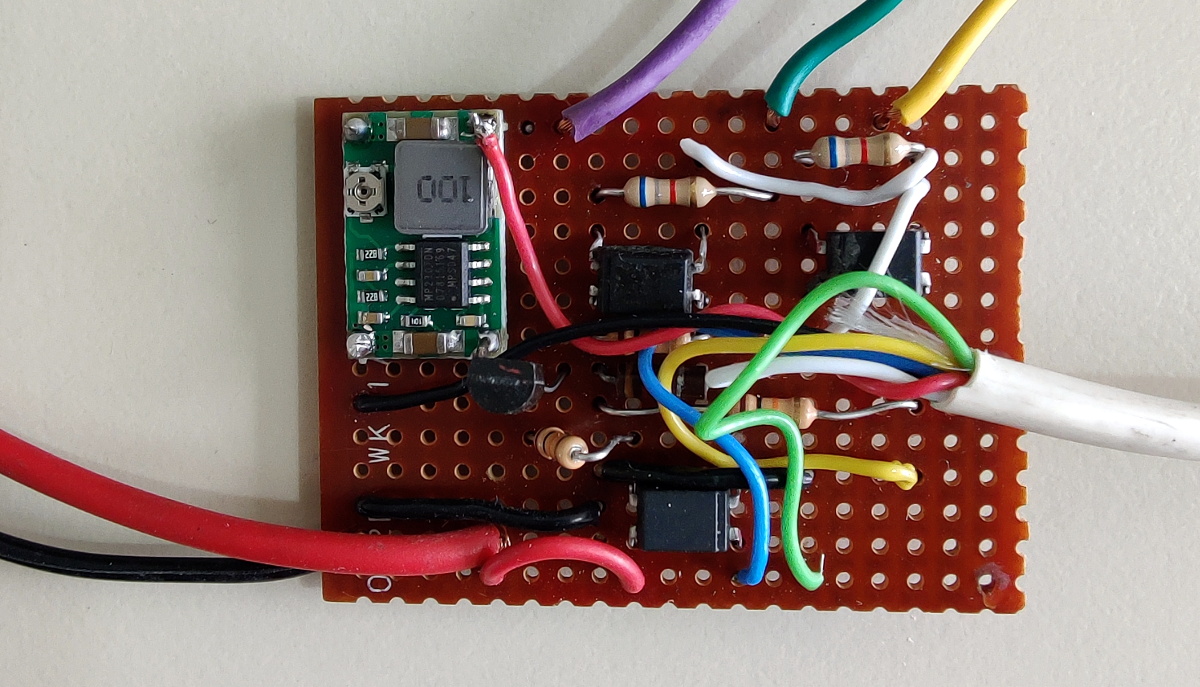
Well if you’re like [Brett Laniosh], you might want the ability to arm the system and check its current status from your phone. But instead of getting a whole new system, he decided to upgrade his circa 1993 Gardiner Gardtec 800 alarm with an ESP32. As it so happens, the original panel has an expansion connector which he was able to tap into without making any modifications to the alarm itself. If you’ve got a similar panel, you might even be able to use his source code and circuit schematics to perform your own modification.
Optocouplers link the ESP and alarm panel.
Now we know what you’re thinking. Surely there’s a risk involved when trusting an ESP32 connected to the Internet with the ability to disarm your home alarm system. [Brett] has considered this, and made sure that the web server running on the microcontroller can only be accessed from the local network. If he does want to connect from beyond WiFi range, he does so through a VPN. In other words, his code is never directly exposed to the wilds of the Internet and is always hiding behind some kind of encryption.
The WiFi connection allows [Brett] to arm and disarm the alarm system remotely, check if it’s been triggered, and reset it if necessary, all from his smartphone. But he’s also added in a 433 MHz receiver so he can use simple handheld fobs to arm the system if he doesn’t want to go through the phone. Even if you dropped out the Internet connectivity, this alone is a pretty nice upgrade.
Homes in different parts of the world used to look different from each other out of necessity, built to optimize for the challenges and benefits of local climate. When residential climate control systems became commonplace that changed. Where a home in tropical south Florida once required very different building methods (and materials) compared to a home in the cold mountains of New England, essentially identical construction methods are now used for single-family homes in any climate. The result is inefficient and virtually indistinguishable housing from coast to coast, regardless of climate. As regions throughout the world are facing increasingly dire housing shortages, the race is on to find solutions that are economical and available to us right now.
The mission of CalEarth, one of the non-profits that Hackaday has teamed up with for this year’s Hackaday Prize, is to address that housing shortage by building energy-efficient homes out of materials already available in the areas that they will be built. CalEarth specializes in building adobe, or earth, homes that have a large thermal mass and an inexpensive bill of materials. Not only does this save on heating and cooling costs, but transportation costs for materials can be reduced as well. Some downside to this method of construction are increased labor costs and the necessity of geometric precision of the construction method, both of which are tackled in this two-month design challenge.
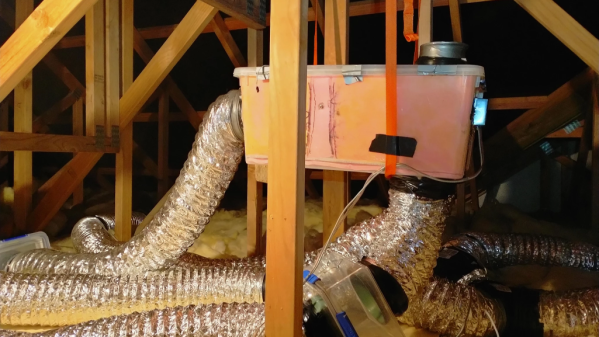
We have no idea whether [Nick Goodey] is a trained engineer or not. But given the detailed design of this DIY energy recovery ventilator for his home HVAC system, we’re going to go out on a limb and say he probably knows what he’s doing.
For those not in the know, an energy recovery ventilator (ERV) is an increasingly common piece of equipment in modern residential and commercial construction. As buildings have become progressively “tighter” to decrease heating and cooling energy losses to the environment, the air inside them has gotten increasingly stale. ERVs solve the problem by bringing fresh, unconditioned air in from the outside while venting stale but conditioned air to the outside. The two streams pass each other in a heat exchanger so that much of the energy put into the conditioned air is transferred to the incoming unconditioned air.
While ERV systems are readily available commercially, [Nick] decided to roll his own after a few experiments with Coroplast and some extensive calculations convinced him it would be a viable idea. One may scoff at the idea of corrugated plastic for the heat exchanger, but the smooth channels through the material make it a great choice. He built up a block of Coroplast squares with the channels in alternate layers oriented orthogonally, letting stale inside air pass very close to fresh outside air to exchange heat without ever mixing directly. The entire system, including fans, an Arduino for control, sensors galore, and the Hubitat home automation hub, is powered by DC, so no electrician was needed. [Nick] has a ton of detail in his build log, including all the tools and calculators he used to design the system.
Given the expense of ERV systems, we’re surprised we haven’t seen more stories about DIY versions. We have talked about HVAC systems a lot, though — after all, HVAC techs are hackers who make housecalls.
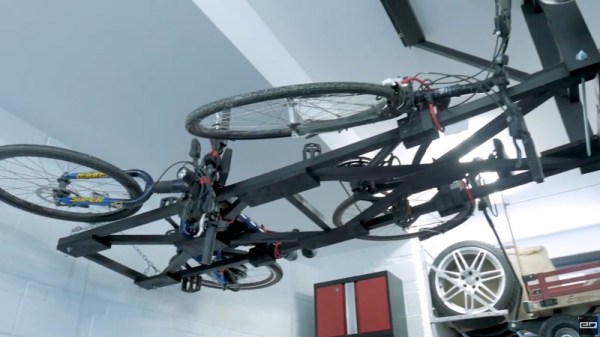
Vertical storage is often underused in the garage or workshop as it can be tricky to get bulky objects off the floor safely. So we stick a few shelves on the wall, put boxes of screws and components on them, and call it a day. Meanwhile, you end up playing a game of horizontal Tetris with all the big stuff on the ground.
Looking to free up some floor space in his garage, [Chris Chimienti] recently decided to design and build his own hoist to lift his bicycles off the floor. While his design is obviously purpose built for bikes, the core concept could potentially be adapted to lift whatever it is you’ve been kicking across the garage floor as of late; assuming it doesn’t have any strong feelings on suddenly being tipped over on its side, anyway.
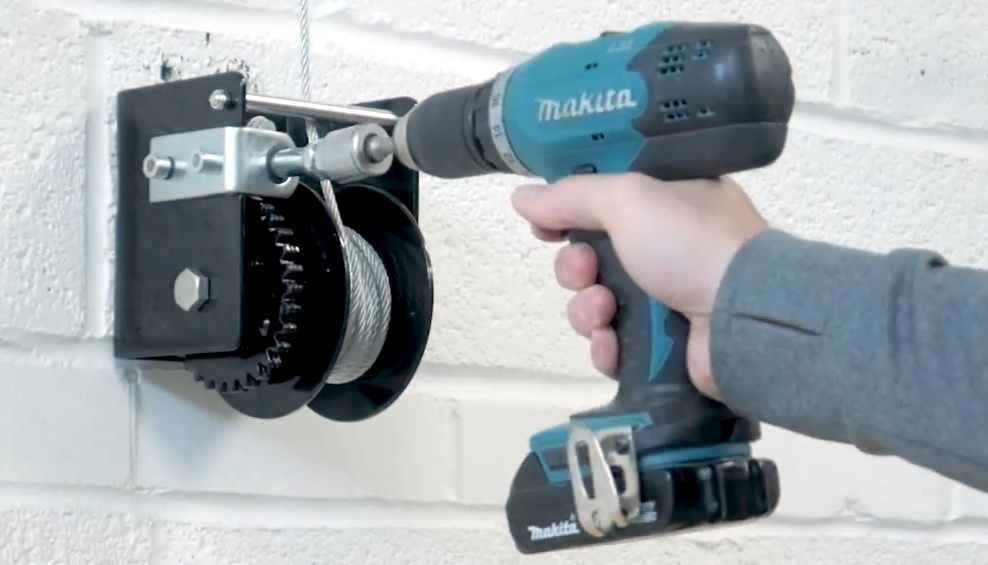
A simple modification allows for operation with a drill.
Before he started the actual build, [Chris] knocked together a rough facsimile of his garage in SolidWorks and started experimenting with the layout and mechanism that the hoist would ultimately use. While we’ve all felt the desire to run into a project full-speed, this more methodical approach can definitely save you time and money when working on a complex project. Redesigning a component in CAD to try it a different way will always be faster and easier than having to do it for real.
We’ve become accustomed to seeing projects include sensors, microcontrollers, and 3D printed components as a matter of course, but [Chris] kept this build relatively low-tech. Not that we blame him when heavy overhead loads are involved. Even still, he did have to make a few tweaks in the name of safety: his original ratcheting winch could freewheel under load, so he swapped it out for a worm gear version that he operates with an electric drill.