Everyone who builds embedded systems wants tools to help build and debug systems faster, so it isn’t uncommon to see boards outfitted with various tools like serial port sniffers. We’ve seen a few incarnations and the latest is Glasgow. The small board uses an FPGA and claims to do the following:
- UART with automatic baud rate determination
- SPI or I2C
- Read and write common EEPROMs and flash chips
- Read and write common EPROMs including a data rescue function
- Program AVR chips via SPI
- Play back JTAG SVF files
- Debug ARC and some MIPS CPUs
- Program XC9500LX CPLDs
- Communicate to several wireless radios and CPUs
- Do sound synthesis
- Read raw data from floppy drives
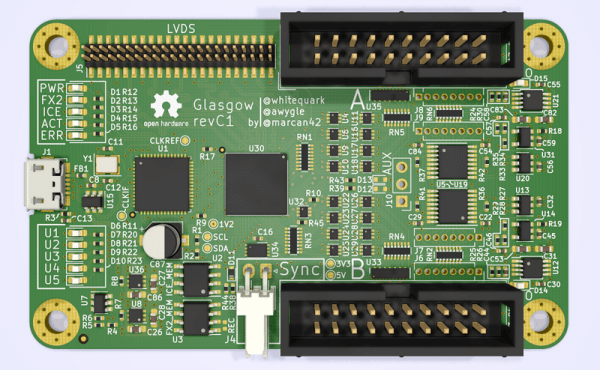
The revC board is the first to be relatively functional and sports 16 I/O pins operating at up to 100 MHz, although the documentation hints that 6 MHz might be the top of what’s easily accomplished. The software is written in Python and the iCE40 FPGA toolchain that we’ve talked about many times in the past.
This already looks like a useful tool and the reconfigurable nature of FPGAs makes it a good platform to expand. The documentation discusses the difficulty in debugging things for the board, so the base software offers support such as a built-in logic analyzer to help.
We have seen dev boards become bench tools, like using the iCEstick as a logic analyzer. It’s nice to see dedicated tools like this one built up around the speed and versatility of FPGAs.
Continue reading “Glasgow Uses An FPGA As An Embedded Systems Multitool”