New Part Day: The $15 ESP32 With Cellular

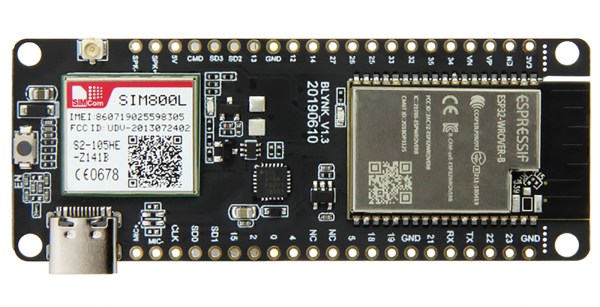
Cruise around AliExpress for long enough and you’ll find some interesting new hardware. The latest is the TTGO T-Call, an ESP32 breakout board that also has a cellular modem. Yes, it’s only a 2G modem, but that still works in a lot of places, and the whole thing is $15.

On board the TTGO T-Cal is the ESP-WROVER-B, the same module you all know and love that features a dual-core ESP running at 240 MHz with 4 MB of Flash and 8 MB of SRAM. Add to this WiFi and Bluetooth, and you have a capable microcontroller platform. Of note is that this board includes a USB-C port, ostensibly wired so that it behaves like a normal USB micro port. That’s neat, 2019 is the year USB C connectors became cheaper than USB micro connectors.

In addition to the ESP32 module, there’s also cellular in the form of a SIM800 module. This module has been around for a while and used in many, many cellular-connected projects and products like the ZeroPhone. This module is only a 2G module, and that’ll be going away shortly (if not already) in built-up areas, but this can serve as a building block for modules that have more Gees than a 2G module. That said, if you’re looking for a WiFi and cellular bridge for fifteen bucks, you could do a lot worse for a lot more money.
ESP32 Gets Advance Windowed Apps Using This VGA GUI Library

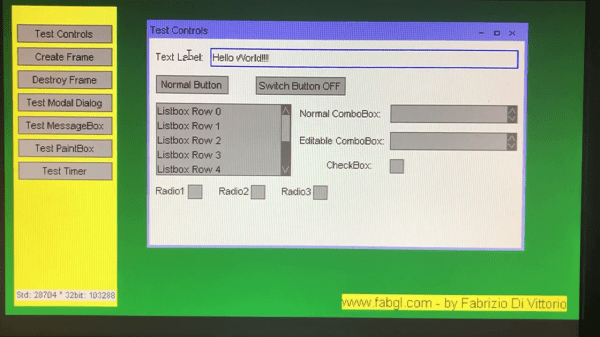
We featured [Fabrizio Di Vittorio]’s FabGL library for the ESP32 back in April of this year. This library allows VGA output using a simple resistor based DAC (3 resistors for 8 colors; 6 resistors for 64 colors), and includes functions for PS/2 mouse and keyboard input, a graphics library, and many of the miscellaneous functions you might need to develop games on the ESP32. Now, a GUI interface library has been added to ease application development.

The GUI, of course, runs on the VGA output. The library includes what you’d expect from a minimal windowing GUI, like keyboard and mouse support, windows with the usual minimize/maximize/close controls, and modal and message dialog boxes. For input controls, there are labels, text boxes, buttons, radio buttons, checkboxes, normal and editable combo boxes, and listboxes — you know, pretty much everything you need to develop a modern GUI application. All the code is open-source (GPL 3.0) and in the GitHub repo.

While the original FabGL had a game-development orientation, the addition of this new GUI functionality opens up a new range of applications. If you want to find out more about using the FabGL library, you can check out our previous coverage of the mostly game-oriented functions.

You can get a look at the new GUI functions in action in the video, after the break.

Continue reading “ESP32 Gets Advance Windowed Apps Using This VGA GUI Library” →

A 3D Printed Micro:Bit Nunchuk

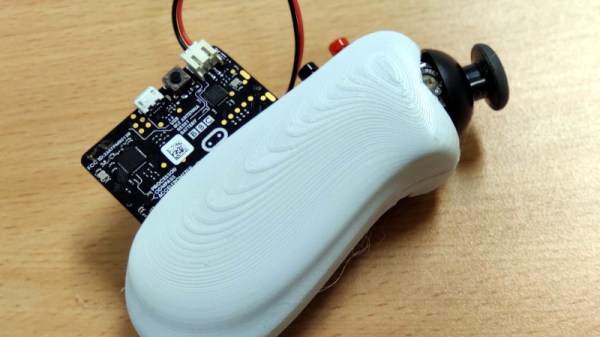
As [Paul Bardini] explains on the Thingiverse page for his “Micro:Bit Hand Controller”, the Bluetooth radio baked into the BBC’s educational microcontroller makes it an ideal choice for remotely controlling things. You just need to give it a nice enclosure, a joystick, a couple of buttons, and away you go. You can even use the integrated accelerometer as another axis of control. This is starting to sound a bit familiar, especially to gamers.

While it might not come with the Official Nintendo Seal of Quality, the 3D printable enclosure [Paul] has come up with for the Micro:Bit certainly takes more than a little inspiration from the iconic Wii “Nunchuck” controller. He’s jostled around the positions of the joystick and momentary buttons a bit, but it still has that iconic one-handed ergonomic styling.

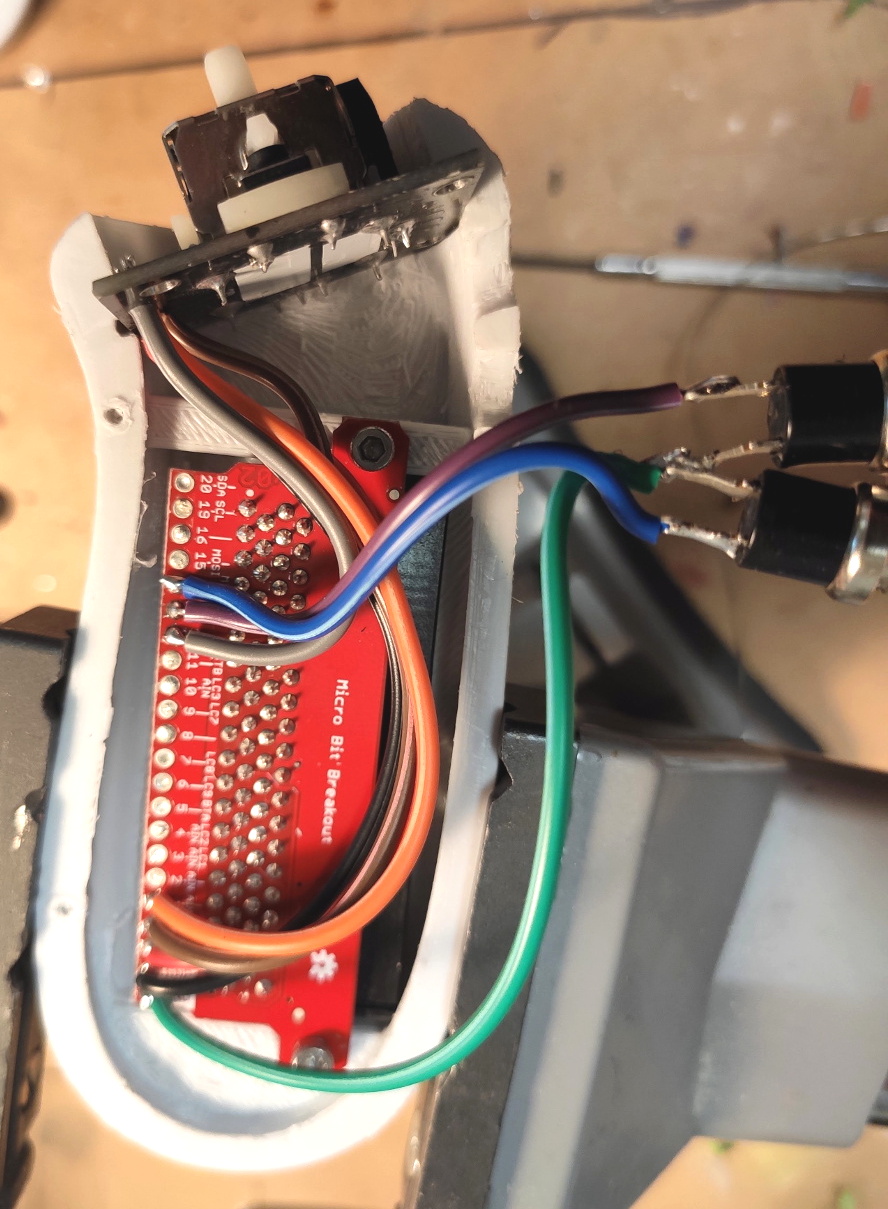
In a particularly nice touch, [Paul] has built his controller around a Micro:Bit breakout board from SparkFun that allows you to plug the microcontroller in via its edge connector. This means you can pull the board out and still use it in other projects. The only other connection to the controller leads to the battery, which uses a two pin JST-PH plug that can easily be removed.

Thanks to this breakout board, the internal wiring is exceptionally simple. The joystick (the type used in a PS2 controller) and the buttons are simply soldered directly to pins on the breakout board. No passives required, just a few short lengths of flexible wiring to snake through the printed enclosure.

The Thingiverse page only has the STLs for the two halves of the controller, and no source code for the Micro:Bit itself. But it shouldn’t be terribly hard to piece together the basic functionality with example code that’s floating around out there. Especially since you can run Python on them now. Of course, you could also add Bluetooth to the original Wii version if you’re not looking to reinvent the wheel nunchuck.

Understanding Elliptic Curve Cryptography And Embedded Security

We all know the usual jokes about the ‘S’ in ‘IoT’ standing for ‘Security’. It’s hardly a secret that security in embedded, networked devices (‘IoT devices’) is all too often a last-minute task that gets left to whichever intern was unfortunate enough to walk first into the office that day. Inspired by this situation, All About Circuits is publishing a series of articles on embedded security, with a strong focus on network security.

In addition to the primer article, so far they have covered the Diffie-Hellman exchange (using prime numbers, exponentiation and modular arithmetic) and the evolution of this exchange using elliptic curve cryptography (ECC) which prevents anyone from brute-forcing the key. Barring any quantum computers, naturally. All three articles should be understandable by anyone, with a simple, step-by-step format.

The upcoming articles will cover implementing security on microcontrollers specifically.  For those who cannot wait to learn more, Wikipedia has a number of articles on the topic of Elliptic Curve Cryptography (comparing it to the more older and still very common RSA encryption) specifically, as well as the Elliptic-Curve Diffie-Hellman key agreement protocol as discussed in the All About Circuits article.

A detail of note here is that the hardest problem in secure communications isn’t to keep the communications going, but to securely exchange the keys in the first place. That’s why a much much computationally expensive key exchange scheme using an asymmetric (or public-key) cryptography scheme  is generally used to set up the second part of the communications, which would use a much faster symmetric-key cryptography scheme, where both parties have the means to decode and encode messages using the same private key.

All the math aside, one does have to wonder about how one might denote ‘secure’ IoT. Somehow ‘SIoT’ doesn’t feel very catchy.

Amiga In The MiST Gets Online With An ESP8266

While he couldn’t quite come up with the cash to buy one in their hayday, [Bruno Antunes] has always been fascinated with the Amiga. When PCs got fast enough he used emulators like UAE to get a taste of the experience, but it was never quite the same thing. Not until he found the MiST anyway, which uses an FPGA to implement several retro computers such as the Apple II, Atari, and of course his beloved Amiga.

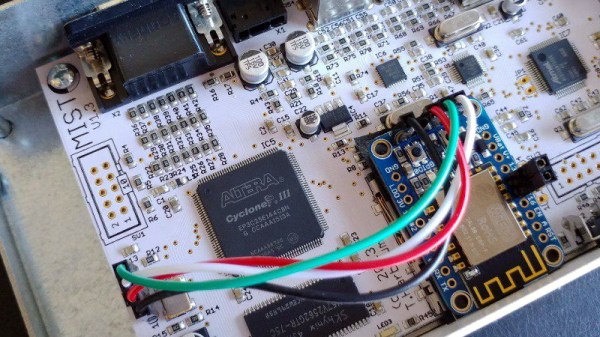
The only downside for [Bruno] was that the MiST has no network interfaces. To get onto the Internet, he had to install an ESP8266 inside the device and spend some quality time tweaking various software settings to get everything talking to each other. The end result is a BBS hosted on an Amiga 1200, that’s running on an FPGA, that’s connected to WiFi via an ESP8266. What a time to be alive.

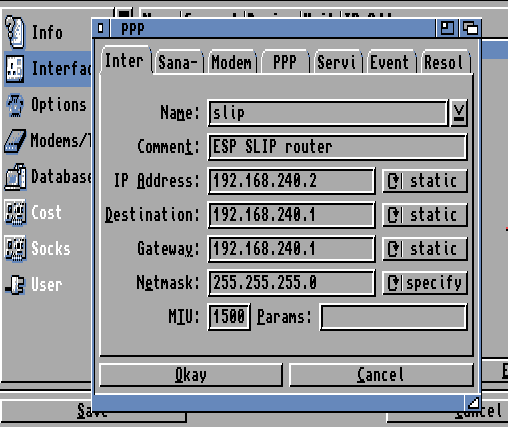
Adding the ESP8266 to the MiST was actually quite straightforward, as there’s an unpopulated serial port header right on the board. Though [Bruno] cautions this header has been removed as of version 1.4 of the device, so if you’re in the market for an FPGA retro box and might want to get it online at some point, that may be a detail to keep in mind. The ESP is running a firmware which implements Serial Line IP (SLIP); which allows you to use TCP/IP over a serial port, albeit very slowly.

The hardware implant went well enough, but unfortunately [Bruno] found the ESP8266 was unable to communicate through the thick metal case of the MiST. He enlisted his girlfriend to make a new papercraft enclosure for the MiST that the ESP could talk though, and it even has the added benefit of glowing thanks to the internal LEDs. We probably would have just got one of the ESP modules that includes an external antenna, but to each their own.

With the hardware taken care of, the rest of the considerable write-up details how he got the Amiga operating system to talk to the Internet through the SLIP connection. He goes over everything from setting the system time with NTP to getting a Telnet daemon installed. As you might expect, this involves installing a number of additional software packages, but [Bruno] is kind enough to provide links for everything you’ll need.

We’ve seen the ESP8266 used to get other retro computers onto the modern Internet before, but it’s usually through the use of an external device. This internal modification is very clean, and seems like a no-brainer for anyone who owns a MiST and a soldering iron.

Continue reading “Amiga In The MiST Gets Online With An ESP8266” →

Hands-On: GreatFET Is An Embedded Tool That Does It All

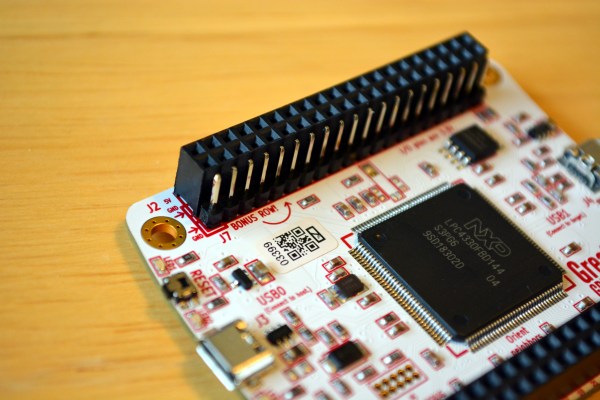
There’s a new embedded hacking tool on the scene that gives you an interactive Python interface for a speedy chip on a board with oodles of GPIO, the ability to masquerade as different USB devices, and a legacy of tricks up its sleeve. This is the GreatFET, the successor to the much loved GoodFET.

I first heard this board was close to launch almost a year ago and asked for an early look. When shipping began at the end of April, they sent me one. Let’s dig in for a hands-on review of the GreatFET from Great Scott Gadgets.

Continue reading “Hands-On: GreatFET Is An Embedded Tool That Does It All” →

Blisteringly Fast Machine Learning On An Arduino Uno

Even though machine learning AKA ‘deep learning’ / ‘artificial intelligence’ has been around for several decades now, it’s only recently that computing power has become fast enough to do anything useful with the science.

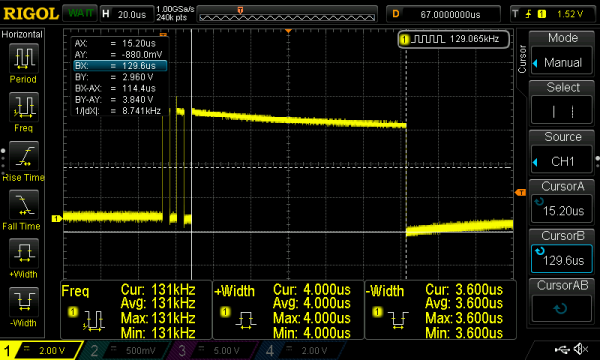
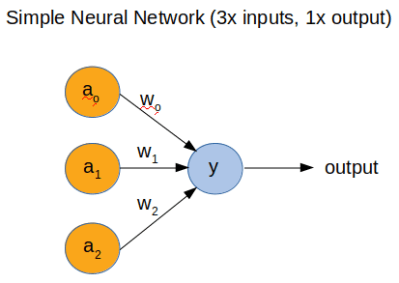
However, to fully understand how a neural network (NN) works, [Dimitris Tassopoulos] has stripped the concept down to pretty much the simplest example possible – a 3 input, 1 output network – and run inference on a number of MCUs, including the humble Arduino Uno. Miraculously, the Uno processed the network in an impressively fast prediction time of 114.4 μsec!

Whilst we did not test the code on an MCU, we just happened to have Jupyter Notebook installed so ran the same code on a Raspberry Pi directly from [Dimitris’s] bitbucket repo.

He explains in the project pages that now that the hype about AI has died down a bit that it’s the right time for engineers to get into the nitty-gritty of the theory and start using some of the ‘tools’ such as Keras, which have now matured into something fairly useful.

In part 2 of the project, we get to see the guts of a more complicated NN with 3-inputs, a hidden layer with 32 nodes and 1-output, which runs on an Uno at a much slower speed of 5600 μsec.

This exploration of ML in the embedded world is NOT ‘high level’ research stuff that tends to be inaccessible and hard to understand. We have covered Machine Learning On Tiny Platforms Like Raspberry Pi And Arduino before, but not with such an easy and thoroughly practical example.