The Electric Imp Sniffs Out California Wildfires

The wildfires in California are now officially the largest the state has ever seen. Over 50,000 people have been displaced from their homes, hundreds are missing, and the cost in property damage will surely be measured in the billions of dollars when all is said and done. With a disaster of this scale just the immediate effects are difficult to conceptualize, to say nothing of the collateral damage.

While not suggesting their situation is comparable to those who’ve lost their homes or families, Electric Imp CEO [Hugo Fiennes] has recently made a post on their blog calling attention to the air quality issues they’re seeing at their offices in Los Altos. To quantify the problem so that employees with respiratory issues would know the conditions before they came into work, they quickly hacked together a method for displaying particulate counts in their Slack server.

The key to the system is one of the laser particle sensors that we’re starting to see more of thanks to a fairly recent price drop on the technology. A small fan pulls air to be tested into the device, where a very sensitive optical sensor detects the light reflected by particles as they pass through the laser beam. The device reports not only how many particles are passing through it, but how large they are. The version of the sensor [Hugo] links to in his blog post includes an adapter board to make it easier to connect to your favorite microcontroller, but we’ve previously seen DIY builds which accomplish the same goal.

[Hugo] then goes on to provide firmware for the Electric Imp board that reads the current particulate counts from the sensor and creates a simple web page that can be viewed from anywhere in the world to see real-time conditions at the office. From there, this data can be plugged into a Slack webhook which will provide an instantaneous air quality reading anytime a user types “air” into the channel.

We’ve covered a number of air quality sensors over the years, and it doesn’t look like they’re going to become any less prevalent as time goes on. If anything, we’re seeing a trend towards networks of distributed pollution sensors so that citizens can collect their own data on their air they’re breathing.

[Thanks to DillonMCU for the tip.]

ESP8266 Wi-Fi Instant Camera Is A Simple Shooter

If a camera that combines the immediate gratification of a Polaroid with cloud hosting sounds like something that tickles your fancy, look no farther than this ESP-powered point and shoot camera created by [Martin Fasani]. There’s no screen or complicated configuration on this camera; just press the button and the raw picture pops up on the online gallery. Somehow it’s simultaneously one of the most simplistic and complex implementations of the classic “instant camera” concept, and we love it.

The electronics in the camera itself, which [Martin] calls the FS2, is quite simple. At the core, it’s nothing more than the ESP board, an ArduCAM camera module, and a momentary button for the shutter. To make it portable he added a 2000 mAh Li-ion battery and an Adafruit Micro Micro USB charger. [Martin] added support for an optional 128×64 OLED display for user feedback. Everything is housed in a relatively spacious 3D printed enclosure, leaving some room for possible future hardware.

There are firmware versions for both the ESP8266 and ESP32, so fans of either generation of the popular microcontroller are invited to the party. Processing images is obviously a bit faster if you go with the more powerful 32-bit chip, but on the flip side the ESP8266 uses 3MB of SPI flash as a local buffer for the images during upload, which helps prevent lost images if there’s a problem pushing them to the cloud. The camera is intended to be as simple as possible so right now the only option other than taking still images is a time-lapse mode. [Martin] hopes to implement some additional filters and effects in the future. He’s also hoping others might lend a hand with his firmware. He’s specifically looking for assistance getting autofocus working and implementing more robust error correction for image uploads.

We’ve seen some impressive DIY camera builds using everything from a salvaged thermal sensor to film and molten aluminum. But the quaint simplicity of what [Martin] has put together here really puts his project in a whole new category.

Continue reading “ESP8266 Wi-Fi Instant Camera Is A Simple Shooter”

Low-energy ESP8266-based Board Sleeps Like A Log Until Triggered

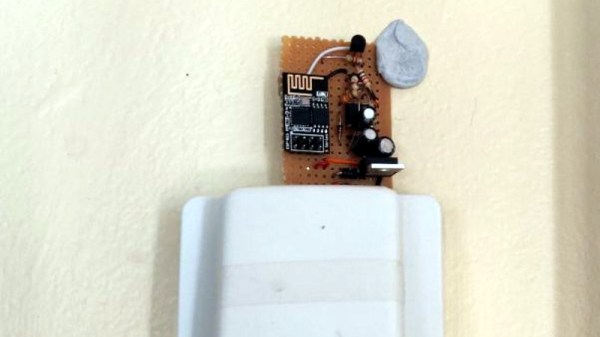
Given the popularity of hacking and repurposing Amazon Dash buttons, there appears to be a real need amongst tinkerers for a simple “do something interesting on the internet when a button is pressed” device. If you have this need but don’t feel like fighting to bend a Dash device to your will, take a look at [Kevin Darrah]’s trigBoard instead.

The trigBoard is a battery-powered, ESP8266-based board that includes some clever circuitry to help it barely sip power (less than one microamp!) while waiting to be triggered by a digital input. This input could be a magnetic reed switch, push button, or similar, and you can configure the board for either normally open or normally closed switches.

The clever hardware bits that allow for such low power consumption are explained in [Kevin]’s YouTube video, which we’ve also embedded after the break. To summarize: the EPS8266 spends most of it’s time completely unpowered. A Texas Instruments TPL5111 power timer chip burns 35 nanoamps and wakes the ESP8266 up every hour to check on the battery. This chip also has a manual wake pin, and it’s this pin – along with more power-saving circuitry – that’s used to trigger actions based on the external input.

Apparently the microcontroller can somehow distinguish between being woken up for a battery check versus a button press, so you needn’t worry about accidentally sending yourself an alert every hour. The default firmware is set up to use Pushbullet to send notifications, but of course you could do anything an EPS8266 is capable of. The code is available on the project’s wiki page.

The board also includes a standard micro-JST connector for a LiPo battery, and can charge said battery through a micro-USB port. The trigBoard’s full schematic is on the wiki, and pre-built devices are available on Tindie.

[Kevin]’s hardware walkthrough video is embedded after the break.

Continue reading “Low-energy ESP8266-based Board Sleeps Like A Log Until Triggered”

Arduino Gets A Command Line Interface

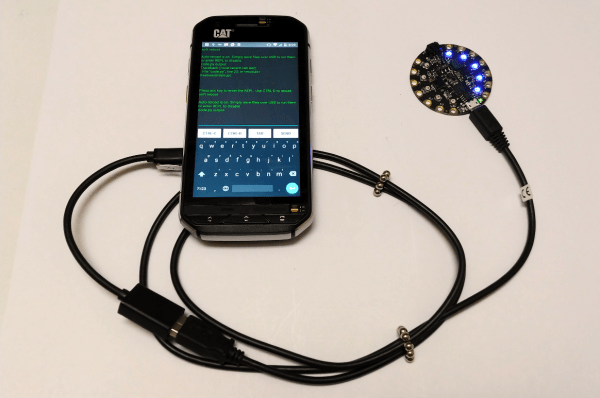
When using an Arduino, at least once you’ve made it past blinking LEDs, you might start making use of the serial connection to send and receive information from the microcontroller. Communicating with the board while it’s interacting with its environment is a crucial way to get information in real-time. Usually, that’s as far as it goes, but [Pieter] wanted to take it a step farther than that with his command line interpreter (CLI) for the Arduino.

The CLI allows the user to run Unix-like commands directly on the Arduino. This means control of GPIO and the rest of the features of the microcontroller via command line. The CLI communicates between the microcontroller and the ANSI/VT100 terminal emulator of your choosing on your computer, enabling a wealth of new methods of interacting with an Arduino.

The CLI requires a hex file to be loaded onto the Arduino that you can find at a separate site, also maintained by [Pieter]. Once that’s running, you can get all of that sweet command line goodness out of your Arduino. [Pieter] also has some examples on his project page, as well as the complete how-to to get this all set up and running. There’s a lot going on in the command line world, in Linux as well as windows. So there’s plenty to explore there as well.

ESP8266 Monitor Keeps An Eye On OctoPrint

At this point, you’ve almost certainly heard of OctoPrint. The web-based control interface for 3D printers is especially popular for those who’s primary computers run on an operating system that has a penchant for occasionally imploding. Even if you aren’t laboring under that common software handicap, OctoPrint offers a wide away of compelling features. Perhaps chief among them the ability to monitor your printer over the network, and if you insist, over the Internet. But while OctoPrint provides the server side for getting your printer on the net, you’re on your own for the client.

Rather than using a web browser like some kind of peon, [David Payne] has come up with a very slick desktop OctoPrint monitor using the WeMos D1 Mini ESP8266 board. With an exceptionally low part count and housed in a (what else) 3D printed enclosure, this is a cheap and easy OctoPrint accessory that we suspect will be decorating many a hacker’s desk before too long.

The electronics are simple to the extreme, just hook the 4 wires of an 128×64 OLED I2C display to the appropriate pins of the ESP8266 board, and you’re ready to upload the Arduino code [David] has come up with.

His code is very polished, from using WiFiManager for initial network setup to providing its own web-based configuration menus to get the device linked up to your OctoPrint instance, [David] clearly wanted this to be as smooth an experience as possible for the end user. When the 3D printer isn’t working on a job, the monitor will even switch over to showing you the time and weather. We’ve seen commercial products that weren’t this user-friendly.

We also love the case design on this little gadget. While the aesthetics are perhaps debatable (sort of reminds us of the little fellows from Darwinia), we appreciate any functional print that doesn’t require supports. You’ll need to provide a couple of little screws to keep the back panel on, but other than that everything snaps into place.

Of course, you could always just use your smartphone to keep an eye on OctoPrint, and even if the remote management capabilities don’t grab your interest, there’s plenty of interesting plugins to keep you occupied.

Continue reading “ESP8266 Monitor Keeps An Eye On OctoPrint”

Weather Station Is A Tutorial In Low Power Design

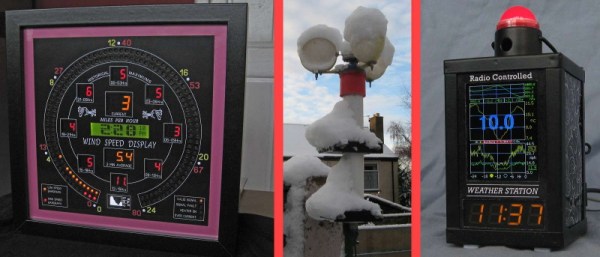
Building your own weather station is a fun project in itself, but building it to be self-sufficient and off-grid adds another set of challenges to the mix. You’ll need a battery and a solar panel to power the station, which means adding at least a regulator and charge controller to your build. If the panel and battery are small, you’ll also need to make some power-saving tweaks to the code as well. (Google Translate from Italian) The tricks that [Danilo Larizza] uses in his build are useful for more than just weather stations though, they’ll be perfect for anyone trying to optimize their off-grid projects for battery and solar panel size.

When it comes to power conservation, the low-hanging fruit is plucked first. [Danilo] set the measurement intervals to as long as possible and put the microcontroller (a NodeMCU) to sleep in between. Removing the power from the sensors when the microcontroller was asleep was another easy step, but the device was still crashing overnight. Then he turned to a hardware solution and added a more efficient battery charger to the setup, which saved even more power. This is all the more impressive because the station communicates via WiFi which is notoriously difficult to run in low-power applications.

Besides the low power optimizations, the weather station itself is interesting for its relative simplicity. It could be built with things most of us have knocking around. Best of all, [Danilo] published the source code on his site, so most of the hard work has been done already. If you’re thinking he seems a little familiar, it’s because we’ve featured some of his projects before, like his cheap WiFi extender antenna and his homemade hybrid tube amplifier.

Drawing On An OLED With An ATtiny85, No RAM Buffers Allowed

Small I2C OLED displays are common nowadays, and thanks to the work of helpful developers, there are also a variety of graphics libraries for using them. Most of them work by using a RAM buffer, which means that anything one wants to draw gets written to a buffer representing the screen, and the contents of that buffer are copied out to the display whenever it is updated. The drawback is that for some microcontrollers, there simply isn’t enough RAM for this approach to work. For example, a 128×64 monochrome OLED requires a 1024 byte buffer, but that’s bad news if a microcontroller has only 512 bytes of RAM in total like the ATtiny85. [David Johnson-Davies] has two solutions: a Tiny Graphics Library that needs no RAM buffer and an even slimmer Tiny Function Plotter, which we’ll discuss in order.

Tiny Function Plotter works on both SSD1306 and SH1106-based displays.

[David]’s Tiny Graphics Library works by taking advantage of a feature of SH1106 driver-based displays: the ability to read the display over I2C as well as write to it. With the ability to perform read-modify-write on a section at a time, using a large RAM buffer can be avoided. The only catch is that the library only works with OLEDs using the SH1106, but the good news is that these are very common at the usual Chinese resellers. ([David] notes that SH1106 is sometimes misspelled as “SSH1106”, so keep that in mind when searching.)

What about all those other SSD1306-based OLED displays out there? Are they out of luck? Not quite. [David] has one more trick up his sleeve: his Tiny Function Plotter works on the SSD1306 and also requires no RAM buffer. It’s unable to write text, but it can easily handle drawing graphs plotting things like values over time while needing very little overhead.

Another approach we’ve seen for using OLEDs driven by microcontrollers with limited memory is the solution [Michael] used in Tiny Sideways Tetris, which was done in part by realizing the smallest screen element he needed was a 4×4 block, and using that premise as the basis of a simple compression scheme.