Photograph of a BLDC motor controller circuit board

Take A Ride Through The Development Of A Custom BLDC Motor Controller

The folks over at the [Barkhausen Institut] are doing research into controlling autonomous fleets of RC cars and had been using off the shelf electronic speed controllers (ESCs) to control the car motors. Unfortunately they required more reliable feedback for closed loop control of the motors, so they created their own open source hardware brushless DC (BLDC) controller.

The motor controller they developed uses an STM32 microcontroller that talks to a TMC6140 3 phase MOSFET driver to drive 6 IRLR 2905 MOSFETs. The [Barkhausen Institut] researchers went with the SimpleFOC library as the basis to program the STM32, with installed hall effect sensors indicating motor orientation for their closed loop control.

Designing a functioning BLDC and ESC controllers can be subtle, and their post goes into details about the problems and solutions they came up with to deal with with what was ultimately improper isolation of the MOSFETs interfering with the power rail for the STM32. The source for their BLDC motor controller is available through their GitLab page. For more information on the parent project that uses the BLDC driver, be sure to check out their work on a connected convoy of RC cars.

There’s now a wealth of open source BLDC drivers and projects, many of which we’ve featured in the past, like the Moteus and haptic smart knob, and it’s nice to see other projects explore different options.

The International Space Station Is Always Up There

Thanks to its high orbital inclination, the International Space Station (ISS) eventually passes over most inhabited parts of the Earth. Like other artificial satellites, though, it’s typically only visible overhead during passes at sunrise and sunset. If you’d like to have an idea of where it is beyond the times that it’s directly visible, take a look at this tabletop ISS tracking system created by [dpelgrift].

The tracker uses an Adafruit Feather inside its enclosure along with a Featherwing ESP32 WiFi co-processor. Together they direct a 3D printed rocket-shaped pointing device up and down by way of a SG90 micro-servo, while a 28BYJ-48 stepper motor provides rotation.

This setup allows it to take in all of the information required to calculate the Station’s current position. The device uses the current latitude and longitude, as well as its compass heading, and combines that with data pulled off the net to calculate which direction it should be pointing.

While it might seem like a novelty or programming challenge, this project could be useful for plenty of people who just want to keep track so they know when to run outside and see the Station pass by, or even by those who use the radio repeater aboard the ISS. The repeater on the ISS and plenty of other satellites are available to amateur radio operators for long-distance VHF and UHF communication like we’ve seen in projects like these.

Modded See ‘N Say Teaches The Sounds Of City Life

The Fisher-Price See ‘n Say was introduced back in 1964, and since then has helped teach countless children the different sounds made by farm animals. But what about our urban youth? If they’re going to navigate a concrete jungle, why not prepare them to identify the sound of a jackhammer or the chime that plays before an announcement goes out over the subway’s PA system?

That’s the idea behind this hacked See ‘n Say [John Park] put together for Adafruit. Now we should note up front that no vintage toys were sacrificed during the production of this gadget — it seems Fisher-Price (predictably) dropped the tiny record player these toys used to use for a cheap electronic board sometime in the 90s. A quick check with everyone’s favorite A-to-Z megacorp shows you can pick up one of these new-school models for around $25 USD.

The modern electronic version of the toy is easy to mod.

Cracking open the electronic version of the See ‘n Say reveals a circular PCB with a series of membrane buttons that are pressed by the mechanics of the spinning pointer. As it so happens, there are handy test points next to each of these buttons, which makes it simple to wire up to a microcontroller.

In this case, it’s Adafruit’s KB2040, which is connected to a MAX98357A amplifier board over I2S. A small boost converter module is used to wring 5 volts out of the toy’s pair of AA batteries. The original speaker is repurposed, though [John] adds a physical power switch to keep the boost converter from flattening the alkaline batteries when not in use.

On the software side, all you’ve got to do is load the MCU with your sounds and write a bit of code that associates them with the button being pressed on the PCB. [John] gets his city sounds from Freesound, a community-maintained database of Creative Commons Licensed sounds, and provides the CircuitPython code necessary to tie everything together.

The last step is the artwork. For this project, [Brian Kesinger] provided some swanky vintage-looking imagery that perfectly fits the See ‘n Say style. The art is available under the NonCommercial-ShareAlike Creative Commons license, so you’re free to use it in your own version. Though naturally, that assumes you’ve decided to use the same sounds as [John] — the beauty of this project is that you could easily load it up with whatever sounds you’d like Hacker Junior to learn. Possibly a well-known Australian YouTuber?

If anyone feels inclined to build a Hackaday-themed See ‘n Say based on this project, we’ve love to see it.

Continue reading “Modded See ‘N Say Teaches The Sounds Of City Life”

Flipper Zero Mayhem Hat Adds Camera, More Radios

For a device advertised as the “Multi-tool Device for Hackers”, the Flipper Zero already offers a considerable list of onboard capabilities. But some hard decisions had to be made to get the retail price down, so features like WiFi and Bluetooth had to be left off. Luckily, there’s an expansion interface along the top of the device which makes it possible to plug in additional hardware.

One of those expansions is the “Mayhem Hat” from [Erwin Ried]. This board adds many requested features to the Flipper Zero, as well as some that might not seem as obvious. The addition of an ESP32-CAM brings WiFi and Bluetooth to the party, while also unlocking access to the highly-capable ESP32Marauder firmware and the plethora of security research tools therein.

But the camera also enables some interesting features, such as motion detection and the ability to read QR codes. It even lets you use the Flipper as an impromptu digital camera, complete with an onscreen viewfinder reminiscent of the Game Boy Camera.

What’s more, the Mayhem Hat features its own expansion capabilities. There’s a spot to plug in either a CC1101 or NRF24l01 radio module, both of which are supported by community developed plugins that allow the user to sniff out and hijack signals. There are also extra pins for connecting your own sensors or hardware. In the demo video below you can see the device automatically detect the popular DHT11 environmental sensor and display the current temperature and humidity readings.

[Erwin] has the Mayhem Hat up for sale on Tindie, but as of this writing, is currently out of stock. Apparently, demand for the add-on boards is just as high as for the Flipper Zero itself — not a huge surprise, given the excitement we saw around this platform during its $4.8 million Kickstarter campaign.

Continue reading “Flipper Zero Mayhem Hat Adds Camera, More Radios”

Large E-Paper Slow Movie Player Offers Great Docs

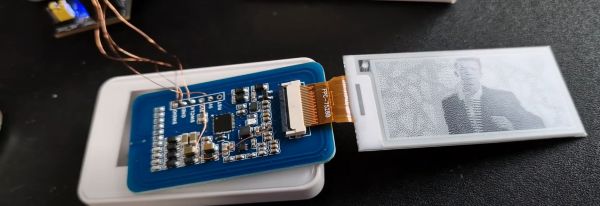
Over the last couple of years we’ve seen several iterations of the “slow movie player” concept, where a film is broken up into individual frames which are displayed on an e-paper display for a few minutes at a time. This turns your favorite movie into a constantly changing piece of long-term art. Unfortunately, due to the relatively high cost of e-paper panels, most of the examples we’ve seen have only been a few inches across.

Of course, technology tends to get cheaper with time, which has allowed [szantaii] to put together this beautiful 10.3-inch version. With a 1872 × 1404 Waveshare panel capable of displaying 16 shades of gray and a Raspberry Pi Zero 2 W installed in a commercially purchased frame, the final product looks very professional. It certainly wouldn’t look out of place in a well-appointed living room.

It’s not just a large display that sets this project apart. [szantaii] has done a phenomenal job documenting both the hardware and software of this project, which includes the “Slow Movie Player service” Python software he’s written. Even if you aren’t using an identical hardware setup, his MIT-licensed code will absolutely get you going in the right direction.

We especially liked the several example configurations provided, as well as the explanation of how ImageMagick’s various grayscale conversion options impact the appearance of the final image.

All in all, this is not only a beautiful and well implemented version of the slow movie player concept — but it’s also the kind of project that helps elevate the entire community thanks to its transparency. We wouldn’t be surprised to see this latest iteration inspire more folks to pick up an e-paper panel and build one of their own. Could 2023 be the year of the slow movie player? We certainly hope so.

The USB Protocol, Explained

If you can explain what a USB PID, a J state, a K state, and an SOF are, you can probably stop reading now. But if you don’t know or you want a refresher, you can spend 15 minutes watching [Sine Lab’s] straightforward explanation of the USB protocol details. You can find the video below.

The motivation for this is he wants to add USB to his projects using an ATMega with a hardware USB implementation. Honestly, most of the time, you’ll just consume some premade library and get it working that way. However, understanding the terminology can help you, especially if things don’t go as planned.

Continue reading “The USB Protocol, Explained”

Low-Power Wi-Fi Includes E-Paper Display

Designing devices that can operate in remote environments on battery power is often challenging, especially if the devices need to last a long time between charges or battery swaps. Thankfully there are some things available that make these tasks a little easier, such as e-ink or e-paper displays which only use power when making changes to the display. That doesn’t solve all of the challenges of low-power devices, but [Albertas] shows us a few other tricks with this development board.

The platform is designed around an e-paper display and is meant to be used in places where something like sensor data needs to not only be collected, but also displayed. It also uses the ESP32C3 microcontroller as a platform which is well-known for its low power capabilities, and additionally has an on-board temperature and humidity sensor. With Bluetooth included as well, the tiny device can connect to plenty of wireless networks while consuming a remarkably low 34 µA in standby.

With a platform like this that can use extremely low power when not taking measurements, a battery charge can last a surprisingly long time. And, since it is based on common components, adding even a slightly larger battery would not be too difficult and could greatly extend this capability as well. But, we have seen similar builds running on nothing more than a coin cell, so doing so might only be necessary in the most extreme of situations.