Streaming Video From A Mouse

The first optical mice had to be used on a specially printed mousepad with a printed grid that the four-quadrant infrared sensor could detect. Later, mice swapped the infrared sensor for an optoelectric module (essentially a tiny, very low-resolution camera) and a powerful image processing. [8051enthusiast] was lying in bed one day when they decided to crack the firmware in their gaming mouse and eventually start streaming frames from the camera inside.

Step one was to analyze the protocol between the mouse and the host machine. Booting up a Windows VM and Wireshark allowed him to capture all the control transfers to the USB controller. Since it was a “programmable” gaming mouse that allowed a user to set macros, [8051enthusiast] could use the control transfers that would normally query that macro that had been set to return the memory at an arbitrary location. A little bit of tinkering later, and he now had a dump of the firmware. Looking at the most abundant bytes, it seems to match a profile similar to the Intel 8051. In a fascinating blur of reverse engineering, he traced the main structure of the program back from the function that sets the LED colors for the scroll wheel (which is dependent on the current DPI setting). Unfortunately, the firmware prevented the same macro mechanism from writing to arbitrary locations.

Looking through the code, a good old buffer overflow exploit seemed possible, but it caused the system to reset via watchdog. So he took another approach, invoking recovery mode and loading an entirely new firmware on the device, which a set_report control transfer can invoke.

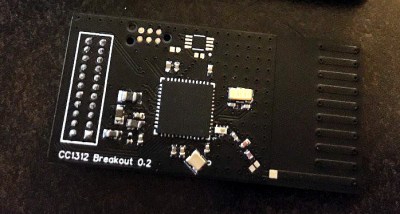
Next, he moved onto the ADNS-9800 optical sensor (pictured in the top image provided by JACK Enterprises), which had a large encrypted blob in the firmware. Some poking around and deduction lead to a guess that the optical sensor was another 8051 system. With some clever reasoning and sheer determination, [8051enthusiast] was able to crack the XOR stream cipher encryption with a program that showed him versions of the disassembled assembly and allowed him to pick the one that was the most likely. With the firmware decrypted, he was able to see the encryption code and confirm his deducted algorithm.

With the sensor now cracked open, it was onto the 30 x 30 240 fps video stream. The sensor communicates over SPI, and the USB controller has to bit-bang the connection as it doesn’t have the hardware. Putting two custom firmware images on with a few extra functions was easy enough, but the 7 fps was somewhat lacking. The first optimization was loop unrolling and removing some sleeps in the firmware, which bought it up to 34 fps. By measuring the cycle counts of individual instructions, he was able to find some alternatives such as a mov instead of a setb that took one less cycle. Going from a 17 cycle loop to an 11 cycle loop and some other optimizations gave him 54 fps. Not content to stop there, he modified the ADNS-9800 firmware to continuously sample rather than waiting for the USB controller to finish processing. While this yielded 100 fps, there was still more to do: image compression. At a whopping 230 fps, [8051enthusiast] decided to call it done.

However, there was one last thing he wanted to do: control the mouse with the video stream. Writing some image processing into his Python-based program that received the image files allowed him to use the mouse, however impractically.

All in all, it’s an incredible journey by [8051enthusiast], and we would highly recommend reading the whole journey yourself. This isn’t the first time he’s modified the firmware of 8051-based devices, such as modifying the firmware of the WiFi chipset in his laptop.

[Thanks to JACK Enterprises over at Tindie for the use of the image of an ADNS9000].


Here’s How To Sniff Out An LCD Protocol, But How Do You Look Up The Controller?

Nothing feels better than getting a salvaged component to do your bidding. But in the land of electronic displays, the process can quickly become a quagmire. For more complex displays, the secret incantation necessary just to get the things to turn on can be a non-starter. Today’s exercise targets a much simpler character display and has the added benefit of being able to sniff the data from a functioning radio unit.

When [Amen] upgraded his DAB radio he eyed the 16×2 character display for salvage. With three traces between the display and the controller it didn’t take long to trace out the two data lines using an oscilloscope. Turing on the scope’s decoding function verified his hunch that it was using I2C, and gave him plenty of data to work from. This included a device address, initialization string, and that each character was drawn on screen using two bytes on the data bus.

He says that some searching turned up the most likely hardware: a Winstar WO1602I-TFH- AT derived from an ST7032 controller. What we’re wondering is if there is a good resource for searching this kind of info? Our go-to is the LCD display and controller reference we covered here back in March. It’s a great resource, but turns up bupkis on this particular display. Are we relegated to using DuckDuckGo for initialization strings and hoping someone’s published a driver or a logic dump of these parts in the past, or is there a better way to go about this? Let us know in the comments!

Portable GPS Time Server Powered By The ESP8266

Most Hackaday readers will be familiar with the idea of a network time server; a magical box nestled away in some distant data center that runs the Network Time Protocol (NTP) and allows us to conveniently synchronize the clocks in our computers and gadgets. Particularly eager clock watchers can actually rig up their own NTP server for their personal use, and if you’re a true time aficionado like [Cristiano Monteiro], you might be interested in the portable GPS-controlled time server he recently put together.

The heart of the build is a NEO-6M GPS module which features a dedicated pulse per second (PPS) pin. The ESP8266 combines the timestamp from the GPS messages and the PPS signal to synchronize itself with the atomic clock aboard the orbiting satellite. To prevent the system from drifting too far out of sync when it doesn’t have a lock on the GPS signal, [Cristiano] is using a DS3231 I2C real-time clock module that features a high accuracy temperature-compensated crystal oscillator (TCXO).

Continue reading “Portable GPS Time Server Powered By The ESP8266”

ESP8266 Adds WiFi Logging To IKEA’s Air Quality Sensor

Introduced back in June, the IKEA VINDRIKTNING is a $12 USD sensor that uses colored LEDs to indicate the relative air quality in your home depending on how many particles it sucks up. Looking to improve on this simplistic interface, [Sören Beye] tacked an ESP8266 to the board so it can broadcast sensor readings out over MQTT.

Just three wires link the ESP8266 to the PCB.

While some of us would have been tempted to gut the VINDRIKTNING and attach its particle sensor directly to the ESP8266, the approach [Sören] has used is actually quite elegant. Rather than replacing IKEA’s electronics, the microcontroller is simply listening in on the UART communications between the sensor and the original controller. This not only preserves the stock functionality of the VINDRIKTNING, but simplifies the code as the ESP doesn’t need to do nearly as much.

All you need to do if you want to perform this modification is solder a couple wires to convenient test pads on the VINDRIKTNING board, then flash the firmware (or write your own version), and you’re good to go. There’s plenty of room inside the case for the ESP8266, though you may want to tape it down so it doesn’t impact air flow.

While not required, [Sören] also recommends making a small modification to the VINDRIKTNING which makes it a bit quieter. Apparently the 5 V fan inside the sensor is occasionally revved up by the original controller, rather than kept at a continuous level that you can mentally tune out. But by attaching the sensor’s fan to the ESP8266’s 3.3 V pin, it will run continuously at a lower speed.

We’ve seen custom firmware for IKEA products before, but this approach, which keeps the device’s functionality intact regardless of what’s been flashed to the secondary microcontroller, is particularly appealing for those of us who can’t seem to keep the gremlins out of our code.

[Thanks to nexgensri for the tip.]

The Newlib Embedded C Standard Library And How To Use It

When writing code for a new hardware platform, the last thing you want to do is bother with the minutiae of I/O routines, string handling and other similarly tedious details that have nothing to do with the actual project. On bigger systems, this is where the C standard library would traditionally come into play.

For small embedded platforms like microcontrollers, resources are often tight enough that a full-blown stdlib won’t fit, which is why Newlib exists: to bring the portability benefits of a standard library to microcontrollers.

Whether you use C, C++ or MicroPython to program an MCU, Newlib is likely there under the hood. Yet how exactly does it integrate with the hardware, and how are system calls (syscalls) for e.g. file and input/output handling implemented? Continue reading “The Newlib Embedded C Standard Library And How To Use It”

PNG Image Decoding Library Does It With Minimal RAM

Want to display a PNG file on a display attached to an Arduino or other microcontroller board? You’ll want to look at [Larry Bank]’s PNGdec, the Arduino-friendly PNG decoder library which makes it much easier to work with PNG files on your chosen microcontroller.

The PNG image format supports useful features like lossless compression, and was generally developed as an improved (and non-patented) alternative to GIF files. So far so great, but it turns out that decoding PNG files on a microcontroller is a challenge due to the limited amount of memory compared to desktop machines. When the PNG specification was developed in the 90s, computers easily had megabytes of memory to work with, but microcontrollers tend to have memory measured in kilobytes, and lack high-level memory management. [Larry]’s library addresses these issues.

PNGdec is self-contained and free from external dependencies, and also has some features to make converting pixel formats for different display types easy. It will run on any microcontroller that can spare at least 48 K of RAM, so if that sounds useful then check out the GitHub repository for code and examples.

We’ve seen [Larry]’s wonderful work before on optimizing GIF playback as well as rapid JPEG decoding, and these libraries have increasing relevance as hobbyists continue to see small LCD and OLED-based displays become ever more accessible and affordable.

[PNG logo: PNG Home Site]

Digital Audio For Microcontrollers Doesn’t Come Much Simpler Than A WART

Adding an audio channel to your microcontroller project can mean a pile of extra components and a ton of processing power, as a compressed stream must be retrieved and sent to a dedicated DAC. Or if you are [rdpoor], it can mean hooking up a low-pass filter to the UART that’s present on even the simplest of devices, and constructing a serial data stream that mimics PWM audio.

Sound on your microcontroller, it’s this simple!

WART is a Python script that converts a WAV file into a C formatted byte array that can be baked into your microcontroller code, and for which playback is as simple as streaming it to the UART. The example uses a Teensy and a transistor to drive a small speaker, we’re guessing that better quality might come with using a dedicated low-pass filter rather than relying on the speaker itself, but at least audio doesn’t come any simpler.

The code can be found in a GitHub repository and there’s a few recordings of the output in the files section Hackaday.io page, one is embedded below. It’s better than we might have expected given that the quality won’t be the best at the PWM data rate of even the fastest UART. But even if you won’t be incorporating it into your music system any time soon we can see it being a useful addition for such things as small warning sounds. Meanwhile if persuading serially driven speakers to talk is of interest, there’s always the venerable PC speaker.

Continue reading “Digital Audio For Microcontrollers Doesn’t Come Much Simpler Than A WART”