Remember when work meetings were just a bunch of people filling up a small, poorly ventilated room with their exhaled breath? Back in the good old days, all you had to worry about was being lulled to sleep by a combination of the endless slide deck and the accumulation of carbon dioxide. Now? Well, the stakes may just be a little bit higher.
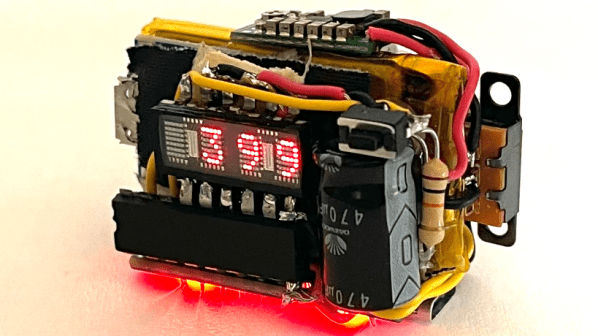
In either situation, knowing the CO2 level in a room could be a handy data point, which is where a portable CO2 sensor like this one could be useful. Or at least that’s [KaRMaN]’s justification for SYPHCOM, the “simple yet powerful handheld carbon dioxide meter.” The guts of the sensor are pretty much what you’d expect — an Arduino Pro Micro, a SenseAir S8 CO2 sensor board, and the necessary battery and charging circuits. But the build does break the mold in a couple of interesting places. One is in the choice of display — a 1980s-era LED matrix display. The HDSP2000 looks like it belongs in a nice bench meter, and is surprisingly legible without a filter. It looks like it flickers a bit in the video below, but chances are that’s just a camera artifact.
The other nice part of this build is the obvious care [KaRMaN] put into making it as small as possible. The layout of boards and components is very clever, making this a solid, compact package, even without an enclosure. We’ve seen CO2 sensors with more features, but for a quick check on air quality, SYPHCOM looks like a great tool.
Continue reading “Compact Sensor Keeps You Safe By Watching CO2 Levels”