Ammo Can Battery; 50 Ah LiFePO4 Clad In Army Green

For the price of a mid-range Android phone, [Kenneth Finnegan] turned a 50 caliber ammo can into a 50 amp-hour portable power supply. The battery pack uses four 3.5 V LiFePO4 cells wired in series to achieve a nominal 12 V supply that stands in for a traditional lead-acid battery. The angel of second-hand purchases was smiling on this project as the cells were acquired on eBay in unused condition, complete with bus bars and mounting spacers. All it took to fit them in the case was to grind off the spacers’ dovetails on the outer edges.

There are many benefits to Lithium Iron Phosphate chemistry over traditional lead acid and [Kenneth] spells that out in his discussion of the battery management system at work here. While the newer technology has a much better discharge curve than lead-acid, there’s a frightening amount of power density there if these batteries were to have a catastrophic failure. That’s why there are Battery Management Systems and the one in use here is capable of monitoring all four cells individually which explains the small-gauge wires in the image above. It can balance all of the cells to make sure one doesn’t get more juice than the others, and can disconnect the system if trouble is a-brewin’. Continue reading “Ammo Can Battery; 50 Ah LiFePO4 Clad In Army Green”

BCD To I2C: Turning A Nixie Counter Into Whatever You Want It To Be

Whenever a project calls for displaying numbers, a 7-segment display is the classic and straightforward choice. However, if you’re more into a rustic, retro, almost mystical, and steampunky look and feel, it’s hard to beat the warm, orange glow of a Nixie tube. Once doomed as obsolete technology of yesteryear, they have since reclaimed their significance in the hobbyist space, and have become such a frequent and deliberate design choice, that it’s easy to forget that older devices actually used them out of necessity for lack of alternatives. Exhibit A: the impulse counter [soldeerridder] found in the attic that he turned into a general-purpose, I2C controlled display.

Instead of just salvaging the Nixie tubes, [soldeerridder] kept and re-used the original device, with the goal to embed an Intel Edison module and connect it via I2C. Naturally, as the counter is a standalone device containing mainly just a handful of SN74141 drivers and SN7490 BCD counters, there was no I2C connectivity available out of the box. At the same time, the Edison would anyway replace the 7490s functionality, so the solution is simple yet genius: remove the BCD counter ICs and design a custom PCB containing a PCF8574 GPIO expander as drop-in replacement for them, hence allowing to send arbitrary values to the driver ICs via I2C, while keeping everything else in its original shape.

Containing six Nixie tubes, the obvious choice is of course to use it as a clock, but [soldeerridder] wanted more than that. Okay, it does display the time, along with the date, but also some sensor values and even the likes on his project blog. If you want to experiment with Nixie tubes yourself, but lack a matching device, Arduino has you obviously covered. Although, you might as well go the other direction then.

Continue reading “BCD To I2C: Turning A Nixie Counter Into Whatever You Want It To Be”

Put Down New Roots From Home With A Free-Form Tree Of Life

Mandalas are meditative objects that mean many things to myriad religions. Psychologist Carl Jung equated them with the concept of the Self as a whole, and put forth the notion that an urge to create mandalas signifies a period of intense personal growth.

[Sander van de Bor] took up the mandala challenge at the beginning of 2020 and decided to create several of them in free-form electronic style. If you’re looking for a healthy new way to deal, [Sander] has step-by-step instructions for making your own light-up tree of life by wrangling a wad of wires into a trunk and branches. Big bonus if you already find soldering to be soothing.

[Sander] starts by forming a circle from brass rod. This is the base for the rest of the build and will tie all the LED grounds together. The tree is twisted from a cluster of enameled copper wires that are eventually soldered together to distribute power from a coin cell out to the six SMT LEDs.

You could argue that the tree should be ground because it’s rooted to Earth, but you could also argue that the circle should be ground because the circle of life is a grounding force. Something to think about while you design and build your own, eh?

If electronic sculpture becomes your new thing, explore all the angles with the master manipulator, [Mohit Bhoite].

Whirling Shutters On This Field Mill Measure Electrostatic Charges At Distance

Hardly a person hasn’t experienced the sudden, sharp discharge of static electricity, especially on a crisp winter’s day. It usually requires a touch, though, the classic example being a spark from finger to doorknob after scuffing across the carpet. But how would one measure the electrostatic charge of an object without touching it? Something like this field mill, which is capable of measuring electrostatic charge over a range of several meters, will do the trick.

We confess to not having heard of field mills before, and found [Leo Fernekes]’ video documenting his build to be very instructive. Field mills have applications in meteorology, being used to measure the electrostatic state of the atmosphere from the ground. They’ve also played a role in many a scrubbing of rocket launches, to prevent the missile from getting zapped during launch.

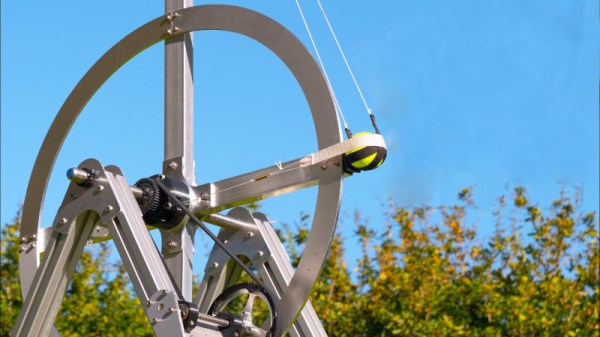
[Leo]’s mill works much like the commercial units: a grounded shutter rotates in front of two disc-shaped electrodes, modulating the capacitance of the system relative to the outside world. The two electrodes are fed into a series of transimpedance amplifiers, which boost the AC signal coming from them. A Hall sensor on the shutter allows sampling of the signal to be synchronized to the rotation of the shutter; this not only generates the interrupts needed to sample the sine wave output of the amplifier at its peaks and troughs, but it also measures whether the electrostatic field is positive or negative. Check out the video below for a great explanation and a good looking build with a junk-bin vibe to it.

Meteorological uses aside, we’d love to see this turned toward any of the dozens of Tesla coil builds we’ve seen. From the tiny to the absurd, this field mill should be able to easily measure any Tesla coil’s output with ease.

Continue reading “Whirling Shutters On This Field Mill Measure Electrostatic Charges At Distance”

[Ben Krasnow] Rolls Old School Camera Out For Photolithography

In a time when cameras have been reduced to microchips, it’s ironic that the old view camera, with its bellows and black cloth draped over the viewscreen for focusing, endures as an icon for photography. Such technology appears dated and with no application in the modern world, but as [Ben Krasnow] shows us, an old view camera is just the thing when you want to make homemade microchips. (Video, embedded below.)

Granted, the photolithography process [Ben] demonstrates in the video below is quite a bit upstream from the creation of chips. But mastering the process on a larger scale is a step on the way. The idea is to create a high-resolution photograph of a pattern — [Ben] chose both a test pattern and, in a nod to the season, an IRS tax form — that can be used as a mask. The camera he chose is a 4×5 view camera, the kind with lens and film connected by adjustable bellows. He found that modifications were needed to keep the film fixed at the focal plane, so he added a vacuum port to the film pack to suck the film flat. Developing film has always been magical, and watching the latent images appear on the film under the red light of the darkroom really brings us back — we can practically smell the vinegary stop solution.

[Ben] also steps through the rest of the photolithography process — spin coating glass slides with photoresist, making a contact print of the negative under UV light, developing the print, and sputtering it with titanium. It’s a fascinating process, and the fact that [Ben] mentions both garage chip-maker [Sam Zeloof] and [Justin Atkin] from the Thought Emporium means that three of our favorite YouTube mad scientists are collaborating. The possibilities are endless.

Continue reading “[Ben Krasnow] Rolls Old School Camera Out For Photolithography”

Bee Counter Will Have You Up To Your Nectar In Hive Data

While we admit that free honey sounds pretty good, beekeeping is not some set-it-and-forget-it hobby where you can just put bees in a box and come back in a month to collect the goods. With the world’s bee population in decline, it’s more important than ever to monitor the health of hives.

One way to do that is to count the bees as they leave and reenter the hive. You can use the data to determine how many workers are working, or to compare activity between multiple hives. If you notice the bees are gone for longer and longer periods, it’s probably because their nearby nectar sources are dwindling and they have to travel farther to find flowers.

This open-source bee counter built by [hydronics2] is designed to fit the opening of a standard hive. The bees can only buzz themselves back in by flying through one of 24 little IR break-beam gates. Our favorite thing about this build is the way [hydronics2] created the individual gates by sandwiching two boards together with headers as spacers. It’s such a simple and perfect solution.

It’s also pretty cool that the board is designed to be compatible with any Feather or ItsyBitsy board, so there are a lot of options for data handling. Check out the brief demo we planted after the break, and stick around for the build video. If you’d prefer a more hands-off approach, try computer vision.

Continue reading “Bee Counter Will Have You Up To Your Nectar In Hive Data”

Stylish Mic Is Metal Printing Done Right

[Eric Strebel] wanted a microphone to record voiceovers, and being a designer, wanted something suitably impressive for the task.  Inspired by the classic Unidyne 55, he set about designing his own mic, and used some pretty fancy techniques to get it built.

The mic was built around a ribbon element, providing good dynamic response. The design was created in CAD, and was initially intended to be constructed out of three seperate pieces. However, [Eric] realized that through the use of a binder jetting 3D printer, this wouldn’t be necessary.

Binder jetting is a technique in which a nozzle squirts binder into a powder bed to create a 3D printed part. In this case, a steel powder is used, which is then post-processed in an oven with liquid bronze. The bronze wicks into the finished part, adding strength. It’s a process which creates metal parts with very few limitations; the primary concern being minimum wall thicknesses.

With access to a binder jetting printer, [Eric] was free to design the stylish geometry of the final product. Mashing up hexagons with classic 50s curves, the final result is impressive. [Eric] now uses the microphone regularly to record voiceovers, and the aptly-named Hexavox even made an appearance at NAMM.

If you’re looking for more ways to DIY in your home studio, consider building your own isolation shield. Video after the break.

Continue reading “Stylish Mic Is Metal Printing Done Right”