This FPV Tank Explores The Lawn

Radio control is good and all, and it’s always fun to watch a little vehicle scoot about the backyard. But there’s always something to be said for feeling as though you’re really in control. First person view, or FPV, is the way to do it, and [Brian] has gone down that route with this tidy tank build.

The tank is 3D printed, from the chassis right down to the wheels. There’s even a moving “eye” up front containing the FPV camera, controlled by a servo, allowing the driver to look up and down. A 5.8 GHz transmitter is used to send the signal back to the driver’s goggles. The tracks are a snap-together design that are fully 3D printed, requiring no additional metal links or hardware. Forward propulsion is courtesy of a pair of 12 volt gear motors, driven from an L298N motor driver. An Arduino Nano is used in conjunction with Spektrum RC gear to receive signals and tell the tank where to go.

It’s a tidy build that would be great fun to drive through the bushes or through the house. We’ve seen even tinier builds used to inspect crawlspaces. If you build one of your own, be sure to let us know.

How Safe Is That Ultrasonic Bath For Flux Removal?

How do you clean the residual flux off your boards? There are plenty of ways to go about the job, ranging from “why bother?” to the careful application of isopropyl alcohol to every joint with a cotton swab. It seems like more and more people are turning to ultrasonic cleaners to get the job done, though, and for good reason: just dunk your board and walk away while cavitation does the work for you.

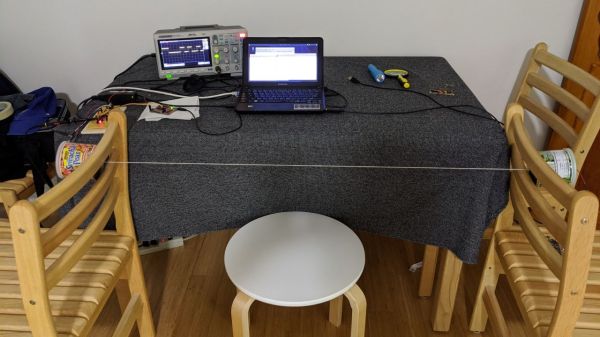
But just how safe is it to sonically blast the flux off your boards? [SDG Electronics] wanted to know, so he ran some cleaning tests to get to the bottom of things. On the face of it, dunking a PCB in an aqueous cleaning solution seems ill-advised; after all, water and electricity famously don’t mix. But assuming all the nooks and crannies of a board can be dried out before power is applied, the cleaning solution itself should be of little concern. The main beef with ultrasonic cleaning seems to be with the acoustic energy coupling with mechanical systems on boards, such as crystal oscillators or micro-electrical-mechanical systems (MEMS) components, such as accelerometers or microphones. Such components could resonate with the ultrasonic waves and be blasted to bits internally.

To test this, [SDG Electronics] built a board with various potentially vulnerable components, including the popular 32.768-kHz crystal, cut for a frequency quite close to the cleaner’s fundamental. The video below goes into some detail on the before-and-after tests, but the short story is that nothing untoward happened to any of the test circuits. Granted, no components with openings as you might find on some MEMS microphones were tested, so be careful. After all, we know that ultrasound can deal damage, and if it can levitate tiny styrofoam balls, it might just do your circuit in.

Continue reading “How Safe Is That Ultrasonic Bath For Flux Removal?”

Building An Engine With An A/C Compressor

Air conditioning compressors aren’t exactly a mainstay of the average hacker’s junk box. Typically, they’re either fitted to a car to do their original job, or they’re on the bench getting refurbished. However, with the right mods, it’s possible to turn one into a functioning internal combustion engine.

The build starts by disassembling the compressor, which contains three double-sided pistons. The housing is drilled with ports to allow gas to flow into and out of the cylinders, as well as to transfer from one side of the piston to the other. Acrylic end plates are fitted to the assembly. One end acts as an intake manifold, delivering air and fuel to the cylinders. The other side acts as the cylinder head, mounting the sparkplugs. Everything is then connected with acrylic tubing and a small square section of acrylic is turned into a carburetor to supply the air-fuel mix. Ignition is handled by coils triggered by the movement of the flywheel.

After an initial failure due to the acrylic manifold cracking, a stronger part is fabricated, and the engine bursts into life. The acrylic end caps give a great view of the combustion process in action. We’d love to see the a dyno graph on how much power and torque the unit puts out, or to see it hooked up to a bicycle or cart.

We’ve seen others attempt their own engine builds, too. If you’ve got an unconventional engine build of your own, be sure to let us know. Video after the break.

Continue reading “Building An Engine With An A/C Compressor”

[Ben Krasnow] Builds A Mass Spectrometer

One of the features that made Scientific American magazine great was a column called “The Amateur Scientist.” Every month, readers were treated to experiments that could be done at home, or some scientific apparatus that could be built on the cheap. Luckily, [Ben Krasnow]’s fans remember the series and urged him to tackle a build from it: a DIY mass spectrometer. (Video, embedded below the break.)

[Ben] just released the video below showing early experiments with a copper tube contraption that was five months in the making; it turns out that analytical particle physics isn’t as easy as it sounds. The idea behind mas spectrometry is to ionize a sample, accelerate the ions as they pass through a magnetic field, and measure the deflection of the particles as a function of their mass-to-charge ratio. But as [Ben] discovered, the details of turning a simple principle into a working instrument are extremely non-trivial.

His rig uses filaments extracted from carefully crushed incandescent lamps to ionize samples of potassium iodide chloride; applied to the filament and dried, the salt solution is ionized when the filament is heated. The stream of ions is accelerated by a high-voltage field and streamed through a narrow slit formed by two razor blades. A detector sits orthogonal to the emitter across a powerful magnetic field, with a high-gain trans-impedance amplifier connected. With old analog meters and big variacs, the whole thing has a great mad scientist vibe to it that reminds us a bit of his one-component interferometer setup.

[Ben]’s data from the potassium sample agreed with expected results, and the instrument is almost sensitive enough to discern the difference between two different isotopes of potassium. He promises upgrades to the mass spec in the future, including perhaps laser ionization of the samples. We’re looking forward to that.

Continue reading “[Ben Krasnow] Builds A Mass Spectrometer”

Turning A Bad Bench Supply Into A Better Bench Supply

‘Tis the season for dropping hints on what new doodads would make a hacker happy, and we have to admit to doing a little virtual window shopping ourselves. And as a decent bench power supply is on our list, it was no surprise to see videos reviews that the hive mind thinks will help us make a choice pop up in our feed. It’s a magical time to be alive.

What did surprise us was this video on a mashup of two power supplies, both of which we’ve been eyeing, with the result being one nicely hacked programmable bench PSU. It comes to us courtesy of [jeffescortlx], who suffered with one of those no-name, low-end 30V-5A bench supplies that has significant lag when changing the settings, to the point that it’s difficult to use, not to mention dangerous for sensitive components.

So he got a hold of a Riden RD6006 programmable buck converter, which is something like those ubiquitous DPS power supply modules we’ve seen so much of, only on steroids. The Riden takes up to 70V input and turns it into a 0-60V output at up to 6 amps, at constant current or constant voltage. It also just happens to (almost) fit as a replacement for the faceplate of the dodgy old supply. A few SMD resistors simulate the original front panel pots being pegged so that the supply outputs maximum voltage and current, and a little finagling with the case and fan was needed to fit everything up, but the finished product actually looks really good, and fixes all the problems of the original.

We love this hack, and may well cobble this together for our bench.

Continue reading “Turning A Bad Bench Supply Into A Better Bench Supply”

Simple Acrylic Plates Make Kirlian Photography A Breeze

We know, we know – “Kirlian photography” is a term loaded with pseudoscientific baggage. Paranormal researchers have longed claimed that Kirlian photography can explore the mood or emotional state of a subject through the “aura”, an energy field said to surround and emanate from all living things. It’s straight-up nonsense, of course, but that doesn’t detract from the beauty of plasma aficionado [Jay Bowles]’ images produced by capacitive coupling and corona discharge.

Technically, what [Jay] is doing here is not quite Kirlian photography. The classic setup for “electrophotography” is a sandwich of photographic film, a glass plate, and a metal ground plate. An object with a high-voltage, high-frequency power supply attached is placed on top of the sandwich, and the resulting corona discharge exposes the film. [Jay]’s version is a thin chamber made of two pieces of solvent-welded acrylic and filled with water. A bolt between the acrylic panes conducts current from a Tesla coil – perhaps this one that we’ve featured before – into the water. When something is placed on the acrylic, a beautiful purple corona discharge streams out from the object.

It’s an eerie effect, and it’s easy to see how people can see an aura and attribute mystical properties to it. In the end, though, it’s not much different than touching a plasma globe, and just about as safe. Feeling a bit more destructive? Corona discharge is a great way to make art, both in wood and in acrylic.

Continue reading “Simple Acrylic Plates Make Kirlian Photography A Breeze”

Building Your Own Tensegrity Structure

It seems that tensegrity structures are trending online, possibly due to the seemingly impossible nature of their construction. The strings appear to levitate without any sound reason, but if you bend them just the right way they’ll succumb to gravity. 

The clue is in the name. Tensegrity is a pormanteau of “tension” and “integrity”. It’s easiest to understand if you have a model in your hand — cut the strings and the structure falls apart. We’re used to thinking of integrity in terms of compression. Most man-made structures rely on this concept of engineering, from the Empire State Building to the foundation of apartment building.

Tensegrity allows strain to be distributed across a structure. While buildings built from continuous compression may not show this property, more elastic structures like our bodies do. These structures can be built on top of smaller units that continuously distribute strain. Additionally, these structures can be contracted and retracted in ways that “compressionegrities” simply can’t exhibit.

How about collapsing the structure? This occurs at the weakest point. Wherever the load has the greatest strain on a structure is where it will likely snap, a property demonstrable in bridges, domes, and even our bodies.

Fascinated? Fortunately, it’s not too difficult to create your own structures.

Continue reading “Building Your Own Tensegrity Structure”