We’re always on the lookout for unexpected budget builds here at Hackaday, and stumbling across a low-cost, DIY version of an instrument that sells for tens of thousands of dollars is always a treat. And so when we saw a tip for a homebrew gas chromatograph in the tips line this morning, we jumped on it. (Video embedded below.)
For those who haven’t had the pleasure, gas chromatography is a chemical analytical method that’s capable of breaking a volatile sample up into its component parts. Like all chromatographic methods, it uses an immobile matrix to differentially retard the flow of a mobile phase containing the sample under study, such that measurement of the transit time through the system can be made and information about the physical properties of the sample inferred.
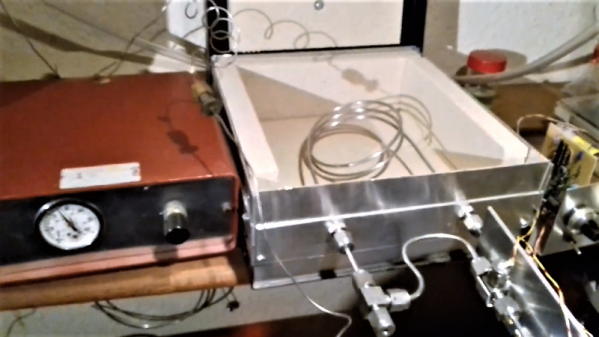
The gas chromatograph that [Chromatogiraffery] built uses a long stainless steel tube filled with finely ground bentonite clay, commonly known as kitty litter, as the immobile phase. A volatile sample is injected along with an inert carrier gas – helium from a party balloon tank, in this case – and transported along the kitty litter column by gas pressure. The sample interacts with the column as it moves along, with larger species held back while smaller ones speed along. Detection is performed with thermal conductivity cells that use old incandescent pilot lamps that have been cracked open to expose their filaments to the stream of gas; using a Wheatstone bridge and a differential amp, thermal differences between the pure carrier gas and the eluate from the column are read and plotted by an Arduino.
The homebrew GC works surprisingly well, and we can’t wait for [Chromatogiraffery] to put out more details of his build.
Continue reading “Kitty Litter And Broken Light Bulbs Power This Homebrew Gas Chromatograph”