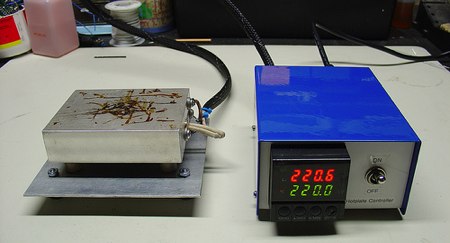
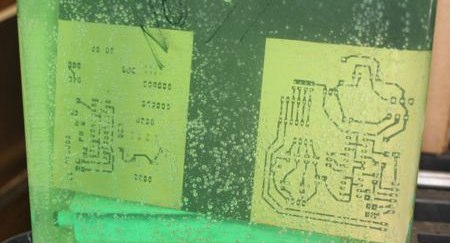
Bouncing Ball Analog Computer

bounce

[Eric Archer] constructed an analog computer to model the physics of a bouncing ball. The core is a TL074 opamp that does all the integral math. He had no trouble finding descriptions of analog computers, but how to set the initial conditions was rarely covered. The controls include potentiometers to set the initial velocity, force of gravity, and coefficient of restitution (how much energy is lost in the bounce). The output is displayed on an oscilloscope. He mentions that this output could be used in electronic music, citing Aphex Twin’s Bucephalus Bouncing Ball. Watch the video below for a demo of all the features.

Continue reading “Bouncing Ball Analog Computer”

Plasma Thruster

plasma_thruster

Some of you probably have plans to build your own spaceships, we know we do. Well, the propulsion system can be a bit tricky, especially if you plan on using plasma drives. This breakdown and build of a simple plasma thruster should help you on your way. All you really need is some Argon, a large capacitor bank, and a custom nozzle. You’ve already got most of that right? As usual, be very careful. This is high voltage and very hot.

Light To Sound Converter

lightnoise

[Alex] built what he calls a light to sound converter. It reacts differently depending on the type of light: remote controls, light bulbs, TV screens, etc. A photodiode is used with an amplifier to pick up the light change. That signal is dumped through a dual opamp. He swapped in several different types of photodiodes and settled on the BPW34 intended for visible light. He’ll be incorporating this into a much larger project.

Automated Wire Cutter And Stripper

witecutter

Kit builder oomlout—we’ve featured their servo bot—needed to produce a lot of precut wires. After cutting and stripping more than their fair share, they decided to apply some heavy engineering to make things easier. They constructed a machine to do the job for them. It has three main components: a servo driven wire feeder to measure the length, a two servo wire stripper that uses an exacto blade, and finally a wire cutter made from snips and a drill motor. The machine is controlled using an Arduino. They’ve published all the plans and code to Thingiverse incase anyone else wants to build a similar machine for their own kit shop. A video of the machine is embedded below.

Continue reading “Automated Wire Cutter And Stripper”

Steam Powered Spud Gun

[googlevideo=http://video.google.com/videoplay?docid=-1469285450334085432&ei=9EhZSd_XIJHEqQK6mO2rDQ&q=steam+powered+potato+pistol]

[robbtoberfest] put together this cool looking steam powered spud pistol. Made from household materials, like a lighter and some copper pipe, this spud gun builds pressure in its little bitty boiler to expel the projectiles. It seems as though he’s using a cork to supply a seal, so why bother with potatos? At roughly 2 minutes between shots, its not the quickest, but it sure is cool. Good job [robbtoberfest].

Working With VFDs

vfd

We love old display technology, like Nixie tubes, but they’re often difficult to work with because they require higher voltages than digital logic. Vacuum florescent displays (VFD) fall into this category. While not necessarily “old”, they are becoming far less common than LCDs. The main benefit of a VFD is that it actually produces light directly; it doesn’t require a backlight. You’ll find these displays on various players and appliances: CD, DVD, VCR, microwaves, stoves, car headunits, and others.

[Sprite_tm] had written off some VFDs, but recently revisited them with renewed interest. He started by testing what sort of voltage would be required to drive the display. It took 3V for the filament plus 15V to drive the grids. There are VFD controller chips available, but he wanted to get this working with what he had on hand. He had experience with older 40xx series logic, which can be powered by much higher voltages than 5V 74xx. His final schematic has three 4094 serial to parallel chips with an ATtiny2313 controller. A 5V power supply is dropped to 3V with diodes to drive the filament while a boost converter brings it up to 15V for the 4094s that switch the segments. While the code is specific to this display, it would be a great place to start your own project.