Computers come in many forms, depending on your definition. We’ve seen computers and computer gates built out of things as diverse as marbles, relays, and — of course — transistors. However, there are logic gate systems that use a property of moving fluids to form logic gates and a bistable element. That’s all the pieces you need to build a working computer.
It may sound far-fetched, but there have been general-purpose computers built using this technology. It is also used in specialized applications where fluids are already flowing, like shower heads, automotive transmissions, and in places where electronics are prone to misbehave. Many think the field will see a resurgence when we need to build logic at the molecular level for nanotech applications, too.
Basics
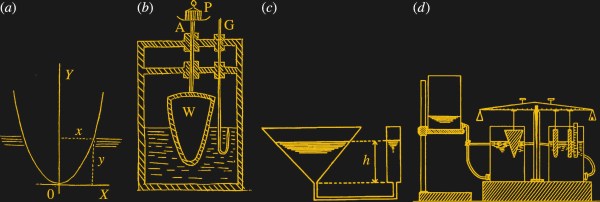
In its most basic form, a fluidic gate uses flow as a logic 1 and less flow to be a logic 0. Merging two streams together provides an OR gate. Using a supply stream that you can divert with a control stream provides a NOT function. Given enough inverters and OR gates, you can build everything else.