Building A Solar Powered Game Boy Pocket

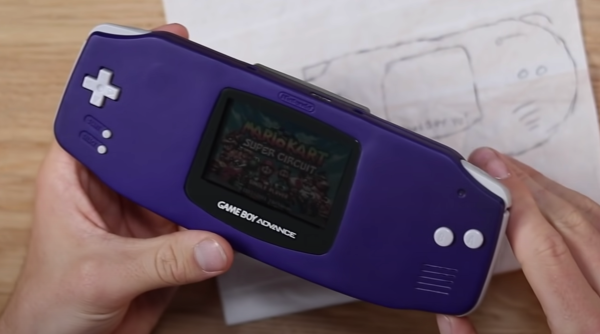
Light has always been a key part of the classic Game Boy experience. Some of us have fond memories of riding along in the back seat of a car at night, pausing and unpausing the game as the street lights overhead briefly give enough light to see the unlit display. The availability of third party IPS displays for these classic handhelds has largely eradicated this problem today, but as you might expect, the increased power requirements of the more modern screen reduces the system’s runtime.

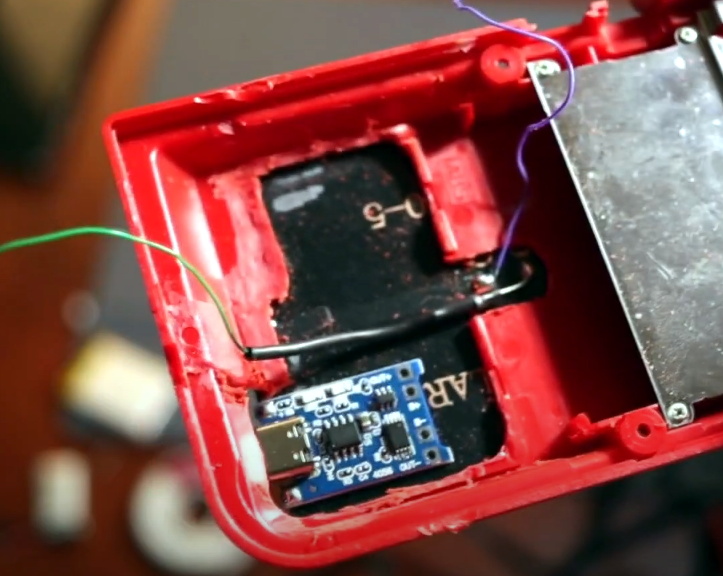
Installing the USB-C charge controller.

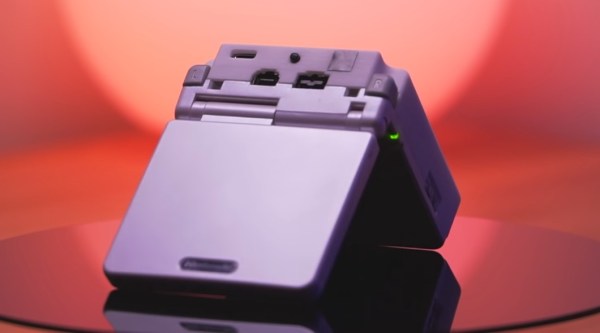
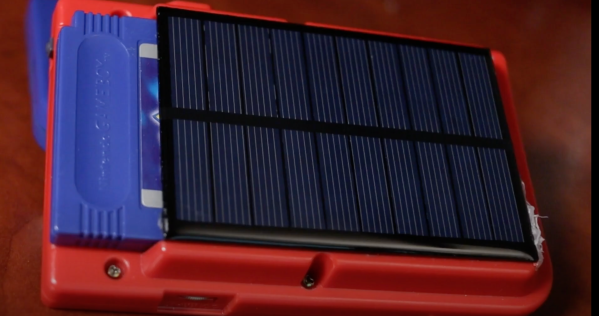
As part of their examination into energy production, the [Houston Museum of Natural Science] set out to see if they could improve things by adding a solar panel to the back of a Game Boy Pocket that had already been modified with an IPS display. The Pocket version of the Game Boy was selected as it has a nice flat back that made it easy to attach a solar panel, and in fact the panel sourced for this mod is so well dimensioned, it almost looks like the device came that way.

In the video below, you can see the modification starts by cutting away a large section of the Game Boy’s rear panel to fit the 1000 mAh LiPo battery. The solar panel is then affixed over the back with super glue. A diode is soldered onto the solar cell, and then wired into a charge controller that came with USB-C input. The placement of the charge controller ended up being trickier than expected, but with a little hot glue, it works just fine. Overall this is a simple mod but a brilliant idea.

This isn’t the first solar-powered handheld game system we’ve seen, but it’s nice to see the idea revisited and expanded on, particularly regarding ergonomics. In addition, we love the incredible detail of narration that’s given as this hack slowly takes shape. Video after the break.

Continue reading “Building A Solar Powered Game Boy Pocket”

Game Boy Color Makes Itself At Home In A DMG-01

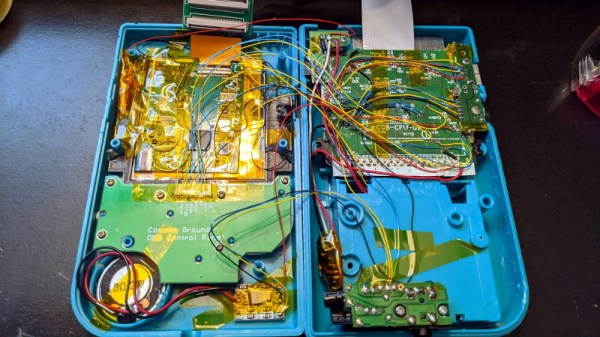
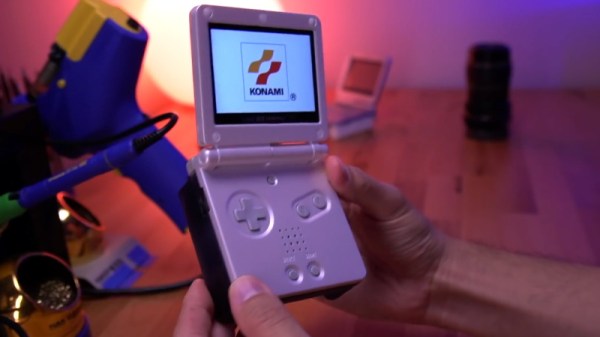
When we last checked in with [Bucket Mouse], he had just finished cramming a Game Boy Advance (GBA) SP motherboard into the body of the iconic Game Boy DMG-01, complete with an aftermarket IPS display. Unfortunately, after a few weeks of using the system, he ran into a few issues that sent him back to the drawing board.

This time, he’s revamped Nintendo’s classic handheld with the internals from its successor, the Game Boy Color (GBC). Obviously that means this new build can’t play any GBA titles, but that was never actually the goal in the first place. It might seem obvious in hindsight, but owing to their general similarity, it ended up being far easier to fit the GBC hardware into the Game Boy’s shell. Though we still wouldn’t call this an “easy” swap by any stretch of the imagination…

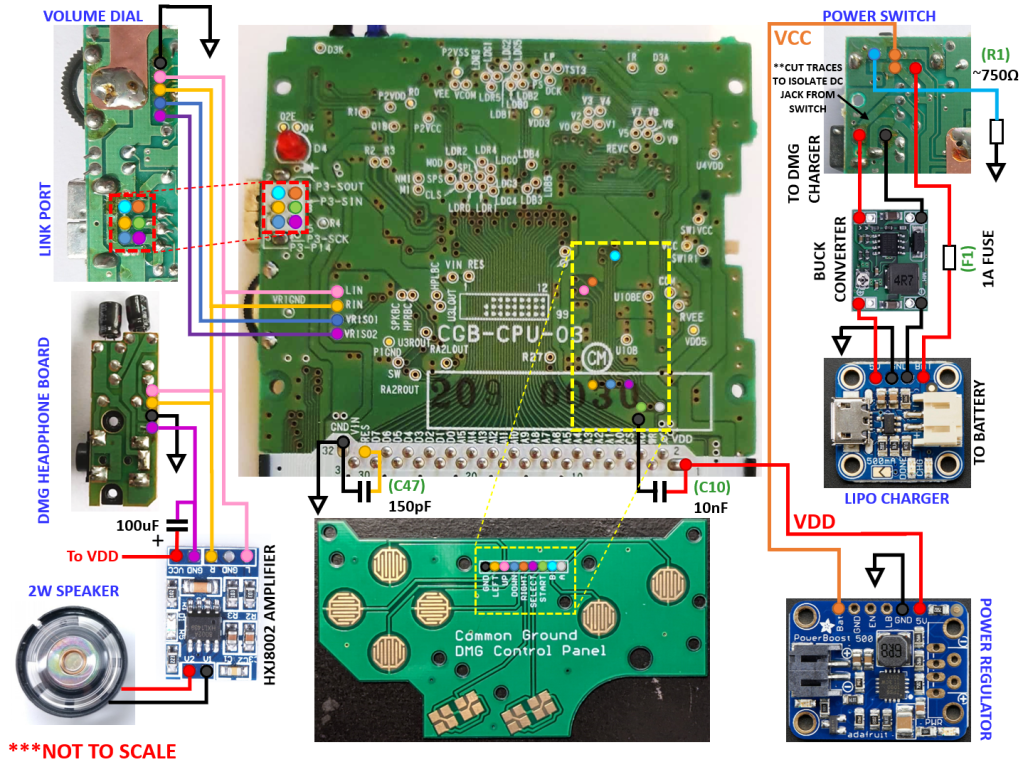
Whether you want to follow his footsteps towards portable gaming bliss or just want to live vicariously through his soldering iron, [Bucket Mouse] has done an absolutely phenomenal job of documenting this build. While he cautions the write-up isn’t designed to be a step by step instructional piece, there’s an incredible wealth of information here for others looking to perform similar modifications.

The build involved removing much of the original Game Boy’s connectors and controls, such as the volume wheel, Link Port, and even headphone jack, and grafting them onto a GBC motherboard that’s been physically trimmed down. At a high level it’s not unlike the trimmed Wii portables we’ve seen, but made much easier due to the fact the GBC only used a two-layer PCB. It also helps that [Bucket Mouse] has once again used an aftermarket IPS display, as that meant he could literally cut off the LCD driver section of the GBC motherboard. Of course there have also been several hardware additions, such as a new audio amplifier, power regulation system, LiPo charger, and 2000 mAh battery.

There’s a lot of fantastic details on this one, so if you’re remotely interested in what made the Game Boy and its successors tick, we’d highly recommend taking the time to read through this handheld hacking tour de force. His previous build is also more than worthy of some close study, even if it ended up being a bit ungainly in practice.

A LiPo Cell Makes A 4AA Pack For A GameBoy

Electronic toys of yesteryear were fantastic objects of desire, but came with the fatal flaw of requiring batteries. Batteries that cost more than the average youngster’s pocket money and for which the pestered parent were usually unwilling to fork out every couple of days to support an incessant playing habit. It’s something [Sen] has addressed for the Nintendo Game Boy, and rather than cutting the device up and soldering wires, the result is a unit that neatly slots into the existing 4AA battery enclosure.

The Nintendo rechargable Game Boy pack.
Much more convenient than Nintendo’s own effort!

Electrically it’s a simple case of wiring up an Adafruit module and a pouch cell, but that’s not the essence of the job in this case. Instead a huge quantity of work and iteration has gone into CAD design to the perfect-fitting pack. It’s sure to be a boon for today’s Game Boy player, but much more than that it should be of interest to owners of far more devices that take four AA cells. Most of us probably keep a few packs of AAs for just those moments, perhaps meanwhile something like this could be a handy thing to have instead.

More traditional conversions resort to extreme measures, as with this Game Boy Color.

Dominate Video Calls With Game Boy Camera Webcam

We can’t promise it will all be positive, but there’s no question you’ll be getting plenty of attention when you join a video call using the Game Boy Camera. Assuming they recognize you, anyway. The resolution and video quality of the 1998 toy certainly hasn’t aged very well, and that’s before it gets compressed and sent over the Internet.

From a technical standpoint, this one is actually pretty simple, if rather convoluted. [RetroGameCouch] hasn’t modified the Game Boy Camera in any way, he’s just connected it to the Super Game Boy, which in turn is slotted into a Super Nintendo. From there the video output of the SNES is passed through an HDMI converter, and finally terminates in a cheap HDMI capture device. His particular SNES has been modified with component video, but on the stock hardware you’ll have to be content with composite.

The end result of all these adapters and cables is that the live feed from the Game Boy Camera, complete with the Super Game Boy’s on-screen border, is available on the computer as a standard USB video device that can be used with whatever program you wish. If you’re more interested in recovering still images, we’ve recently seen a project that lets you pull images from the Game Boy Camera over WiFi.

Continue reading “Dominate Video Calls With Game Boy Camera Webcam”

PlayStation Games On The GBA, With A Few Extra Steps

It might seem impossible, but what you’re looking at is a Sony PlayStation game being played on a Nintendo Game Boy Advance. The resolution is miserable and the GBA doesn’t have nearly enough buttons to do most 3D games justice, but it’s working. There’s even audio support, although turning it on will slow things down considerably.

How does it work? The trick is that creator [Rodrigo Alfonso] is actually emulating the PlayStation on a Raspberry Pi and simply using Nintendo’s handheld as an external display and controller. We say “simply”, but of course, it’s anything but. The GitHub page for the project goes into impressive detail on how the whole thing works, but the short version is that the video data is sent from the Linux framebuffer to a small program running on the GBA over the handheld’s serial port using SPI. In testing he was able to push 2.56 Mbps through the link, which is a decent amount of bandwidth when you’ve only got to keep a 240 × 160 screen filled.

Perhaps the best part is that you don’t even need a flash cart to try it at home. [Rodrigo] is using a trick we’ve seen in other GBA projects, where the program is actually transferred to the handheld over the link cable at boot time.

Nintendo introduced this “multiboot” feature so multiplayer games could be played between systems even if they didn’t all have a physical cartridge, but now that hackers have cracked the code, it means you can run arbitrary code on a completely unmodified console; though it does get wiped as soon as you power it off.

[Rodrigo] provides all the information and software you need to try it at home, you just need a Raspberry Pi, a Game Boy Advance, and Link Cable you don’t mind cutting up; far less hardware than is required by the similar project to run DOOM on the NES. Since he’s tied everything into the popular RetroPie frontend, we imagine it would even work when emulating earlier 2D consoles; which would be a much better fit for the GBA’s display and limited inputs.

Bringing The Game Boy Camera Into The 21st Century

The Game Boy Camera is probably one of the most limited-specification digital cameras to have been mass-marketed, yet it occupies a special position in the hearts of many because despite being a toy with a paltry 128×128 monochrome sensor it was for many the first camera they owned. [Matt Grey] was among those people, and was always frustrated by the device’s inability to export pictures except to the Game Boy printer. So after having bodged together an interface a decade ago but not being happy with it, he returned to the project and made a wireless carrier for the camera that allows easy transfer through WiFi to his mobile phone.

Inside the slab-like 3D-printed enclosure lies a GBxCart RW Game Boy cartridge reader, whose USB port is wired to a Raspberry Pi Zero on which are a set of scripts to read the camera and make its photos available for download via a web browser. At last the camera is a stand-alone unit, allowing the easy snapping and retrieval of as many tiny black and white images as he likes. There’s a video showing the device in action, which we’ve placed for your enjoyment below the break.

This camera has appeared in so many projects on these pages over the years, but we’re guessing that the work on whose shoulders this one stands would be the moment its workings were reverse engineered.

Continue reading “Bringing The Game Boy Camera Into The 21st Century”

Pi Pico Game Boy Flash Cart Gets Slim RP2040 Upgrade

The story for this one starts a few months ago, when [John Green] released his PICO-GB project. His code allowed the Raspberry Pi Pico to stand in for a Game Boy cartridge, complete with a simple text menu that let the user select between ROMs that had been baked into the microcontroller’s firmware. The project was particularly notable for the fact that it was entirely a software solution; while a custom breakout cartridge made for a handy temporary solution, you could have permanently wired the Pico’s pins directly to the Game Boy’s cartridge connector if you wanted to.

PICO-GB running on the full-size Pi Pico

Then in early June, the RP2040 chip that powers the Pi Pico went up for sale in single unit quantities. That opened up the possibility of building the PICO-GB functionality into a cartridge small enough to actually fit inside the Game Boy. So [Martin “HDR” Refseth] got to work creating the slick cartridge PCB you’re seeing now.

The RP2040 is joined by a trio of Texas Instruments TXB0108 level shifters, and there’s a spot for adding a SPI flash chip. The RP2040 supports a maximum of 16 MB of external flash, but given the size of Game Boy games were generally measured in kilobytes, that shouldn’t pose much of a problem.

Looking ahead, the original PICO-GB documentation mentions enhancements like loading ROMs from SD card, as well as hardware additions like a real-time-clock for the more advanced games that supported it. We assume those concepts will become part of [Martin]’s PCB eventually, but these are still early days.

We’ve seen Game Boy cartridge emulation with a microcontroller in the past, but we’re exited to see how the unique capabilities of the Raspberry Pi Foundation’s custom silicon can improve the state-of-the-art.

[Thanks to Itay for the tip.]