Game Boy Repurposed Solely As A Camera

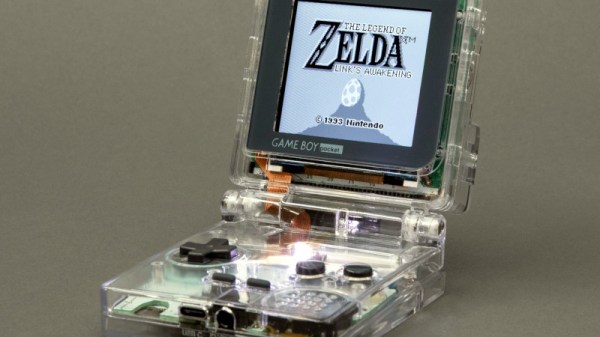
As much as we all love the Game Boy Camera, it’s really just an add-on to the popular handheld console. Twitter user [@thegameboycam] decided to build a dedicated camera platform using the hardware, and the result was the Game Boy DSLR.

Camera pedants will note that it’s not really a DSLR, but that’s not really the point. It’s a Game Boy with the camera accessory built into a proper camera-like housing. There’s a CS/C mount for the lens, and it’s got a custom shell with leatherette, just like the cameras of last century. It’s also got a cold shoe, and a 1/4″ screw thread for tripod mounting. Oh, and strap lugs! So you can really rock that old-school aesthetic with your tweed suit on.

More practical modern features include a 1800 mAh battery that charges over USB Type C and a backlit IPS display. The screen has been turned through 90 degrees, and the cartridge port and buttons are relocated to create a more traditional camera-like form factor. If you really want, though, you can still play it like a regular Game Boy. Just swap out the modified camera cart with the lens mount for a regular Game Boy Camera or another game cartridge.

It’s a fun hack that scores big on style points. No longer can you be the cool kid just by rocking a Game Boy with a big ol’ lens hanging off the back. Now you gotta compete with this!

Our tipsline is waiting for when you’ve got the next big thing in Game Boy Camera hacks. Video after the break.

Continue reading “Game Boy Repurposed Solely As A Camera”

Your Console, Your Cartridge, You Choose? Nintendo Faces A Challenge

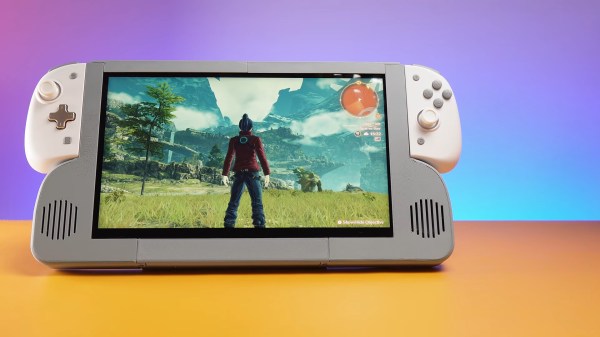
If you read our articles, you’ll notice that we will usually feature images related to the subjects we talk about. If they came from another source and they’re not CC-licensed or similar then they are the property of someone else but we are using them under a doctrine known as fair use. Excerpts of copyrighted material may be used under fair use for the purposes of such things as journalistic reporting, so for example we can use a copyrighted picture of Captain America were we to write about Marvel superheroes. Some content owners still try to stop this, and it’s one of them that [Linus Tech Tips] has in their sights as they have published a guide to running Nintendo Switch games on a Steam Deck without they believe giving any justifiable cause for the notoriously litigious game giant to take action. It’s full of carefully blurred Nintendo IP, and there is no coverage of pirate software downloads.

On one hand it’s about a heavy-handed console developer taking down small online content producers, but there’s another angle which is far more relevant to the hardware community who read Hackaday. It also has application in the field of software emulation, because while the console manufacturer would prefer to stop all but their own unmodified hardware running a game there should be nothing to stop a legally owned piece of software or hardware being run in any way its owner chooses. This is the central thesis explored at the end of the video, and the gimmick of trying to draw Nintendo into the open on the matter is their way of bringing publicity to it.

Even though [Linus Tech Tips] is probably one of the most viewed technology YouTube channels, it’s clear that Nintendo will have the deeper pockets should they choose to rise to the bait. So we’re sure their lawyers are all over this as we write, but we’d be interested to see whether the claims made in the video are enough to see it stay up. It would be nice to think that it might cause Nintendo to reconsider some of their policies, but we’re not holding our breath. Continue reading “Your Console, Your Cartridge, You Choose? Nintendo Faces A Challenge”

A tiny TV playing Super Mario All-Stars

The SF1 Mini Is A Homebrew Version Of An Obscure Nintendo Console

The Super NES is arguably the best known console of the 16-bit era. It typically came in the form of a grey box with either grey or purple buttons, and an angular or streamlined design, depending on whether you lived in North America, Europe or Asia. Compact and mini versions followed later, but there were also a few lesser-known models released during the SNES’s heyday in the early 1990s. One of these was the Sharp SF1: a CRT television with a built-in Super Nintendo. The cartridge slot was located at the top, with the controllers connecting at the front. The internal video connection even provided better image quality than a typical SNES setup.

Some light soldering required.

The SF1 was never sold outside Japan and is quite rare nowadays. But even if you can find one, the bulky CRT will take up a lot of space in your home. [Limone] therefore decided to build himself a smaller replica instead. His “SF1 mini” comes in a 3D printed case that holds a 5.5″ TFT screen, stereo speakers, and connections for game paks and game pads.

Thankfully, [Limone] didn’t sacrifice an original SNES to make this project: instead, he used a DIY Super Nintendo kit developed by a company called Columbus Circle. This kit contains a modern replica of a SNES motherboard and is intended for custom builds like this. However, the layout of the motherboard didn’t match [Limone]’s intended design, so he desoldered several components and re-attached them using a huge web of magnet wire. An RGB-to-HDMI converter connects the SNES’s video output to the TFT screen and provides for remarkably sharp graphics.

[Limone] explains the build process in detail in the video embedded below (in Korean, with English subs available). We’ve seen a couple of neat SNES replicas, some small and some particularly tiny, but this has to be the first SF1 replica.

Continue reading “The SF1 Mini Is A Homebrew Version Of An Obscure Nintendo Console”

Raspberry Pi Pico “Modchip” Unlocks The GameCube

In terms of units sold, it’s no secret that the GameCube was one of Nintendo’s poorest performing home consoles. You could argue increased competition meant sales of the quirky little machine were destined to fall short of the system’s legendary predecessors, but that didn’t keep the Wii from outselling it by a factor of five a few years later. Still, enough incredible games were released for the GameCube that the system still enjoys a considerable fanbase.

Now, with the release of PicoBoot by [webhdx], we suspect the GameCube is about to gain a whole new generation of fans. With just a Raspberry Pi Pico, some jumper wires, and a widely available third-party SD card adapter, this open source project bypasses the console’s original BIOS so it can boot directly into whatever homebrew application the user selects. With how cheap and easy to perform this modification is, we wouldn’t be surprised if it kicked off something of a renaissance for GameCube homebrew development.

Installation takes just five wires.

In the video after the break, [Tito] of Macho Nacho Productions provides a rundown of this new project, including a fantastic step-by-step installation guide that covers everything from soldering the jumper wires to the console’s motherboard to getting the firmware installed on the Pico. He then demonstrates booting the console into various community developed front-ends and tools, showing just how versatile the modification is. While some will see this as little more than an easier way to run bootleg games, we can’t help but be excited about what the future holds now that getting your own code to run on the system is so easy.

Alright, maybe it’s not so easy. To solder on the five wires that will eventually snake their way to the GPIO pins of the Pi Pico, you’ll need to strip the console all the way down to the main board. That wouldn’t be too bad itself, but unfortunately to reach two of the connections you’ll need to remove the system’s massive heatsink — which means you’ll need to clean up the old sticky thermal pads and apply new ones if you don’t want your GameCube to turn into a GameCrisp. It’s nothing that would scare off the average Hackaday reader, but it might give pause to those less handy with an iron.

The release of PicoBoot comes hot on the heels of the revelation that the Raspberry Pi Pico can be used not only as an N64 flash cart but as a supercharged PlayStation Memory Card. These projects would all be significantly improved with a custom RP2040 board, and no doubt that’s the direction they’ll eventually head, but it’s hard not to be impressed by what the low-cost microcontroller development board is capable of in its native form. Especially now that it comes in WiFi flavor.

Continue reading “Raspberry Pi Pico “Modchip” Unlocks The GameCube”

What Do You Get When A Raspberry Pi Pico Flashes A Nintendo 64

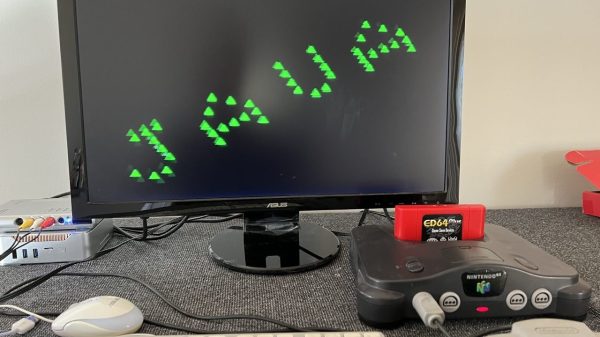
The joke was when the Nintendo 64 first hit the streets around a quarter century ago, that the 64 in the name referred not to the technology on board, but to the excessive cost of the cartridges. Whatever the truth in that, it’s something now completely laid to rest by [Konrad Beckmann] with his Nintendo 64 flash cart powered by a Raspberry Pi Pico (Nitter Link).

The schematic is surprisingly simple, in that the Pico does everything required to both interface to the N64 and to an SD card to hold the software. The clever work is done by the RP2040 firmware, which can be found along with the hardware details in the “develop” branch of the project’s GitHub repository. And while the earliest version was a Raspberry Pi Pico with a host of jumper wires, the more polished version focuses on a custom PCB and bare RP2040 chip.

Perhaps the N64 hasn’t received the attention it should have over the years, overshadowed as it was by its competitors such as the original PlayStation, but it’s projects like this one which remind us that there’s still life in Nintendo’s ’90s flagship. Speaking of which, if you were on Team Sony back in the day but still want to put your Pi Pico to use, check out this DIY PlayStation Memory Card we covered recently.

Optimized Super Mario 64 Offers Exciting Possibilities

When working on any software project, the developers have to balance releasing on time with optimizations. As long as you are hitting your desired time constraints, why not just ship it earlier? It’s no secret that Super Mario 64, a hotly anticipated launch title for the Nintendo 64 console in 1996, had a lot of optimizations left on the table in order to get it out the door on time. In that spirit, [Kaze Emanuar] has been plumbing the depths of the code, refactoring and tweaking until he had a version with serious performance gains.

Why would anyone spend time improving the code for an old game that only runs on hardware released over two decades ago? There exists a healthy modding community for the game, and many of the newer levels that people are creating are more ambitious than what the original game could handle. But with the performance improvements that [Kaze] has been working on, your budget for larger and more complex levels suddenly becomes much more significant. In addition, it’s rumored that a multi-player mode was originally planned for the game, but Nintendo had to scrap the feature when it was found that the frame rate while rendering two cameras wasn’t up to snuff. With these optimizations, the game can now handle two players easily.

Luigi has been waiting 26 years for his chance to shine.

[Kaze] has a multi-step plan for improving the performance involving RAM alignment, compiler optimizations, rendering improvements, physics optimizations, and generally reducing “jankiness.” To be fair to the developers at Nintendo, back then they were working with brand new hardware and pushing the boundaries of what home consoles were capable of. Modeling software, toolchains, compilers, and other supporting infrastructure have vastly improved over the last 20+ years. Along the way, we’ve picked up many tricks around rendering that just weren’t as common back then.

The central theme of [Kaze]’s work is optimizing Rambus usage. As the RCP and the CPU have to share it, the goal is to have as little contention as possible. This means laying out items to improve cachability and asking the compiler to generate smaller code rather than faster code (no loop unrolling here). In addition, certain data structures can be put into particular regions of memory that are write-only or read-only to improve resource contention. Logic bugs are fixed and rendering techniques were improved. The initial results are quite impressive, and while he isn’t done, we’re very much looking forward to playing with the final product.

With the Nintendo 64 on its way to becoming a mainline-supported Linux platform, the old console is certainly seeing a lot of love these days.

Continue reading “Optimized Super Mario 64 Offers Exciting Possibilities”

Fix Every Broken Via To Return This Game To Life

We all know the havoc that water in the wrong place can do to a piece of electronics, and thus we’ve probably all had devices damaged beyond repair. Should [Solderking] have thrown away the water-damaged PCB from a Nintendo Pokemon Ruby cartridge? Of course he should, but when faced with a board on which all vias had succumbed to corrosion he took the less obvious path and repaired them.

Aside from some very fine soldering in the video below the break there’s little unexpected. He removes the parts and tries a spot of reworking, but the reassembled board doesn’t boot. So he removes them again and this time sands it back to copper. There follows a repair of every single vial on the board, sticking fine wires through the holes into a sponge and soldering the top, before turning it over and fixing the forest of wires on the other side. Fixing the ROM results in a rather challenging fitment involving the chip being mounted at an angle and extra wires going to its pads, which demonstrates the value in this story. It’s not one of monetary value but of persevering with some epic rework to achieve a PCB which eventually boots. Of course a replacement board would make more sense. But that’s not the point, is it?

Continue reading “Fix Every Broken Via To Return This Game To Life”