Sometimes, as hackers and makers, we can end up with messy lashed-together gear that is neither reliable nor tidy. Rackmounting your stuff can be a great way to improve the robustness and liveability of your setup. If you find this appealing, you might like CageMaker by [WebMaka].
This parametric OpenSCAD script can generate mounts for all kinds of stuff. Maybe you have a little network switch that’s just a tangle of wires on your desk, or a few pieces of audio gear that are loosely stacked on top of each other and looking rather unkempt. It would be trivial with this tool to create some 3D printed adapters to get all that stuff laced up nice and neat in a rack instead.
Capacitive displacement sensors span a wide range of resolution, from the touchscreen sensors which can only detect displacement as a binary state, all the way to the sensors in semiconductor fabs which measure down to nanometers. The sensor [Matthias Wandel] built with a Raspberry Pi Pico lands somewhere in the middle, providing both sensitive measurements and an absolute scale.
The idea is that the amount of overlap between two metal plates should be detectable by measuring the capacitance between them. Reaching any kind of usable resolution would require a very precise measure of capacitance, around the picofarad range. [Matthias] realized that the Pico’s GPIO pins have an inherent capacitance, and can have a pull-down resistor set, essentially creating an RC circuit. [Matthias] would set a pin to a high-level output, then switch it to an input. The amount of time the pin takes to switch from high to low indicates the RC constant, which includes the capacitance attached to the pin.
When attached to a metal plate, the Pico was sensitive enough to detect the plate’s capacitive coupling to [Matthias]’s hand through a thick wooden floor. To measure capacitance between two metal plates, the Pico measured how well a voltage signal applied to one plate was coupled to the other plate. This was sensitive enough to measure the slight change in the dielectric constant when [Matthias] waved a piece of ABS pipe between the two capacitor plates. Making actual position measurements was tricky, since capacitance changed with both X- and Z-axis shifts in the plates.
Digital calipers use similar capacitive sensors to make their measurements, as [Matthias] knows from his experiments in hacking them. If you’re interested in more details, check out this teardown of some cheap digital calipers.
Machine screws aren’t made for wood or sheet metal, they make specific screws for those applications. You probably also know there are special screws for plastic. But did you know there are at least two distinct types? In a recent video, [Lost in Tech] show us different types of plastic screws, including thermal camera shots of screws driving into 3D printed parts, along with tests using a torque driver.
We have often used “any old” screw in printed parts, which usually works OK. We’ve also used threaded inserts or captive nuts, classic choices. One of the issues with screws or inserts is that you have to get accurately sized holes in your 3D prints.
In addition to learning about the types of screws and how best to accommodate them, he also developed a free web-based tool that does all the math for you.
Of course, there are cases when you do need a threaded insert. In particular, the plastic screws will tend to wear the plastic each time you insert them. If you expect the screw to go in and out many times, this might not be the right technique for you. On the other hand, if you think you might remove and replace the screws a few dozen times over the life of the part, this might be attractive.
We’ve covered self-tapping screws in plastic before, but, as the video shows, not all of them are created equal. And, of course, there are always heat-set inserts.
In a move that’s no doubt going to upset and confuse many, Espressif has released its newest microcontroller — the ESP32-S31. The confusing part here is that the ESP32-S series was always the one based on Tensilica Xtensa LX7 cores, while the ESP32-C series was the one using RISC-V cores.
That said, if one looks at it as a beefier -S3 MCU it does have some appealing upgrades. The most obvious improvements are with the use of WiFi 6, as well as Bluetooth Classic and LE 5.4, including LE Audio. There is also Thread and Zigbee support for those who are into such things.
The Ethernet MAC got a bump from the 100 Mbit RMII MAC in previous MCUs and is now gigabit-rated, while the number of GPIO is significantly higher at 60 instead of 45 on the -S3. On the RAM side, things are mostly the same, except for DDR PSRAM support, with octal SPI offering up to 250 MHz compared to 80 MHz on the -S3.
On the CPU side the up-to-320 MHz RISC-V cores are likely to be about as powerful as the 240 MHz LX7 cores in the -S3, based on the ESP32-C series performance in terms of IPC. Overall it does seem like a pretty nice MCU, it’s just confusing that it doesn’t use LX7 cores with the series it was put into. When this MCU will be available for sale doesn’t seem to be known yet, with only samples available to select customers.
It is a running gag around here that whenever a project posts, someone will inevitably point out that it could have been done with a 555 timer IC. [Stephen Woodward] went the opposite way and built a simple thermostat using the ubiquitous chip.
To be fair, this isn’t some sophisticated PID controller — it’s basically a bang-bang controller. Since the device has a comparator and the circuits use a thermistor, it seems like a clever but simple idea on the surface. However, there are some neat tricks. For example, if you tie the 555 threshold pin to Vdd, then the trigger pin acts as an inverting analog comparator. Another nice feature: the setpoint depends on a resistance ratio, so there is no need for a precise input voltage reference.
A simple circuit change can switch the circuit to power a heater or a cooler. The chip can handle a surprising amount of power, but for some applications, you may need some output drive circuitry. The simple circuit even has hysteresis, which you can set with a different resistor. Pretty impressive for a cheap chip, two resistors, a thermistor, and a battery.
Electro-permanent magnets (EPMs) are pretty nifty concepts, and if you aren’t familiar with them, they are permanent magnets with the ability to be electrically switched on or off. Unlike an electromagnet — which maintains a magnetic field only while power is applied — an EPM can remain “on” even when power is removed. Want to see one work? There’s a video embedded below that shows one off, but if you’d like to know how they work, we have you covered.
Inside are two types of magnet, one of which is permanent and the other being a semi-hard magnet paired with an electromagnetic coil. A semi-hard magnet’s flux can be changed by exposing it to a strong enough magnetic field, and that’s the key to making it work.
Being able to electrically switch a permanent magnet on or off is a neat trick.
When both magnets work together, the EPM is “on” and acts like a permanent magnet. To turn the EPM off, the polarity of the semi-hard magnet is flipped with a short and powerful electromagnetic pulse, after which the two magnets oppose one another and more or less cancel each other out. So rather than generating a magnetic field, an EPM more accurately reconfigures it.
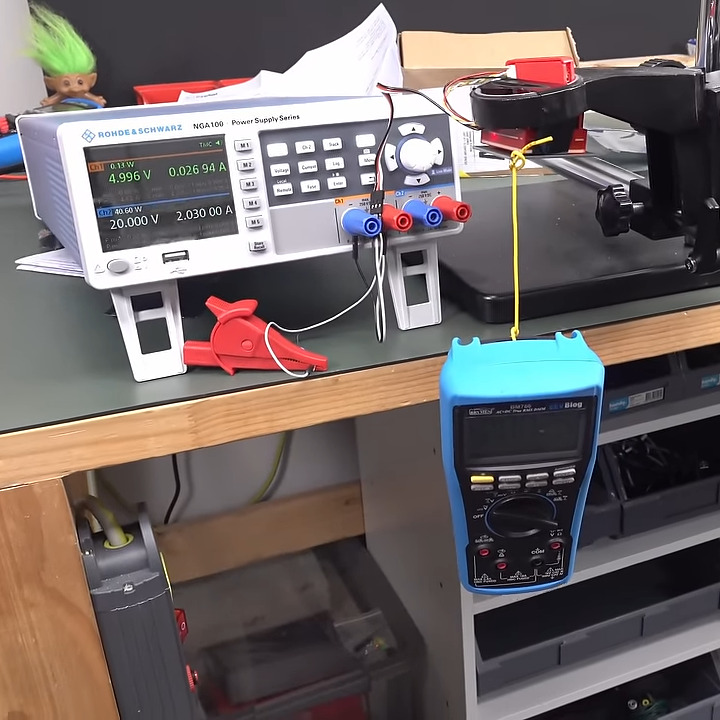
As intriguing as EPMs are, we haven’t really seen one properly in action until it was brought to our attention that [Dave Jones] of EEVblog tried one out last year. He received a Zubax FluxGrip EPM, which is intended for drone and robotic applications and can hold up to 25 kg. Watch [Dave] fire it up in the video (link is cued up to the 7:30 mark), it’s pretty interesting to see one of these actually work.
EPMs are not prohibitively expensive but they are not exactly cheap, either. But if a switchable magnet sounds up your alley and you can’t afford an EPM, consider an alternative “switchable” magnet design that works by momentarily canceling out a permanent magnet with a paired electromagnet. Unlike an EPM, it’s not a permanent switch but it would be enough to drop a payload.
The humble NE555 has been around for over five decades now, and while during that time we’ve seen a succession of better and faster versions of the original, the circuits which surround it are pretty well known. There can’t be anything new in the world of 555s, can there? [Stephen Woodward] claims he’s made a novel 555 circuit, with his 1 MHz linear voltage to frequency converter. Since he’s been in love with the 555 since 1974, we’re inclined to trust him on this part.
It’s visibly the 555 astable oscillator we’re all familiar with, given the addition of a current source in place of the normal charging resistor. This makes for a much more linear sawtooth waveform, but it still doesn’t fix the linearity of the voltage to frequency curve. The novel bit comes in adding an extra resistor between the threshold and discharge pins, with a value calculated for a time constant with the capacitor to match the 555’s own switching delay. This provides the necessary compensation, and gives the circuit its linearity.
This is so brilliantly simple that it’s almost a shock that it’s new, but it’s also a great example of the old-school electronic engineer’s art. We can’t think of an immediate need for a 555 voltage to frequency converter on the Hackaday bench at the moment, but you can bet we’ll come back to this one if we do.