Building a macro pad inside of a 3D printed enclosure is hardly news these days. Neither is adding 3D printed keycaps to the mix. But if you go as far as [James Stanley] has, and actually print the switches themselves, we’ve got to admit that’s another story entirely.
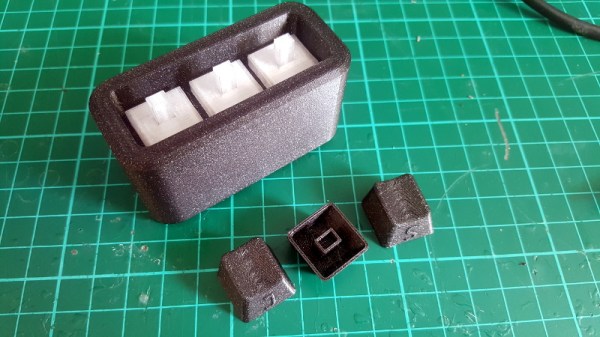
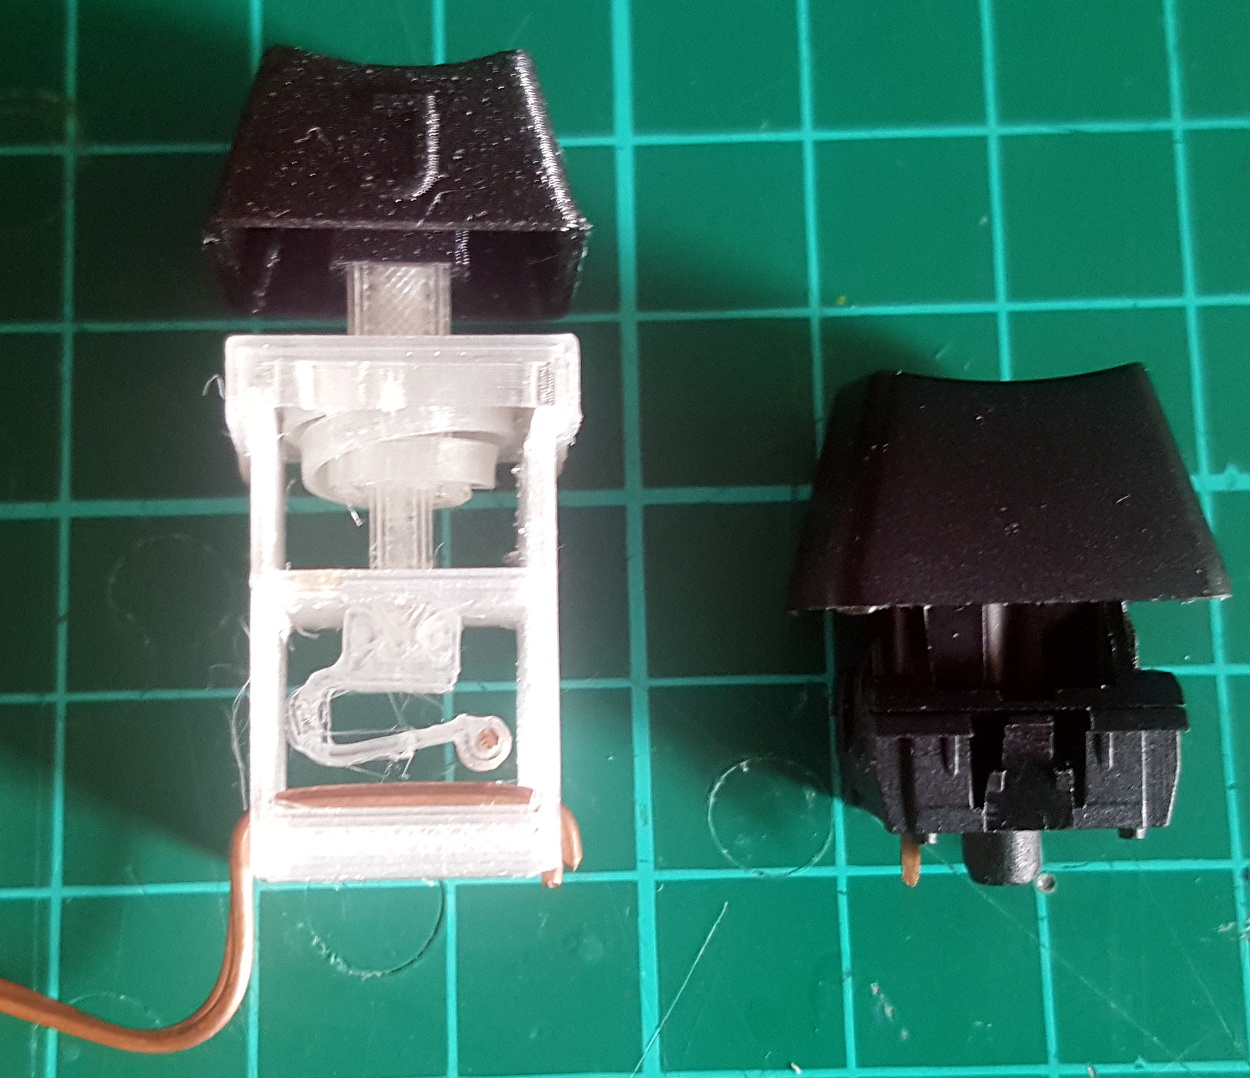 Now you might be wondering how [James] managed to print a mechanical keyboard switch that’s the size of your garden variety Cherry. Well, the simple answer is that he didn’t. While his printed switches have the same footprint as traditional switches, they are twice as tall.
The switches could probably made much smaller if it wasn’t for the printed spring, but using a “real” one would defeat the purpose. Though we do wonder if the mechanical design could be simplified by making it an optical switch.
But can printed switches really stand up to daily use? [James] wondered the same thing, so he built a testing rig that would hit the switches and count how many iterations before they stopped working. This testing seems to indicate that the keys will either fail quickly due to some mechanical defect, or last for hundreds of thousands of presses. So assuming you weed out the duds early, you should be in pretty good shape.
Naturally, there are a few bits of copper inside each printed switch to act as the actual contacts. But beyond that, all you need to build one of these printable pads yourself is a USB-HID capable microcontroller like the Arduino Pro Micro. If you used the ESP32, you could even make it Bluetooth.
Continue reading “3D Printing A Macro Pad, Switches And All”