Computer hardware is by and large compromised out of the box. Whether it’s sloppy factory code, or government-installed backdoors, it’s difficult to trust anything. A great example is that of color laser printers, the vast majority of which place hidden watermarks on printed pages. It’s a somewhat forgotten issue these days, but back in 2005, [bunnie] set out to modify a scanner to help better image and investigate these watermarks.
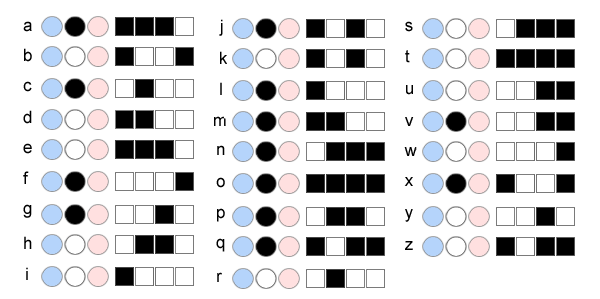
The watermarks in question have been investigated by the EFF, and often, but not always, consist of tiny yellow dots printed on the page. They can store data such as the name of the computer that printed the document, as well as the serial number and model of the printer used. With this functionality baked into the firmware, all prints made on such a printer are compromised.
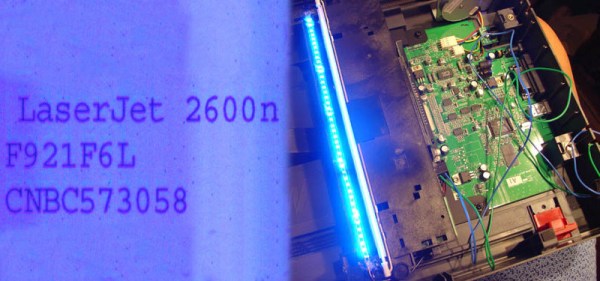
The easiest way to see these watermarks is with blue light, which is reflected by the white paper, but causes yellow dots to show up as dark spots. To make scanning affected documents quick and easy, [bunnie] whipped up a linear LED light array, installing it in a spare slot in his scanner’s light assembly, next to the stock white CCFL. Usage is a little more complex, with the scanner’s automatic calibration getting confused if the blue LEDs are left on at the start of a scan. Instead, the LEDs must be turned off initially, and then powered up once the calibration is complete.
Results are good, with the tiny dots made much clearer in the test scans [bunnie] performed. Unfortunately, the watermarking technology has moved on, and it’s likely that modern printers use a variety of techniques that are even harder to detect. By and large, ransom notes are best made the old fashioned way – by cutting up some old magazines.