Get Your Monitor Transmitting VHF With A Browser Tool

If you’re intending to transmit on the VHF band, you’re probably going to reach for a handheld or some kind of rackmount rig in your ham shack. But you needn’t bother with all that complexity, when you can use the computer on your desk to spit out such signals using a simple browser tool from [Efe].

The concept is straightforward—[Efe]’s tool manipulates pixel clocks in order to create spurious transmissions from your computer’s graphics hardware. The math pencils out pretty easily—multiply the horizontal resolution by the vertical resolution by the refresh rate, while paying attention to the precise timing of the video standard your monitor is using, and you’ve got your transmission frequency. For example, for a screen displaying 1080p at 60 Hz, with the CEA-861 timing standard, your horizontal and vertical resolutions are 2200 and 1125 respectively when paying attention to the requisite blanking intervals. Multiply those by 60 hz, and you’ll find you’re creating a signal at 148.500 MHz. Leverage this by displaying the right pattern of black and white pixels to maximise changes in voltage state on the HDMI or DisplayPort lines, and you might create a strong enough signal that you can actually pick something up. [Efe] created a tool to display these patterns to send simple Morse code messages over VHF just by flickering your screen just right.

You can test the transmitter tool for yourself here, right in your browser. You’ll want to hold your radio’s antenna nice and close to the monitor to see if you can pick up much of a signal. After all, the monitor, connectors, and cable are all built to optimize for clear signal transmission to the display, while preventing signal from leaking out to interfere with surrounding equipment.

Of course, a fair warning—you’re not supposed to intentionally transmit on bands you’re not licensed for, even if it’s incredibly weak and unlikely for anyone else to notice in a scenario like this. Still, it’s an interesting project that shows you just how electromagnetic interference can leak out of just about anything under the right conditions.

The Casio F-91W As A Contactless Payment Device.

The Casio F-91W digital watch is perhaps one of the most successful pieces of consumer electronics ever made, having quietly supplied the essential function of an inexpensive and accurate LCD digital timepiece for many decades. As a result it has a huge following, and we’ve seen plenty of projects based upon it. [Matteo P] has one that we think you’ll like, he’s turned his Casio into a contactless payment device. We missed it when it came out, but sometimes a good project needs sharing.

If you’re a long-time Hackaday reader you may remember our investigation of 13.56 MHz NFC cards in which we showed you a disassembled card in which he antenna was a tuned circuit covering most of the card, with a small coupling coil for the chip. It’s this kind of card he uses, and ends up with an SLA printed front face for the watch that places the chip above the display and puts a pick-up coil around the outside. The most interesting part of the write-up though isn’t in the build, instead it’s the deep-dive into designing the RF parts and ensuring a good coupling at something close to resonance. Read it, if you fancy trying NFC-enabling any other random items.

Meanwhile, if this NFC bug has caught you, don’t forget our rather silly one transistor 125kHz NFC reader challenge.

Thanks to Hackaday alum [John Elliot V] for the tip!

A man's hand is shown holding two small circuit boards, joined together by a central bridge. Each circuit board is connected to four wires and a coaxial antenna cable.

Open-Source ExpressLRS Receiver Reaches For Range

Drone control links are, from a radio signals perspective, nothing short of amazing: using a transmitter capable of transmitting, at most, one watt, a protocol such as ExpressLRS (ELRS) can control a drone over 100 kilometers away. [Stan], who has been building a drone electronics stack from scratch, recently designed four ELRS receivers and went over the principles behind their incredible range.

Up to a certain point, the simplest way to increase a radio’s range is to lower the frequency; lower radio frequencies penetrate better through most materials and don’t attenuate as quickly with distance. However, although ELRS can use 900 MHz bands, [Stan]’s receivers primarily use 2.4 GHz. The major improvement is in modulation: unlike other control protocols, which mostly use frequency modulation, or Wi-Fi, which uses phase and amplitude modulation, ELRS uses Chirp Spread Spectrum modulation. This has a low data rate, but it’s very reliable; every bit is transmitted as a chirp – a linearly rising radio tone – and the data is encoded in the chirp’s starting frequency. To decode this, the receiver multiplies it with an inverse chirp, then takes a fast Fourier transform, revealing the starting frequency. This process has an equivalent gain of 24 dB, which is enough to let it decode signals even below the receiver’s noise floor.

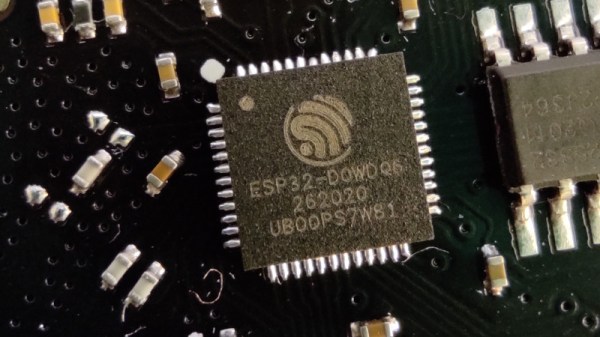
The hardware [Stan] designed to implement this was comparatively simple, just an ESP32 microcontroller, an SX1281 radio chip, and a few peripherals. All four receivers worked in 2.4 GHz, but two had additional 900 MHz antennas. Against RF design convention, one of the receivers used a via to connect the antenna. This would normally cause a significant impedance mismatch, but since there were enough ground-plane vias nearby, the current return path was barely affected; the receiver’s performance hardly changed. In one test, all four receivers maintained a connection at more than five kilometers, despite a forest blocking the signal’s path.

We previously covered ExpressLRS when it was still an emerging technology. To get this kind of range, it builds on LoRa technology, which has reached some impressive distance records.

Thanks to [Keith Olson] for the tip!

555 Makes A Useful Beat Frequency Oscillator

If you’ve got a cheap ham rig, it might not be very practical for you to receive certain transmissions out of the box. However, if you were to hack in a convenient little beat frequency oscillator (BFO) to your rig, then you’d be up and running. Here’s a simple way to do just that with a venerable old part everybody knows and loves.

The build in question concerns the use of a 555 timer IC. It’s seasoned with the right smattering of resistors and capacitors to taste, producing a 455 kHz beat frequency oscillator. This can be injected into the intermediate frequency chain of a receiver, making up for the lack of a steady carrier wave when receiving continuous-wave and single side-band suppressed carrier transmissions. Thanks to a potentiometer in the circuit, it’s tunable, too, from 455 kHz, plus or minus twenty percent or so. Thanks to the versatility of the 555, it’s possible to run the chip on a wide voltage range, anywhere from 4.5 volts to 16 volts, which makes it easy to install in just about any old radio set without requiring adding a specialized power supply. There’s also an alternative design that EDN covered in greater detail some time ago.

If you’re eager to dive into a wider range of transmissions than your radio can currently receive, this old-school ham hack could be just what the shack ordered. We feature plenty of good ham hacks around these parts, and don’t forget—we always want to hear about the freshest ones on the tipsline.

Another Radio On A Chip Design

It used to be a rite of passage to build some sort of AM radio receiver. Many people started with a crystal radio, of course, but you’d graduate to maybe a TRF or superhet design. FM radio projects were not as common, because demodulating an FM signal was harder, as was making things work in the 100 MHz range. These days, though, you can get everything on a chip like the TEA5767, and [turtushig22-blip] has an open design that uses that device on a breakout board, a display, a knob, and an external amplifier. An ESP-32 pulls it together. You can see two videos about the project below.

Unlike older FM radio designs, the TEA5767 doesn’t require any adjustments. RF goes in, and stereo audio goes out. You can control the device through I2C or a 3-wire serial interface.

Continue reading “Another Radio On A Chip Design”

Scanning For Lifesigns With ESP32 And Raspberry Pi

It’s a sci-fi trope that you can ‘scan for life signs’ and detect if there are humans — or suspiciously human-shaped aliens — present, but in real life it’s harder than that. [The Masked Bear]’s wifisense-pi project isn’t really scanning for signs of life, either, unless you happen to consider breathing a sign of life. Even then, it’s not detecting breathing per se, but the subtle motion that goes with it: it’s a very sensitive motion detector that relies on the fact that we fleshy bags of goo disturb WiFi signals with our presence, and motion alters those disturbances.

The device uses an ESP32-S3 to measure the radio channel 100 times per second, while a Raspberry Pi 4 provides the signal processing muscle. It can detect the slightest motions, and even determine the presence of a perfectly still human by their breathing, though you can hide your presence for as long as you can hold your breath.

A single sensor, no matter how sensitive, cannot give position information, and while multiple humans will distort WiFi more than a single one, [The Masked Bear] reports you cannot reliably extract that signal. So this project answers the question: “are there humans in this room?” Or, even more likely, “are there any large breathing animals in this room?” We can’t imagine a 50 kg Mastiff looking any different to this sensor than an equivalent mass of quivering human flesh.

Before you dismiss this as just another motion sensor, keep in mind that it is sniffing the signals already present on the 2.4 GHz band, and, like the WiFi signals themselves, it can work through walls. So we think it’s pretty nifty.

Of course, there are many other ways to detect humans, from machine-learning cameras to millimeter-wave sensors to a simple PIR. This isn’t the first project we’ve seen that uses WiFi like this. It isn’t even the first with an ESP32, but it’s an interesting implementation worth checking out.

Hackaday Europe 2026: High Performance SDR On The Cheap

Radios were once big complicated appliances, full of warm valves and paper-wrapped capacitors, all humming and glowing to capture signals from the aether and spit them out of a speaker. Every component was chosen to build the radio to suit a particular purpose.

These days, we have altogether fancier technology that lets us build radios that can be reconfigured on the fly; software-defined radios, if you will. [Anders Nielsen] has been exploring how to build a high-performance SDR recently, and came to Hackaday Europe 2026 to tell us all about it.

Continue reading “Hackaday Europe 2026: High Performance SDR On The Cheap”