We’ve become used to software-defined radio as the future of radio experimentation, and many of us will have some form of SDR hardware. From the $10 RTL USB sticks through to all-singing, all-dancing models at eye-watering prices, there is an SDR for everyone.
What about the idea of an SDR without any external hardware? Instead of plugging something into your Raspberry Pi, how about using the Pi itself, unmodified? That’s just what the Nexmon SDR project has achieved, and this has been made possible through clever use of the on-board Broadcom 802.11ac WiFi chip. The result is a TX-capable SDR, albeit one only capable of operating within the 2.4 GHz and 5 GHz spectrum used by WiFi.
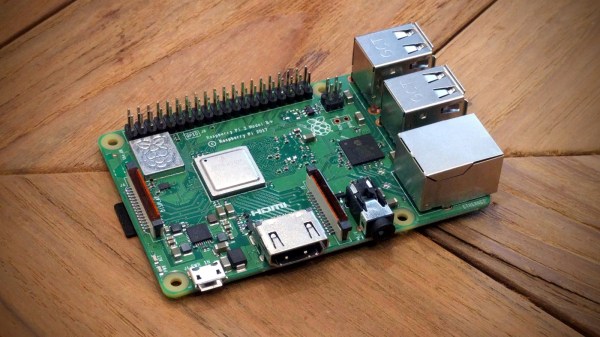
The team had previously worked extensively with the chipset in the Nexus 5 phone, and the SDR extension was first available on that platform. Then along came the Raspberry Pi 3 B+ with a similar-enough WiFi chipset that the same hack was portable to that platform, et voilá: WiFi SDR on a Pi 3 B+.
If you’ve not looked at the Pi 3 B+ we’d like to direct you to our review. If you don’t have a Nexus 5 kicking around, and you’d like to do some WiFi-band SDR work, it’s looking like an amazing deal.
You might remember a time when people thought portable DVD players were a pretty neat idea. In the days before netbooks, cheap tablets, and arguably even the widespread adoption of smartphones, it seemed perfectly reasonable to lug around a device that did nothing but play movies. Today we look back at them as we would flip phones: a quaint precursor to the technology overload we find ourselves in currently. But the fact remains that millions of these comical little devices were pumped into the greedy maw of the consumer electronics market. They’re ripe for the hacking, all you need is some inspiration.
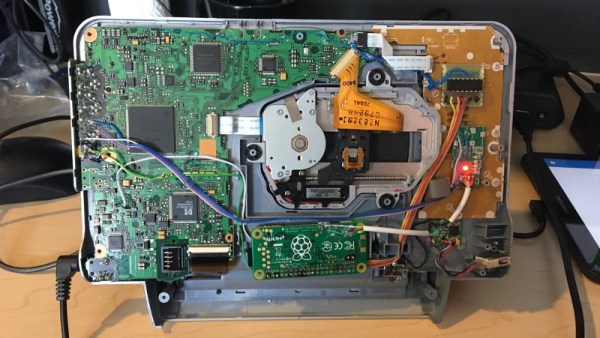
So if this grafting of a portable DVD player and the Raspberry Pi Zero W created by [nutsacrilege] doesn’t get you sniffing around your local second-hand store for a donor device, nothing will. By integrating a Pi running Kodi, the player gets a multi-media kick in the pants that arguably makes up for the rather archaic form factor. Not only can it play a wide array of local and online content, but it could even be used as portable game system if you were so inclined.
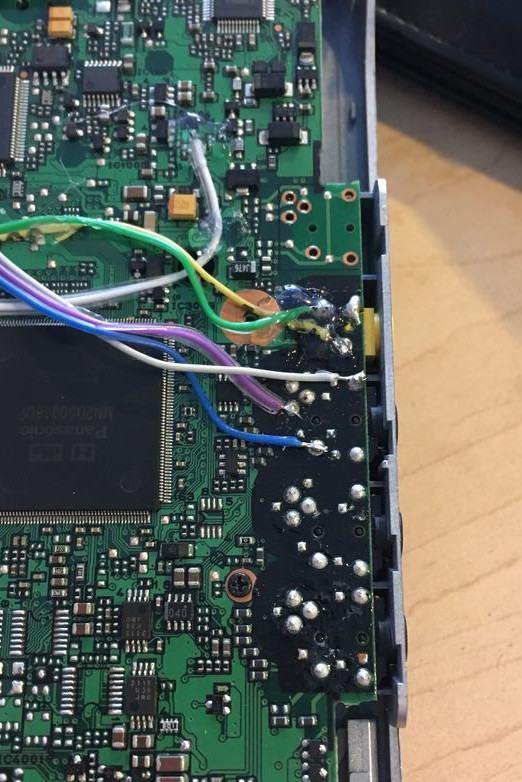
Rest assured, this isn’t some lazy five-minute mod. All of the original physical controls have been made functional by way of a MCP3008 ADC connected to the Pi’s GPIO and some clever Python scripting. Even the headphone jack was made functional by wiring it up to a USB sound card, and by integrating a tiny stripped down hub he was also able to add an external USB port. Who needs discs when you can plug in a flash drive full of content?
Speaking of which, [nutsacrilege] reports that the original functions of the device are still intact after all his modifications. So if you can get the museum to loan you one, you can even play a DVD on the thing as its creators intended.
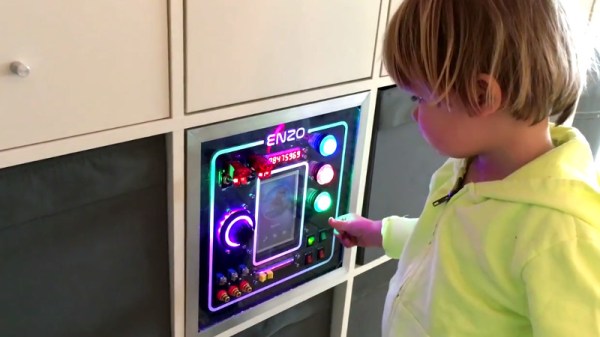
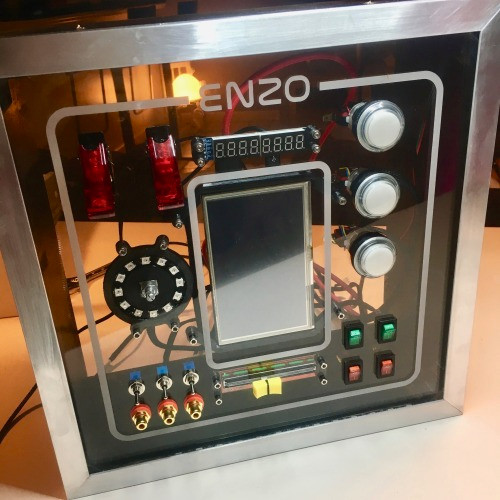
Little humans have a knack for throwing a wrench in the priorities of their parents. As anyone who’s ever had children will tell you, there’s nothing you wouldn’t do for them. If you ever needed evidence to this effect, just take a gander at the nearly year-long saga that chronicles the construction of an activity board [Michael Teeuw] built for his son, Enzo.
Whether you start at the beginning or skip to the end to see the final product, the documentation [Michael] has done for this project is really something to behold. From the early days of the project where he was still deciding on the overall look and feel, to the final programming of the Raspberry Pi powered user interface, every step of the process has been meticulously detailed and photographed.
The construction methods utilized in this project run the gamut from basic woodworking tools for the outside wooden frame, to a laser cutter to create the graphical overlay on the device’s clear acrylic face. [Michael] even went as far as having a custom PCB made to connect up all the LEDs, switches, and buttons to the Arduino Nano by way of an MCP23017 I2C I/O expander.
Even if you aren’t looking to build an elaborate child’s toy that would make some adults jealous, there’s a wealth of first-hand information about turning an idea into a final physical device. It isn’t always easy, and things don’t necessarily go as planned, but as [Michael] clearly demonstrates: the final product is absolutely worth putting the effort in.
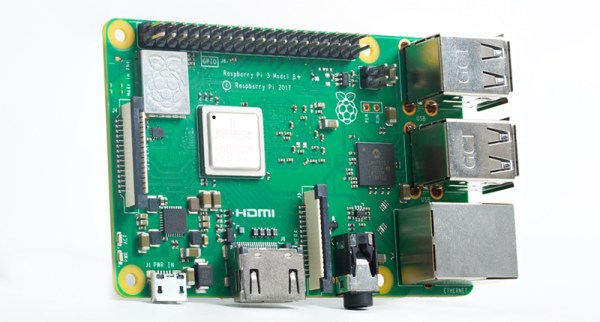
The latest Raspberry Pi, the Pi 3 Model B+, is the most recent iteration of hardware from the Raspberry Pi Foundation. No, it doesn’t have eMMC, it doesn’t have support for cellular connectivity, it doesn’t have USB 3.0, it doesn’t have SATA, it doesn’t have PCIe, and it doesn’t have any of the other unrealistic expectations for a thirty-five dollar computer. That doesn’t mean there wasn’t a lot of engineering that went into this new version of the Pi; on the contrary — the latest Pi is filled with custom silicon, new technologies, and it even has a neat embossed RF shield.
On the Raspberry Pi blog, [James Adams] went over the work that went into what is probably the most significant part of the new Raspberry Pi. It has new, custom silicon in the power supply. This is a chip that was designed for the Raspberry Pi, and it’s a great lesson on what you can do when you know you’ll be making millions of a thing.
The first few generations of the Raspberry Pi, from the original Model B to the Zero, used on-chip power supplies. This is what you would expect when the RAM is soldered directly to the CPU. With the introduction of the Raspberry Pi 2, the RAM was decoupled from the CPU, and that meant providing more power for more cores, and the rails required for LPDDR2 memory. The Pi 2 required voltages of 5V, 3.3V, 1.8V, and 1.2V, and the sequencing to bring them all up in order. This is the job for a power management IC (PMIC), but surprisingly all the PMICs available were more expensive than the Pi 2’s discrete solution.
The MXL7704, with four switching power supplies. The four symmetric gray and brown bits are inductors.
However, where there are semiconductor companies, there’s a possibility of having a custom chip made. [James] talked to [Peter Coyle] of Exar in 2015 (Exar was then bought by MaxLinear last year) about building a custom chip to supply all the voltages found in the Raspberry Pi. The result was the MXL7704, delivered just in time for the production of the Raspberry Pi 3B+.
The new chip takes the 5V in from the USB port and converts that to two 3.3V rails, 1.8V and 1.2V for the LPDDR2 memory, 1.2V nominal for the CPU, which can be raised and lowered via I2C. This is an impressive bit of engineering, and as any hardware designer knows, getting the power right is the first step to a successful product.
With the new MXL7704 chip found in the Raspberry Pi 3B+, the Pi ecosystem now has a simple and cheap chip for all their future revisions. It might not be SATA or PCIe or eMMC or a kitchen sink, but this is the kind of engineering that gives you a successful product rather than a single board computer that will be quickly forgotten.
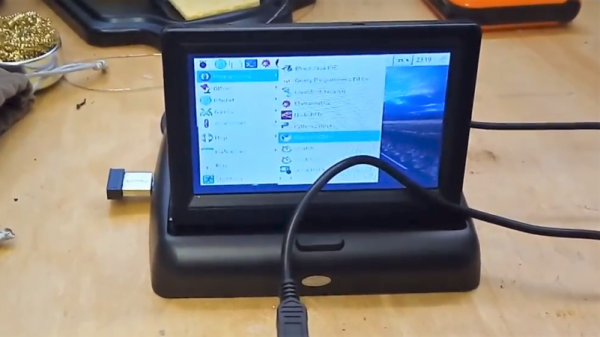
Many of us could use a general-purpose portable workstation, something small enough to pocket but still be ready for a quick troubleshooting session. Terminal apps on a smartphone will usually do the job fine, but they lack the panache of this pocketable pop-top Raspberry Pi workstation.
It doesn’t appear that [Michael Horne] has a specific mission in mind for his tiny Linux machine, but that’s OK — we respect art for art’s sake. The star of the show is the case itself, a unit intended for dashboard use with a mobile DVD player or backup camera. The screen is a 4.3″ TFT with a relatively low-resolution, so [Michael] wasn’t expecting too much from it. And he faced some challenges, like dealing with the different voltage needs for the display and the Raspberry Pi Zero W he intended to stuff into the base. Luckily, the display regulates the 12-volt supply internally to 3.3-volts, so he just tapped into the 3.3-volt pin on the Pi and powered everything from a USB charger. The display also has some smarts built in, blanking until composite video is applied, which caused a bit of confusion at first. A few case mods to bring connectors out, a wireless keyboard, and he had a nice little machine for whatever.
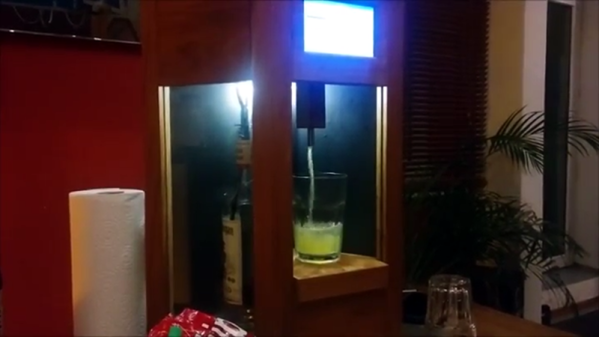
Science fiction has long had the idea that a good drink should just appear from a sliding panel in a wall. Bartending is to be the preserve of robots and AIs – manual control is for the past, and in an effort to continue our progress to towards that sci-fi future, Reddit user [HighwingZ] has built a beautiful machine that mixes and serves drinks.
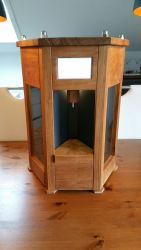
Instead of a sliding wall panel, [HighwingZ] has built a hexagonal container. Five of the six sides contain bottles to fill the drink with, the last panel contains the spigot and a spot for the glass. The machine works by weighing the liquid that gets poured into the glass using a load cell connected to a HX711 load cell amplifier. An aquarium pump is used to push air into whichever bottle has been selected via some magnetic valves which forces the liquid up its tube and into the glass. A simple touch screen UI is used so the user can select which drink and how much of it gets poured. All of this is connected to a Raspberry Pi to control it all.
The whole thing is built into a great looking wooden showcase with see-through sides, so you can see the bottles to be used to make the drinks. [HighwingZ] put the Python code that controls everything on github for anyone wanting to make their own. There are a few cocktail making hacks on the site, like this one, or this one if you need some inspiration.
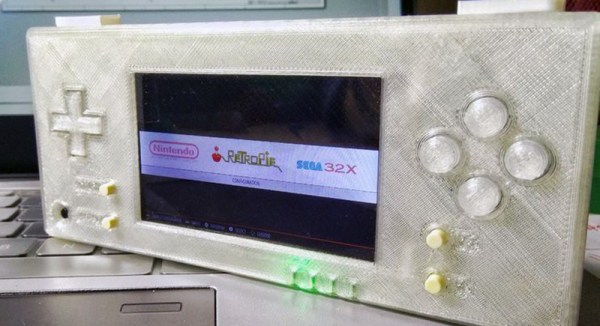
The Raspberry Pi has become the best video game console on the planet. With RetroPi, anyone can play Super Mario 3, Doctor Mario, and even Doki Doki Panic. Adafruit’s PiGRRL Zero and [Wermy]’s reconfabulation of an old brick Game Boy to house a Raspi Zero and display have made the Raspberry Pi portable, along with all those retro games we love so dearly.
There’s a problem with these builds, though. They only use the Raspberry Pi Zero, and with that the limitations on emulation performance, and the Raspi 3 is far too big for a portable console. What’s the solution? It’s the greatest homebrew console ever created. For this year’s Hackaday Prize, [DeanChu] is building the Retro-CM3. It’s a retro handheld with a 3D printed enclosure, that’s powered by the Raspberry Pi Compute Module 3. Stand back, folks. We have a winner that will top the Raspberry Pi and 3D printing subreddits.
The key feature for this build is, of course, the raw processing power of the Raspberry Pi Compute Module 3. This is a Raspberry Pi 3 with 4 GB of eMMC stuffed onto a board that fits into an SODIMM socket. The pins on this device give you access to the GPIOs and the DSI connector. All you really need to turn this into an amazing vintage emulation console is a breakout board with a few buttons, power supply, and a display.
The extra components for this build include a 3.2 inch LCD using the DPI interface. There’s a speaker, and a 2000mAh battery. The real tricky part here is the custom PCB, breaking out the DPI pins on the Compute Module, adding a small speaker, and throwing a small STM32 to read the buttons. It’s an entire system, ready to be housed in a 3D printed enclosure.
This is, simply, the best Raspberry Pi portable you’ll ever see, at least until we get a Rasberry Pi Zero with the capabilities of the Pi 3. It’s an excellent use of the very small Compute Module, and one of the most polished Hackaday Prize entries we’ve seen thus far.

 Instead of a sliding wall panel, [HighwingZ] has built a hexagonal container. Five of the six sides contain bottles to fill the drink with, the last panel contains the spigot and a spot for the glass. The machine works by weighing the liquid that gets poured into the glass using a load cell connected to a HX711 load cell amplifier. An aquarium pump is used to push air into whichever bottle has been selected via some magnetic valves which forces the liquid up its tube and into the glass. A simple touch screen UI is used so the user can select which drink and how much of it gets poured. All of this is connected to a Raspberry Pi to control it all.