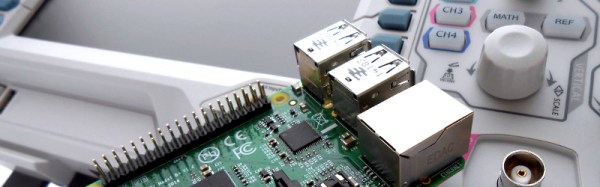
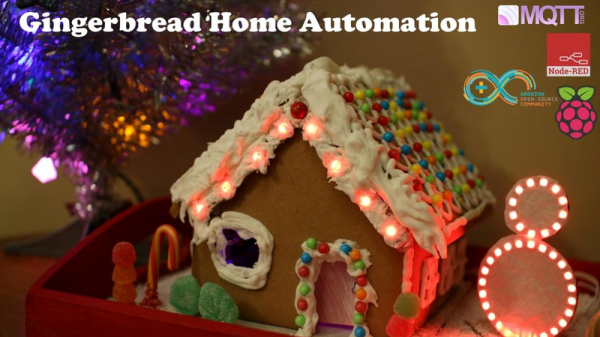
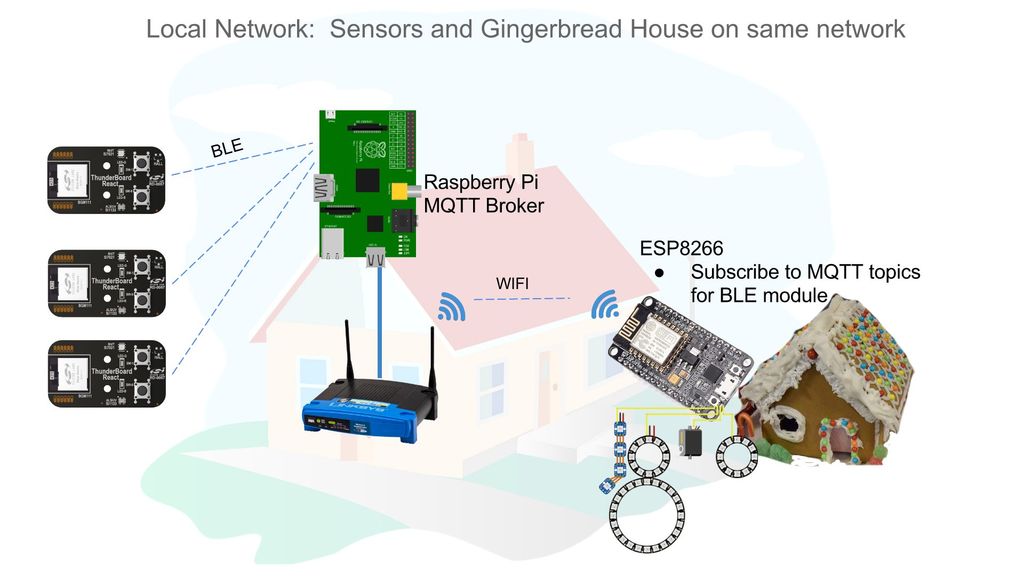
The Raspberry Pi single board computer has been an astounding success since its launch nearly five years ago, to the extent that as of last autumn it had sold ten million units with no sign of sales abating. It has delivered an extremely affordable and pretty powerful computer into the hands of hobbyists, youngsters, hackers, engineers and thousands of other groups, and its open-source Raspbian operating system has brought a useful Linux environment to places we might once have thought impossible.
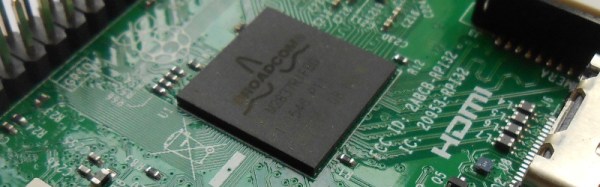
The previous paragraph, we have to admit, is almost true. The Pi has sold a lot, it’s really useful and lots of people use it, but is Raspbian open-source? Not strictly. Because the Broadcom silicon that powers the Pi has a significant amount of proprietary tech that the chipmaker has been unwilling to let us peer too closely at, each and every Raspberry Pi operating system has shipped with a precompiled binary blob containing the proprietary Broadcom code, and of course that’s the bit that isn’t open source. It hasn’t been a problem for most Pi users as it’s understood to be part of the trade-off that enabled the board’s creators to bring it to us at an affordable price back in 2012, but for open-source purists it’s been something of a thorn in the side of the little board from Cambridge.
This is not to say that all is lost on the blob-free Pi front. Aided by a partial pulling back of the curtain of secrecy by Broadcom in 2014, work has quietly been progressing, and we now have the announcement from [Kristina Brooks] that a minimal Linux kernel can boot from her latest open firmware efforts. You won’t be booting a blob-free Raspbian any time soon as there are bugs to fix and USB, DMA, and video hardware has still to receive full support, but it’s a significant step. We won’t pretend to be Broadcom firmware gurus as we’re simply reporting the work, but if it’s your specialty you can find the code in its GitHub repository. Meanwhile, we look forward to future progress on this very interesting project.
We reported on the partial Broadcom release back in 2014. At the time, the Raspberry Pi people offered a prize to the first person running a native Quake III game on their hardware, sadly though they note the competition is closed they haven’t linked to the winning entry.
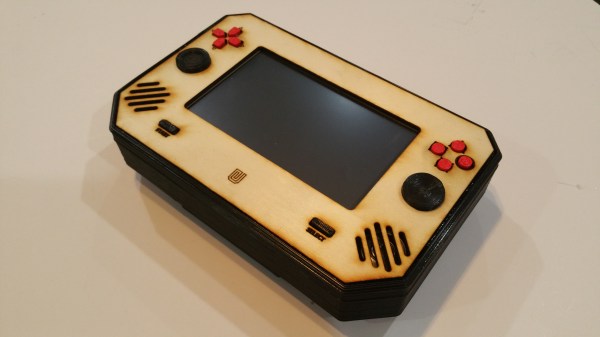
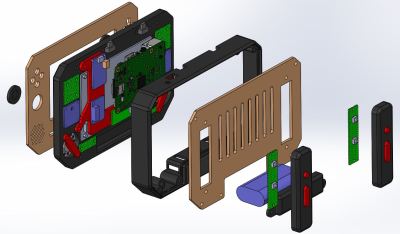 For starters, the laser cut wood case was custom-made. From there, all of the PCBs were fitted including specific ones to handle each set of buttons (complete sets of D-pads, shoulder buttons, and joysticks) and another for the 5″ HDMI screen. It has stereo speakers and its own headphone jack (to the envy of all new iPhone owners), and is powered from a Raspberry Pi 2 running Retropie 4.1. The battery pack shouldn’t leave you stranded, either, especially not if you grew up playing the Sega Game Gear.