A Merciless Environmental Monitoring System

We’ve seen plenty of environmental monitoring setups here on Hackaday — wireless sensors dotted around the house, all uploading their temperature and humidity data to a central server hidden away in some closet. The system put together by [Andy] from Workshopshed is much the same, except this time the server has been designed to be as bright and bold as possible.

The use of Mosquitto, InfluxDB, Node Red, and Grafana (M.I.N.G) made [Andy] think of Ming the Merciless from Flash Gordon, which in turn inspired the enclosure that holds the Raspberry Pi, hard drive, and power supply. Some 3D printed details help sell the look, and painted metal mesh panels make sure there’s plenty of airflow.

While the server is certainly eye-catching, the sensors themselves are also worth a close look. You might expect the sensors to be based on some member of the ESP family, but in this case, [Andy] has opted to go with the Raspberry Pi Pico. As this project pre-dates the release of the wireless variant of the board, he had to add on an ESP-01 for communications as well as the DTH11 temperature and humidity sensor.

For power each sensor includes a 1200 mAh pouch cell and a Pimoroni LiPo SHIM, though he does note working with the Pico’s energy saving modes posed something of a challenge. A perfboard holds all the components together, and the whole thing fits into an understated 3D printed enclosure.

Should you go the ESP8266/ESP32 route for your wireless sensors, we’ve seen some pretty tidy packages that are worth checking out. Or if you’d rather use something off-the-shelf, we’re big fans of the custom firmware developed for Xiaomi Bluetooth thermometers.

Continue reading “A Merciless Environmental Monitoring System”

Self-Hosted Pi Pico Development

Older readers and those with an interest in retrocomputing may remember the days when a computer might well have booted into a BASIC interpreter. It was simultaneously a general purpose device that could run any software it would load, and also a development environment. Not something that can be said for today’s development boards which typically require a host computer on which to write code. Have we lost something along the way? Perhaps an answer to that question can be found in [lurk101]’s self-hosted development environment for the Raspberry Pi Pico.

It presents itself as a shell, with a flash file system, a port of the vi editor, and a C compiler. We might think of vi as being more at home on a UNIX-derived system, but in this case it’s a port of the vi included in BusyBox. Meanwhile the compiler comes from amacc project.

Of course, this still requires a terminal of some type which in practice will mean a host computer. But the feat is nevertheless an interesting one, and we can see that it might not be impossible given the Pico’s surprising versatility to being some of the terminal features onto the chip itself.

It’s worth noting that this isn’t the first attempt we’ve seen to put a command line interface on a development board.

CV Based Barking Dog Keeps Home Secure, Doesn’t Need Walking

Meet [Tanner]. [Tanner] is a hacker who also appreciates the security of their home while they’re out of town. After doing some research about home security, they found that it doesn’t take much to keep a house from being broken into. It’s true that truly determined burglars might be more difficult to avoid. But, for the opportunistic types who don’t like having their appendages treated like a chew toy or their face on the local news, the steaks are lowered.  All it might take is a security camera or two, or a big barking dog to send them on their way. Rather than running to the local animal shelter, [Tanner] used parts that were already sitting around to create a solution to the problem: A computer vision triggered virtual dog.

Continue reading “CV Based Barking Dog Keeps Home Secure, Doesn’t Need Walking”

Custom Raspberry Pi Case Shows The Whole Workflow

If you are a process junkie and love seeing the end-to-end of how a thing is made and with what tools, then watch [Michael Klements] show off his Raspberry Pi case design. His case has quite a few cool-looking elements to it, and incorporates 3D printing as well as laser-cut and clear bent acrylic for a gorgeous three-quarter view.

[Michael]’s write-up (and accompanying video, embedded below) are partly a review of his Creality 3D printer, and partly a showcase of his Raspberry Pi case design (for which he sells the design files for a small fee on his Etsy store.) But the great part is seeing the creation of every piece that goes into the end product. Not everyone is familiar with the way these tools work, or what they can create, so it’s nice to see attention paid to that side of things.

Both the blog post and the video nicely show off what goes into every part. The video opens with unpacking and setting up the 3D printer (skip ahead to 4:58 if you aren’t interested), followed by printing the parts, laser-cutting the acrylic on a K40 laser cutter, bending the acrylic using a small hand tool, and finally, assembling everything. For the curious, there are also links to the exact parts and equipment he uses.

Like we said, it’s part 3D printer review and part showcase of a design he sells, but it’s great to see each of the parts get created, watch the tools get used, and see the results come together in the final product. And should you wish to go in the opposite direction? A one-piece minimalist case for your Raspberry Pi is only a 3D printer away.

Continue reading “Custom Raspberry Pi Case Shows The Whole Workflow”

Digital “Toy” Camera, Made For Tilt-Shift And Other Analog-Like Experimenting

Like many others, [volzo] loves playing with photography in a playful and experimental way. Oddball lenses, vintage elements, and building from kits is what that world looks like. But that kind of stuff is really the domain of film cameras, or at least it was until [volzo] created his Digital Toy Camera design. The result? A self-built, lomography-friendly digital camera that allows for all kinds of weird and wonderful attachments and photo shenanigans.

3D-printed mounts and magnetic attachment makes swapping parts a breeze.

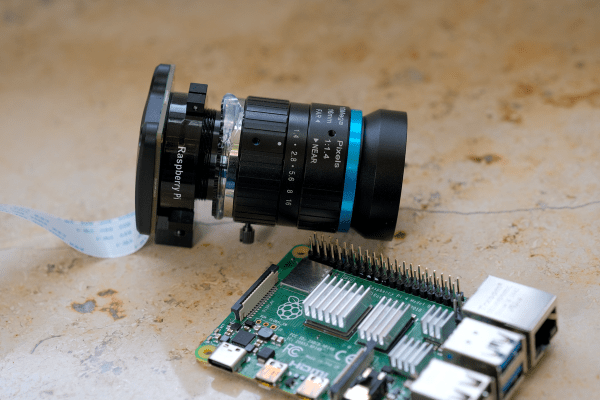
To make a DIY digital camera that allowed that kind of play, the first problem [volzo] had to solve was deciding on an image sensor. It turns out that sourcing image sensors as an individual is a pretty cumbersome process, and even if successful, one still needs to write a driver and create things from the ground up. So, the guts of [volzo]’s creations use the Raspberry Pi and camera sensor ecosystem and M12 lenses, a decision that allows him to focus on the rest of the camera.

3D printing, a bit of CNC machining, and some clever design yields a “toy” camera: simple, inexpensive, and enabling one to take a playful and experimental approach to photography. The design files are available on GitHub, and there are some neat elements to the design. Magnetic mounts allow for easy swapping of lens assemblies, and a M12 x 0.75 tap cuts perfect threads into 3D-printed pieces for M12 lenses.

Heat-set inserts also provide robust fastening that can hold up to disassembly and re-assembly (and don’t miss that our own [Joshua Vasquez] has shared how best to design for and use heat-set inserts.)

[volzo] has a fantastic video to accompany his project; give it a watch (embedded below, under the page break) and see if you don’t come away with some inspiration of your own.

Continue reading “Digital “Toy” Camera, Made For Tilt-Shift And Other Analog-Like Experimenting”

Stratum 1 Grandmaster Time Server On A Budget

[Jeff Geerling] has been following the various open source time projects for some time now, and is finally able to demonstrate a working and affordable solution for nanoseconds-accurate timekeeping in your local lab. The possibility of a low-cost time server came about with the introduction of the Raspberry Pi CM4 compute module back in Oct 2020, whose Broadcom network chip (BCM54210PE) supports PTP (Precision Time Protocol, IEEE-1588) 1PPS output and hardware-based time stamping. Despite the CM4 data sheet specifying PTP support, it wasn’t available in the kernel. An issue was raised in Feb last year, and Raspberry Pi kernel support was finally released this month.

[Jeff] demonstrates how easy it is to get two CM4 modules to synchronize to within a few tens of nanoseconds in the video below the break. That alone can be very useful on many projects. But if you want really stable and absolute time, you need a stratum 1 external source. These time servers, called grandmasters in PTP nomenclature, have traditionally been specialized pieces of kit costing tens of thousands of dollars, using precision oscillators for stability and RF signals from stratum 0 devices like navigation satellites or terrestrial broadcast stations to get absolute time. But as Lasse Johnsen, who worked on the kernel updates remarks in the video:

In 2022 these purpose-built grandmaster clocks from the traditional vendors are about as relevant as the appliance web servers like the Raq and Qube were back in 1998.

It is now possible to build your own low-cost stratum 1 time server in your lab from open source projects. Two examples shown in the video. The Open Time Server project’s Timecard uses a GNSS satellite receiver and a Microchip MAC-SA5X Rubidium oscillator. If that’s overkill for your projects or budget, the Time4Pi CM4 hat is about to be release for under $200. If accurate time keeping is your thing, the technology is now within reach of the average home lab. You can also add PTP to a non-CM4 Raspberry Pi — check out the Real-Time HAT that we covered last year.

Continue reading “Stratum 1 Grandmaster Time Server On A Budget”

Part of a picture showing all kinds of different CAN devices in a car

CAN Peripheral For RP2040, Courtesy Of PIO

[Kevin O’Connor] writes to us about his project, can2040adding CAN support to the RP2040. The RP2040 doesn’t have a CAN peripheral, but [Kevin] wrote code for the RP2040’s PIO engine that can receive and send CAN packets. Now we can all benefit from his work by using this openly available CAN driver. This library is written in C, so it’s a good fit for the lower-level hackers among us, and in all likelihood, it wouldn’t be hard to make a MicroPython wrapper around it.

The CAN bus needs a peripheral for the messages to be handled properly, and people have been using external chips for this purpose until now. These chips, [Kevin] tells us, have lately been unavailable due to the chip shortage, making this project more valuable. The documentation is extensive and accessible, and [Kevin] details how to best use this driver. With such a tool in hand, you can now turn your Pico into a CAN tinkering toolkit, or wire up some CAN devices for use in your own projects!

[Kevin] says this code is already being used in Klipper, a framework powering 3D printers and other machines like them. As for your own purposes, you can absolutely use such a CAN tool to hack on your car – here’s a treasure trove of car hacking documentation, by the way! Thanks to the PIO engine, there seems to be no end to the RP2040’s versatility – you can even drive HDMI monitor with this PIO-based DVI code.

Continue reading “CAN Peripheral For RP2040, Courtesy Of PIO”