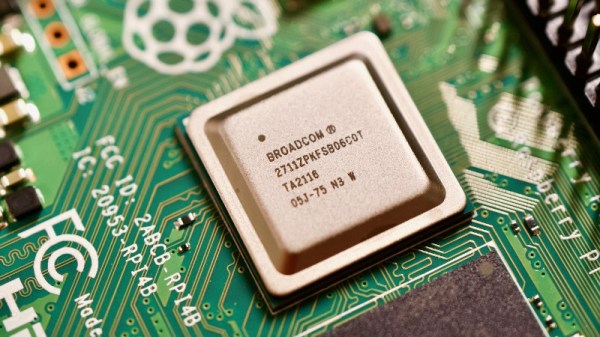
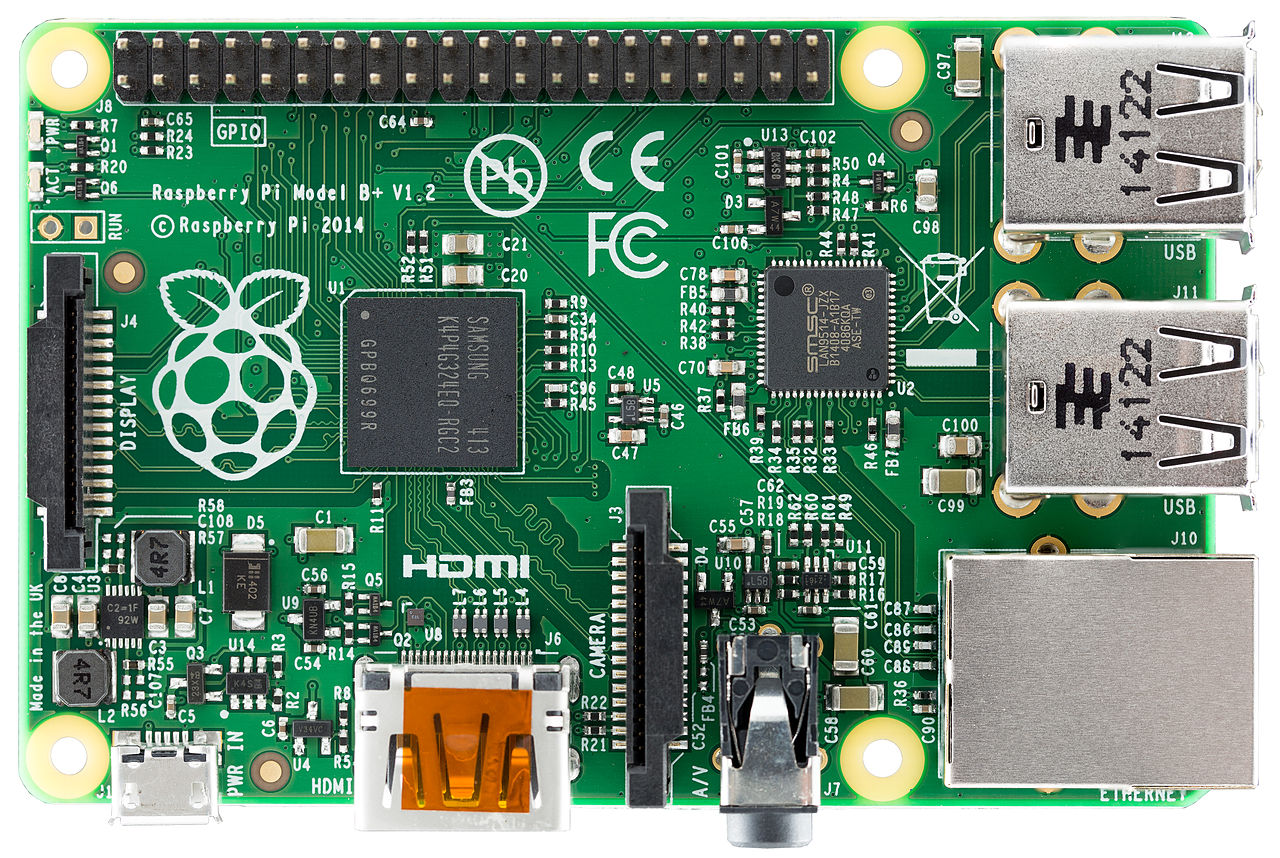
Breadboard containing speech synthesis chip

RPi Python Library Has Retro Chiptunes And Speech Covered

The classic SP0256-AL2 speech chip has featured a few times on these pages, and if you’ve not seen the actual part before, you almost certainly have heard the resulting audio output. The latest Python library from prolific retrocomputing enthusiast [Nick Bild] brings the joy of the old chip to the Raspberry Pi platform, with an added extra trick; support for the venerable AY-3-8910 sound generator as well.

The SP0256-AL2 chip generates vaguely recognisable speech using the allophone system. Allophones are kind of like small chunks of speech audio which when reproduced sequentially, result in intelligible phonemes that form the basis of speech. The chip requires an external device to feed it the allophones at a regular rate, which is the job of his Gi-Pi library.

This speech synthesis technology is based on Linear-predictive coding, which is used to implement a human vocal tract model. This is the same coding method utilized by the first generation of GSM digital mobile phones, implementing a system known as Full-Rate. Both an LPC encoder and an LPC decoder are present on the handset. The LPC encoder takes audio in from the user, breaks it into the tiny constituent parts of speech, and then simply sends a code representing the audio block, but not the actual audio. Obviously there are a few more parameters sent as well to adjust the model at the receiving side. The actual decoding side is therefore not all that dissimilar to what the AY-3-8910 and related devices are doing, except you the user have to create the list of audio blocks up-front and feed the chip at the rate it demands.

Continue reading “RPi Python Library Has Retro Chiptunes And Speech Covered”

Espresso maker with added nixie flair

AI Powered Coffee Maker Knows A Bit Too Much About You

People keep warning that Skynet and the great robot uprising is not that far away, what with all this recent AI and machine-learning malarky getting all the attention lately. But we think going straight for a terminator robot army is not a very smart approach, not least due to a lack of subtlety. We think that it’s a much better bet to take over the world one home appliance at a time, and this AI Powered coffee maker might just well be part of that master plan.

Raspberry Pi Zero sitting atop the custom nixie tube driver PCB
PCB stackup with Pi Zero sat atop the driver / PSU PCBs

[Mark Smith] has taken a standard semi-auto espresso maker and jazzed it up a bit, with a sweet bar graph nixie tube the only obvious addition, at least from the front of the unit. Inside, a Raspberry Pi Zero sits atop his own nixie tube hat and associated power supply. The whole assembly is dropped into a 3D printed case and lives snuggled up to the water pump.

The Pi is running a web application written with the excellent Flask framework, and also an additional control application written in python. This allows the user to connect to the machine via Ethernet and see its status. The smarts are in the form of a simple self-grading machine learning algorithm, that takes a time series as an input (in this case when you take your shots of espresso) and after a few weeks of data, is able to make a reasonable prediction as to when you might want it in the future. It then automatically heats up in time for you to use the machine, when you usually do, then cools back down to save energy. No more pointless wandering around to see if the machine is hot enough yet – as you can just check the web page and see from the comfort of your desk.

But that’s not all [Mark] has done. He also improved the temperature control of the water boiler, and added an interlock that prevents the machine from producing a shot until the water temperature is just so. Water level is indicated by the glorious bar graph nixie tube, which also serves a few other user indication duties when appropriate. All in all a pretty sweet build, but we do add a word of caution: If your toaster starts making an unreasonable number of offers of toasted teacakes, give it a wide berth.

A Raspberry Pi next to a small circuit board

An Inexpensive FM Receiver For The Raspberry Pi

At this point, there are no shortage of impressive hacks for the Raspberry Pi. [Dilshan Jayakody] recently documented his experience in designing and building an inexpensive FM Stereo Receiver for the Pi platform, and the results are impressive.

Quite a few FM receiver projects center around the RDA5807 or TEA5767 ICs, however [Dilshan] has used the QN8035 by Quintic Corporation in his build. A handful of discrete components on a pleasing single-sided PCB is all that is needed to interface the QN8035 with the Pi’s I2C bus.

After demonstrating that the FM tuner could be, well, tuned at the command line, [Dilshan] then coded a smart looking GUI application that makes tuning a breeze. The software allows the listener to manually and automatically scan through FM stations, decode program service data, control the volume, and display the RSSI and SNR readings from the tuner.

As we reported earlier, FM radio is on a slow decline into obsolescence. This latest project isn’t aiming to break new ground, however its simplicity and inexpensive components are the perfect combination for beginner hackers and radio enthusiasts alike. More details can be found over on Hackaday.io. The schematic, source code and bill of materials can be found on GitHub.

Continue reading “An Inexpensive FM Receiver For The Raspberry Pi”

Upgrade Board Adds GPIO Pins To Your Replica PDP-11

Like many Hackaday readers, [Steven Stallion] has had his eyes on the replica PDP-11 created by [Oscar Vermeulen] for some time now, and this summer he finally got the opportunity to build one himself. But while most owners might be content to just watch the Raspberry Pi based faux-retro computer blink away on a shelf, he wanted to explore putting the machine to more practical use. The end result is the PiDP-11 I/O Expander,  an add-on that lets the modern minicomputer interact with the world around it.

Developed after some discussion with [Oscar] himself, the Microchip MCP23016 based expander board fits neatly onto the PiDP-11 PCB, and [Steven] has made sure his installation guide meshes well with the replica’s documentation. The Pi’s I2C bus is actually broken out on the original PCB, so you just need to solder a header on and run some jumpers to where the expander is mounted. You’ll need to pull 5 V as well, and the installation guide has a few tips on convenient connection points.

The installed PiDP-11 I/O Expander

Each expander board gives you 16 GPIO pins which can be accessed over I2C, including support for interrupts which has been connected to GPIO 19 on the Raspberry Pi. [Steven] notes that you should be able to stack multiples of his expander up should you need even more free pins, though some fiddling with pull-up resistors and I2C addresses will likely be necessary.

The PCBs for the expander have been released under the two clause BSD license, so you’re free to spin up your own copies however you see fit. But if you’d like to save some time, [Steven] is offering assembled boards on Tindie.

Since [Oscar] first teased it at the 2015 Hackaday Supercon, we’ve been enamored with his fantastic PDP-11 replica. We’re always glad to see when somebody has picked up one of these wonderful kits, and doubly so when they’ve figured out a way to expand it in unexpected ways.

A Simpsons TV For A Golden Age

While the pace of technology continues to advance at breakneck speed, certain things in the past are left behind largely subject to the whims of nostalgia. Televisions, for example, are lighter, cheaper, and bigger than they were in the early 90s, but they did have a certain design aesthetic that doesn’t exist anymore. Meanwhile, Simpsons episodes have been (arguably) on the decline since the golden age of the 90s, so [buba447] decided to combine these two facets of a nostalgic past into a custom TV that only plays these older Simpsons episodes.

Update: Now there’s a build guide.

The TV is 3D printed but takes design cues from CRT-based technology from decades past. It even has working knobs emblematic of that era as well. Inside the “television” is a Raspberry Pi which is hooked up to a small screen. The Pi powers up and automatically starts playing Simpsons episodes once it boots. There is a power button at the top of the TV which mutes the sound and also turns off the display. As an added touch, the display outputs in 640×480 resolution, which is also somewhat historically accurate, even if the TV itself is much smaller than its ancient relatives.

Of course, the TV only plays episodes from The Simpson’s first eleven seasons, which includes all of the episodes of The Simpson’s golden era (and a few extra) and omits those episodes from the modern era, which will please certain Simpsons fans as well. This actually isn’t the first time we’ve seen a 24 hour Simpsons device. This Pi-based build serves up Simpsons episodes nonstop as well, but sends them out over the airwaves instead.

Continue reading “A Simpsons TV For A Golden Age”

magicBlueSmoke-piStick-featured

How Do You Make A Raspberry Pi On A Stick?

We agree with [magic-blue-smoke] that one of the only things more fun than a standard Raspberry Pi 4 is the Compute Module form factor. If they are not destined to be embedded in a system, these need a breakout board to be useful. Each can be customized with a myriad board shapes and ports, and that’s where the real fun starts. We’ve already seen projects that include custom carrier boards in everything from a 3D Printer to a NAS and one that shows we can build a single-sided board at home complete with high-speed ports.

[magic blue smoke] used this ability to customize the breakout board as an opportunity to create a hackable media player “stick” with the Raspberry Pi built-in. We love that this Raspberry Pi CM4 TV Stick eliminates all the adapters and cables usually required to connect a Pi’s fiddly micro HDMI ports to a display and has heat sinks and an IR receiver to boot. Like a consumer media player HDMI stick, all you need to add is power. Continue reading “How Do You Make A Raspberry Pi On A Stick?”

Dedicated box to play new videos from a handful of content creators.

Dedicated Box Makes YouTube More TV-Like

[Exposed Wire] is a huge fan of YouTube and consumes a lot of content. If that sounds familiar, maybe you should build a dedicated YouTube box, too. You get to push buttons, there’s LEDs, and you can take a break from other screens to look at this one for a while. [Exposed Wire] wanted to make it easier to watch the latest videos from their favorite creators, but we would argue that this is more fun, too.

The Rasberry Pi 4 inside checks every five minutes for new videos by keeping track of the creator’s total number of videos in a text file and doing a comparison. If one of the channels has a new video, then the corresponding LED lights up and the new video’s URL is linked to the button. Press the button and the Raspi opens the browser, goes the the URL, maximizes the video, turns off the LED, and updates the video count in the text file.

We like the construction job here. The 1/4″ MDF walls are connected by 3D-printed L-brackets in PETG. At first, [Exposed Wire] mounted the LEDs and buttons to a PCB, but that was really fiddly so they printed panels instead. Combined with the bracket around the screen, the finished build looks good. Check out the build montage after the break.

Regular old YouTube videos not doing it for you anymore? Try watching them at low resolution on an LED matrix.

Continue reading “Dedicated Box Makes YouTube More TV-Like”