Fixing A Cheap UPS HAT For Your Raspberry Pi With A Tiny Daemon

An uninterruptible power supply (UPS) isn’t something solely to have hooked up to your desktop PC. Your Raspberry Pi SBC might also benefit from it. Yet the available options aren’t too great, or are too expensive. This leads folk including [Joachim Baumann] to modify cheerfully cheap Chinese UPS HAT boards such as the Geekworm UPS HAT to fix its myriad of issues and missing features.

Inspired by a number of other hacks on this board which fixed things like needing to push a button on the UPS to boot the Raspberry Pi, [Joachim] set out to make a similar ATtiny-based solution that would address all issues, above all the fact that this Geekworm UPS does not detect when the connected SBC has turned off and will happily run the lithium battery pack dry. Finding a blog post by Simon who had reverse-engineered the board previously was immensely helpful. Continue reading “Fixing A Cheap UPS HAT For Your Raspberry Pi With A Tiny Daemon”

Vintage Car Radio Now Plays Games And Chiptunes

[MisterM] seems to specialize in squeezing new electronics into old but good-looking technology. His latest creation focuses on a space-age specimen: an interesting car radio from 1963 that could be pulled out from the dashboard and taken along wherever. The beat goes on, thanks to a shiny built-in speaker on the bottom.

He replaced the non-working radio guts with a Raspberry Pi 3 running RetroPie and a Picade controller board. A Pimoroni Blinkt LED strip behind the radio dial glows a different color for each emulated console, which we think is a nice touch. [MisterM] built this console to play in his workshop, and even made a dock for it. But in a lovely homage to the original radio, it’s self-contained and can be taken to the living room or to a friend’s house. There’s also a USB port for whenever player two is ready to enter. For [MisterM]’s next trick, he’ll be converting an 80s joystick.

We love that [MisterM] repurposed the dials as housings for start and select buttons. As he points out, this keeps them out of the way while he’s wildly working the controls. Just enter the Konami Code to unlock the build video below.

Do you dream of playing Donkey Kong absolutely everywhere? Check out the ultraportable mintyPi 2.0.

Continue reading “Vintage Car Radio Now Plays Games And Chiptunes”

Build A Fungus Foraging App With Machine Learning

As the 2019 mushroom foraging season approaches it’s timely to combine my thirst for knowledge about low level machine learning (ML) with a popular pastime that we enjoy here where I live. Just for the record, I’m not an expert on ML, and I’m simply inviting readers to follow me back down some rabbit holes that I recently explored.

But mushrooms, I do know a little bit about, so firstly, a bit about health and safety:

  • The app created should be used with extreme caution and results always confirmed by a fungus expert.
  • Always test the fungus by initially only eating a very small piece and waiting for several hours to check there is no ill effect.
  • Always wear gloves  – It’s surprisingly easy to absorb toxins through fingers.

Since this is very much an introduction to ML, there won’t be too much terminology and the emphasis will be on having fun rather than going on a deep dive. The system that I stumbled upon is called XGBoost (XGB). One of the XGB demos is for binary classification, and the data was drawn from The Audubon Society Field Guide to North American Mushrooms. Binary means that the app spits out a probability of ‘yes’ or ‘no’ and in this case it tends to give about 95% probability that a common edible mushroom (Agaricus campestris) is actually edible. 

The app asks the user 22 questions about their specimen and collates the data inputted as a series of letters separated by commas. At the end of the questionnaire, this data line is written to a file called ‘fungusFile.data’ for further processing.

XGB can not accept letters as data so they have to be mapped into ‘classic LibSVM format’ which looks like this: ‘3:218’, for each letter. Next, this XGB friendly data is split into two parts for training a model and then subsequently testing that model.

Installing XGB is relatively easy compared to higher level deep learning systems and runs well on both Linux Ubuntu 16.04 and on a Raspberry Pi. I wrote the deployment app in bash so there should not be any additional software to install. Before getting any deeper into the ML side of things, I highly advise installing XGB, running the app, and having a bit of a play with it.

Training and testing is carried out by running bash runexp.sh in the terminal and it takes less than one second to process the 8124 lines of fungal data. At the end, bash spits out a set of statistics to represent the accuracy of the training and also attempts to ‘draw’ the decision tree that XGB has devised. If we have a quick look in directory ~/xgboost/demo/binary_classification, there should now be a 0002.model file in it ready for deployment with the questionnaire.

I was interested to explore the decision tree a bit further and look at the way XGB weighted different characteristics of the fungi. I eventually got some rough visualisations working on a Python based Jupyter Notebook script:


Obviously this app is not going to win any Kaggle competitions since the various parameters within the software need to be carefully tuned with the help of all the different software tools available. A good place to start is to tweak the maximum depth of the tree and the number or trees used. Depth = 4 and number = 4 seems to work well for this data. Other parameters include the feature importance type, for example: gain, weight, cover, total_gain or total_cover. These can be tuned using tools such as SHAP.

Finally, this app could easily be adapted to other questionnaire based systems such as diagnosing a particular disease, or deciding whether to buy a particular stock or share in the market place.

An even more basic introduction to ML goes into the baseline theory in a bit more detail – well worth a quick look.

DIY Gimbal For The Raspberry Pi Camera

If one wants a stabilized video feed from a drone, a gimbal setup is the way to go. However, the cheaper offerings are all rather similar, suited to a certain size and type of drone. [Jean] was building a smaller craft, so set out to create his own design specifically fit for purpose.

The build begins in the CAD suite, with a series of 3D printed parts designed to link together with a pair of brushless motors to make a 2-axis set up. After printing, the gimbal arms are bolted together with the motors and the camera and IMU are installed, with everything being wired up to a GLB MiniSTorM32 brushless gimbal controller. These controllers make the process of building a gimbal easy, meaning that individual makers don’t have to go to the trouble of designing motor controller circuitry again and again.

The final result is a compact gimbal sized perfectly for the Raspberry Pi camera in [Jean]’s design. If you’re very particular about your gimbal’s performance, building your own doesn’t hurt. Video after the break.

Continue reading “DIY Gimbal For The Raspberry Pi Camera”

MIDI Harp Looks Pretty Sharp

[Julien] is one of those cool dads who shows his love with time invested rather than money spent. His daughter plays the harp, and you would not believe the price of concert harps. Even the cheap ones are several thousand USD. So naturally, he decided he would build her a MIDI concert harp from the ground up.

This plucky work in progress uses a strain gauge and an AD620 amplifier on every string to detect the tension when plucked. These amplifiers are connected to Arduinos, with an Arduino every nine strings. The Arduinos send MIDI events via USB to a Raspberry Pi, which is running the open synth platform Zynthian along with Pianoteq.

The harp is strung with guitar strings painted with silver, because he wanted capacitive touch support as well. But he scrapped that plan due to speed and reliability issues. Strain past the break to check out a brief demo video.

[Julien] used strings because he wanted to anchor the harpist in tactility. But you’re right; many if not most MIDI harps use lasers.

Continue reading “MIDI Harp Looks Pretty Sharp”

You Need A Cyberdeck, This Board Will Help

In 1984, William Gibson’s novel Neuromancer helped kick off the cyberpunk genre that many hackers have been delighting in ever since. Years before Tim Berners-Lee created the World Wide Web, Gibson was imagining worldwide computer networks and omnipresent artificial intelligence. One of his most famous fictional creations is the cyberdeck, a powerful mobile computer that allowed its users to navigate the global net; though today we might just call them smartphones.

While we might have the functional equivalent in our pockets, hackers like [Tillo] have been working on building cyberdecks that look a bit more in line with what fans of Neuromancer imagined the hardware would be like. His project is hardly the first, but what’s particularly notable here is that he’s trying to make it easier for others to follow in his footsteps.

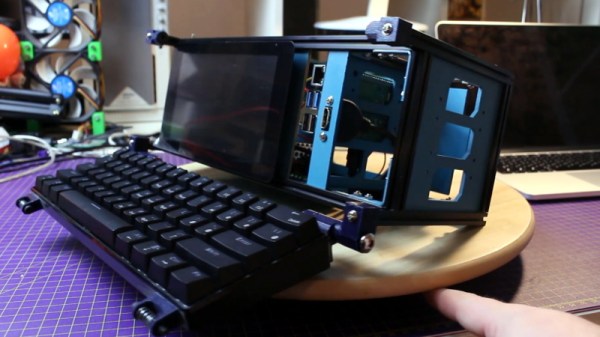
There’s a trend to base DIY cyberdecks on 1980s vintage computer hardware, with the logic being that it would be closer to what Gibson had in mind at the time. Equally important, the brutalist angular designs of some of those early computers not only look a lot cooler than anything we’ve got today, but offer cavernous internal volume ripe for a modern hardware transfusion. Often powered by the Raspberry Pi, featuring a relatively small LCD, and packed full of rechargeable batteries, these cyberdecks make mobile what was once anchored to a desk and television.

[Tillo] based his cyberdeck on what’s left of a Commodore C64c, reusing the original keyboard for that vintage feel. That meant he needed to adapt the keyboard to something the Raspberry Pi could understand, for which some commercially available options existed already. But why not take the idea farther for those looking to create their own C64c cyberdecks?

He’s currently working on a new PCB specifically designed for retrofitting one of these classic machines with a Raspberry Pi. The board includes niceties like a USB hub, and should fill out some of those gaping holes left in the case once you remove the original electronics. [Tillo] has already sent the first version of his open source board out for fabrication, so hopefully we’ll get an update soon.

In the meantime, you might want to check out some of the other fantastic cyberdeck builds we’ve covered over the last couple of years.

Simple Bluetooth Car Audio From A Pi Zero

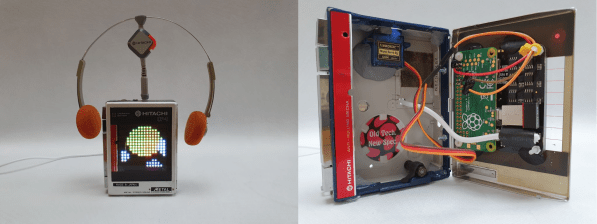
When [Sami Pietikäinen] realized that the Bluetooth built into his car didn’t support audio, he didn’t junk it and buy a Tesla. Instead, he decided to remedy the problem by building a small Bluetooth device that plugged into the Aux socket. To do this, he used a Raspberry Pi Zero with a pHAT DAC (Digital to Audio Converter). That’s perhaps using a sledgehammer to crack a walnut, but sometimes you work with what you have. The interesting part is to be found in what he did next: he used Yocto to optimize the device down to make it as simple and straightforward as possible.

Continue reading “Simple Bluetooth Car Audio From A Pi Zero”