Game console hacking remains a fascinating area, and we’re glad when someone brings the spoils of exploration for us to marvel at. This time, we’re looking at the [mast1c0re] hack story by [cturt] – an effort to find bugs in PS2 emulation toolkit present on Sony PlayStation 4 and 5 consoles, proving fruitful in the end. What’s more, this exploit seems unpatchable – not technically, but under the Sony’s security practices, this emulator falls under the category of things they refuse to patch when identified.
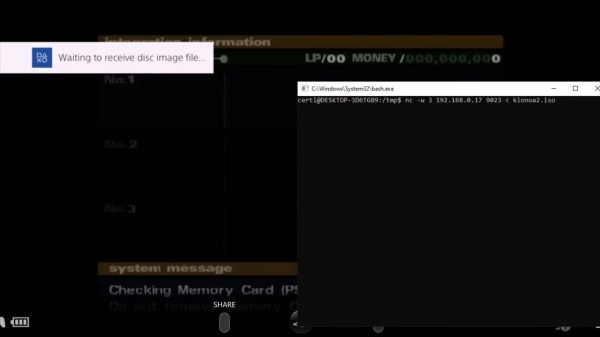
In this story, we’re taken on a journey through the PS2 emulator internals, going through known-exploitable PS2 games and learning about a prospective entry point. Circling around it, collecting primitives and gadgets, bypassing ASLR on the way there, the emulator is eventually escaped, with a trove of insights shared along the way. As a demonstration, [cturt] successfully loaded a different PS2 game from outside the PS2 emulator, transferring it to the PS4 over WiFi! Continue reading “Subverting PS4 And PS5 Through The PS2 Emulator”