NextThingCo, makers of the very popular C.H.I.P. single board Linux computer, have released the latest iteration of their hardware. It’s the C.H.I.P. Pro, an SBC designed to be the embedded brains of your next great project, product, or Internet of Things thing.
The C.H.I.P. Pro features an Allwinner R8 ARMv7 Cortex-A8 running at 1 GHz, a MALI-400 GPU, and either 256 MB or 512 MB of NAND Flash. The Pro also features 802.11 b/g/n WiFi, Bluetooth 4.2, and is fully certified by the FCC. This board will be available in December at supposedly any quantity for $16.
The design of the C.H.I.P. Pro is a mix between a module designed to be installed in a product and a single board computer designed for a breadboard. It features castellated edges like hundreds of other modules, but the design means that assembly won’t be as simple as throwing down some paste and reflowing everything. The C.H.I.P. Pro features parts on two sides, making reflow questionable and either 0.1″ headers or a cutout on a PCB necessary. As a single board computer, this thing is small, powerful, and a worthy competitor to the Raspberry Pi Zero. A C.H.I.P. Pro development kit, consisting of two C.H.I.P. Pro units, a ‘debug’ board, and headers for breadboarding, is available for $49, with an estimated ship date in December.
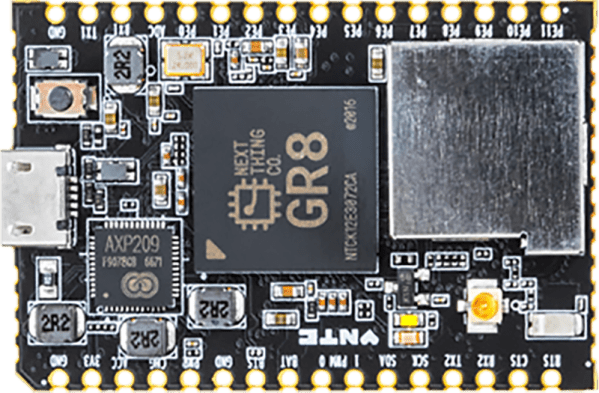
A $16 Linux module with WiFi, Bluetooth, and no NDA is neat, but perhaps a more interesting announcement is that NextThingCo will also be selling the module that powers the C.H.I.P. Pro.
The GR8 module includes an Allwinner R8 ARMv7 Cortex-A8 running at 1 GHz, a MALI-400 GPU, and 256 MB of DDR3 SDRAM. Peripherals include TWI, two UARTS, SPI (SD cards support is hacked onto this), two PWM outputs, a single 6-bit ADC, I2S audio, S/PDIF, one USB 2.0 Host and one USB 2.0 OTG, and a parallel camera interface. This isn’t really a chip meant for video out, but it does support TV out and a parallel LCD interface. A limited datasheet for the GR8 is available on the NextThingCo GitHub.
Putting an entire Linux system on a single BGA module must draw comparisons to the recent release of the Octavo Systems OSD355X family, best known to the Hackaday audiences as the Beaglebone on a chip. Mechanically, the Octavo chip will be a bit easier to solder. Even though it has almost twice as many balls as the GR8, 400 on the Octavo and 252 on the GR8, the Octavo has a much wider pitch between the balls, making escape routing much easier.
Comparing peripherals between the OSD355X and GR8, it’s a bit of a wash, with the OSD coming out slightly ahead with Ethernet, more RAM and fancy TI PRUs. Concerning pricing, the GR8 wins hands down at $6 per chip in any quantity. That’s significantly less than the OSD355X.
The original C.H.I.P. has been exceptionally well received by the community NextThingCo is marketing to, despite the community’s distaste for Allwinner CPUs, cringeworthy PR, and questions concerning the true price of the C.H.I.P.. The C.H.I.P. Pro will surely see more than a few uses, but the GR8 is the real story here. A jellybean part that contains an entire Linux system has been the fevered dream of a madman for years now. The GR8 makes putting the power of open software into any project much easier, and we can’t wait to see the applications it allows.

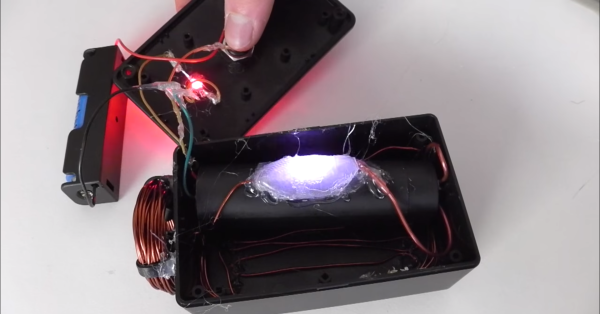
 Our curiosity into this phenomenon was piqued when we featured an “EMP generator” from [FPS Weapons]. The device doesn’t create an enrapturing movie-esque EMP pulse suitable for taking down a casino or two, but it does spew a healthy amount of broadband electromagnetic interference (EMI) in every direction. It probably also doesn’t send the EMI very far; as we’ve seen in many other projects, it’s hard to transfer energy through the air. It got us wondering, though: what is the difference between being annoying and creating a weapon? And, is there any practical use for a device like this?


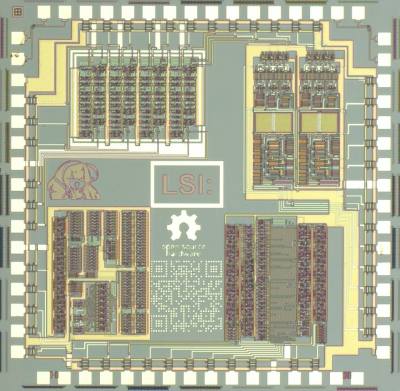 I guess you might have a couple of lingering questions. First you’ll likely bemoan your lack of your own fabrication facility (I’m still eyeing those used 1 micron fab lines that crop up on eBay from time to time). And secondly you might be asking yourself… why?