Printed It: Rubber Band PCB Vise

If you’ve ever worked on a small PCB, you know how much of a hassle it can be to hold on to the thing. It’s almost as if they weren’t designed to be held in the grubby mitts of a human. As designs have become miniaturized over time, PCBs are often so fragile and festooned with components that tossing them into the alligator clips of the classic soldering “third hand” can damage them. The proper tool for this job is a dedicated PCB vise, which is like a normal bench vise except it doesn’t crank down very hard and usually has plastic pads on the jaws to protect the board.

Only problem with a PCB vise is, like many cool tools and gadgets out there, not everybody owns one. Unless you’re doing regular PCB fabrication, you might not take the plunge and buy one either. So what’s a hacker on a budget to do when they’ve got fiddly little PCBs that need attention?

Luckily for us, we live in a world where you can press a button and have a magical robot on your desktop build things for you. Online model repositories like Thingiverse and YouMagine are full of designs for printable PCB vises, all you have to do is pick one. After looking through a number of them I eventually decided on a model designed by [Delph27] on Thingiverse, which I think has a couple of compelling features and more than deserves the few meters of filament it will take to add to your bench.

Of course the best part of all of this is that you can customize and improve the designs you download, which is what I’m about to do with this PCB vise!

Continue reading “Printed It: Rubber Band PCB Vise”

Ancient Insect Scales Analyzed With Help Of Nose Hair

Scientists working to advance the frontier of knowledge frequently also need to invent their tools along the way. Sometimes these are interesting little hacks to get a job done. Recently some researchers found ancestors of moths and butterflies older than any previously known by analyzing tiny scales found alongside ancient pollen. They needed a tool to manipulate these scales: separating them from surrounding debris, transferring them to microscope slides. The special tool was a needle tipped with a single human nostril hair.

As ancient insects were the published paper‘s focus, their use of nose hair tipped needle was only given a brief mention in the “Materials and Methods” section. Interviews by press quoted researchers’ claim that nose hair has the right mechanical properties for the job, without further details. Not even a picture of the tool itself. What properties of insect scales made them a good match with the properties of nose hair? Was there a comprehensive evaluation of multiple types of hair for the task? Would we regret asking these questions?

Novel approaches to fine-tipped tools would be interesting to examine under other contexts, like the tweezers we use to build surface-mount electronics. As SMD parts continue to shrink in size, will we reach a point where hair-tipped tools are the best DIY alternative to an expensive pick-and-place machine? It would be another creative approach to deal with the challenges of hand-built SMD. From simple but effective mechanical helpers, to handy 3D printed tools, to building hybrid Manual + CNC pick-and-place more affordable than their fully automated counterparts.

[via Washington Post]

The (Unnecessary?) Art Of Connector Crimping

The “Completion Backwards Principle” is a method of reasoning through a problem by visualizing the end result and then working your way backwards from that point. The blog post that [Alan Hawse] has recently written about the intricacies of crimping wires for plug connectors is a perfect example of this principle. The end result of his work is the realization that you probably shouldn’t bother crimping your own connectors, but watching him work backwards from that point is still fascinating. It’s also the name of a rock album from the 80’s by The Tubes, but this is not a useful piece of information in regards to electrical wiring.

Of course, sometimes people do silly things. Even though there are pre-crimped wires available online for a pittance, you might still want to do your own. With this in mind, [Alan] has put together an exceptionally detailed and well-research post that gives you all the information you could possibly want to know about crimping what is often erroneously referred to as the “JST connector”.

He starts by showing off some common examples of this connector, which if you’ve ever opened a piece of consumer electronics will be like looking through a High School yearbook. You might not know their names without reading them, but you definitely remember what they look like.

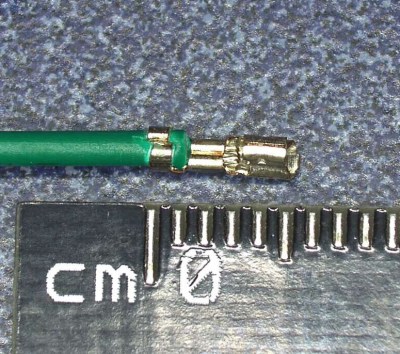
We’re then treated to an array of macro shots showing the scale of the pieces involved. If getting up close and personal with metal bits that are only a few millimeters long is your kind of thing, then you’re really going to love this part.

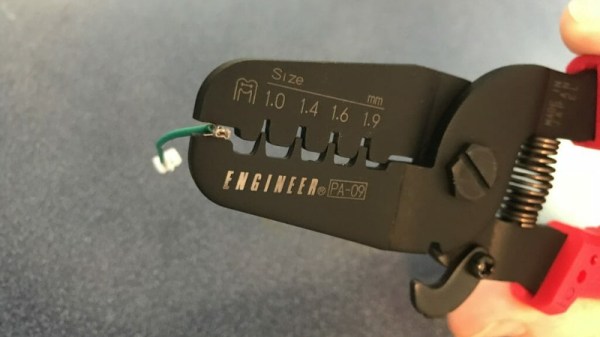
Finally, the post is wrapped up with a few words about the kind of crimping tools that are available on the market, and then a demonstration of his personal crimping method. While some tools would have you crimp both sets of “wings” at the same time, [Alan] tells us he finds taking them on individually leads to better results in his experience.

If this this little taste has left you hungry for a true feast of hyper-specialized knowledge, be sure to check out the Superconference talk by [Bradley Gawthrop].

Continue reading “The (Unnecessary?) Art Of Connector Crimping”

Getting To Know An 18th Century Hacker

Here at Hackaday we tend to stay pretty close to the bleeding edge in tech, not by any conscious effort, but simply because that’s what most hackers are interested in. Sure we see the occasional vintage computer rebuild, or reverse engineering of some component that was put into service before most of us were born; but on the whole you’re way more likely to see projects involving the latest and greatest microcontroller to hit AliExpress than ones involving the once ubiquitous vacuum tube.

Bill Maddox

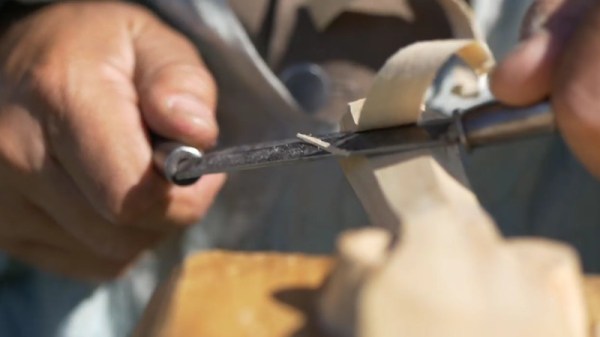
But occasionally it’s nice to take a step back from the latest and greatest, to really look at what makes the hacker spirit without the all modern trappings of blinking LEDs and Wi-Fi connectivity. We make and explore because it’s something we are passionate about, and while today most of us are doing that with a soldering iron or a compiler, that hasn’t always been the case. In the video below, historic interpreter and woodworker [Bill Maddox] talks about what draws him to 18th century technology. His tools may look foreign to us, but the passion he shows while talking about his creations will be familiar to anyone who’s ever set foot in a hackerspace.

Even with a vastly different set of interests than the modern hacker, [Bill] runs into some very familiar problems. When the highly specialized tools he needed to work like an 18th century craftsman weren’t available, he decided to make his own. But to make his own tools he needed to learn how to forge, and after he forged his hand tools he moved on to forging chisels for the lathe he decided to build.

Whether or not we ever take a knife to a piece of wood and try to carve out a spoon, it’s impossible to watch [Bill] speak about his creations and not see him as a kindred spirit. Like many of us, he’s honed skills in a niche that the everyday person takes for granted. Makes you wonder what people from 300 years in the future would think of us if they could peer back through the centuries.

Continue reading “Getting To Know An 18th Century Hacker”

Build A Sandblasting Rig For $6

Let’s get something out of the way: yes, this assumes you already own or have access to a compressor. So if you do, and know what you’re getting into, why not build a cheap sandblasting rig? That’s what [adamf135] did after seeing someone do it on YouTube. He seriously doubted it would work, but the results are pretty impressive.

This one doesn’t require much more than an empty 20oz bottle, a cheap air gun/nozzle, and an adapter. The hardest part of this hack seems to be cutting a groove in the nozzle for the blasting material without severing it completely. [Adam] cut a 1/2″ section out of his, but that large of an opening really uses up the blasting material. He recommends going smaller. After snipping off the sealing ring, he runs the nozzle through a 3/16″ hole drilled through the strongest part of the bottle and seals it off with hot glue. Watch it power through rust and paint with crushed glass after the break.

If you do any open sandblasting like this, be sure to at least wear a mask. If you don’t want to spray fine particles all over the shop, you could build a wet media blasting cabinet instead, or go even lower-tech and build a drill-powered parts tumbler.

Continue reading “Build A Sandblasting Rig For $6”

Make A Better, Spring-Loaded SMT Tape Strip Holder

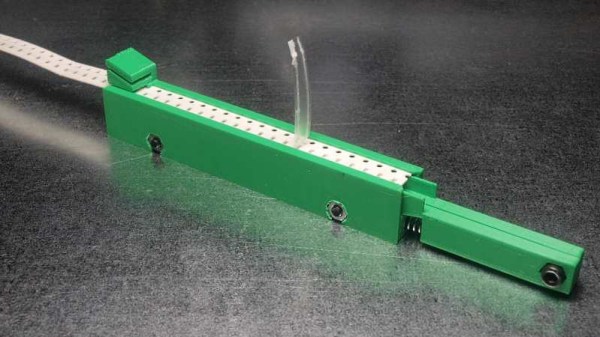
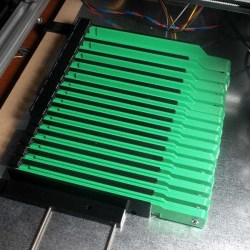
Every so often, a project is worth some extra work to see if the idea can go any further. [JohnSL] has been busy doing exactly that with his spring-loaded SMT tape holder project. Having done the original with 3D printing, he has been working on designing for injection molding. This isn’t a motorized feeder, it’s still a manual tool but it is an improvement over the usual workshop expedient method of just sticking segments of tape down to the desktop. Tape is fed into the holders from one end and spring tension holds the tape firm while a small slot allows the cover tape to be guided backward after peeling. As anyone who has used cut segments of tape to manually deal with SMT parts knows, small vibrations — like those that come from peeling off the clear cover — can cause the smaller components to jump around and out of their pockets, and any length of peeled cover gets awkward quickly.

The design allows for multiple holders to mount side-by-side.

In [JohnSL]’s design, all SMT tapes sit at an even height regardless of size or tape thickness. A central support pushes up from the bottom with tension coming from a spring pulling sideways; the central support is forced upward by cams and presses against the bottom surface of the tape. As a result, the SMT tape gets supported from below with even tension and the whole assembly maintains a narrow profile suitable for stacking multiple holders side by side. The CAD files are available online along with a McMaster-Carr part number for the specific spring he used.

After working out the kinks on 3D printed prototypes, [JohnSL] decided to see if it would be feasible to design an injection molded version and made a video outlining the process, embedded below.

Continue reading “Make A Better, Spring-Loaded SMT Tape Strip Holder”

Cable Cutting Machine Makes Fast Work Of A Tedious Job

We’ve all been there: faced with a tedious job that could be knocked out manually with a modest investment of time, we choose instead to overcomplicate the task and build something to do it for us. Such was the impetus behind this automated wire cutter, but in this case the ends justify the means.

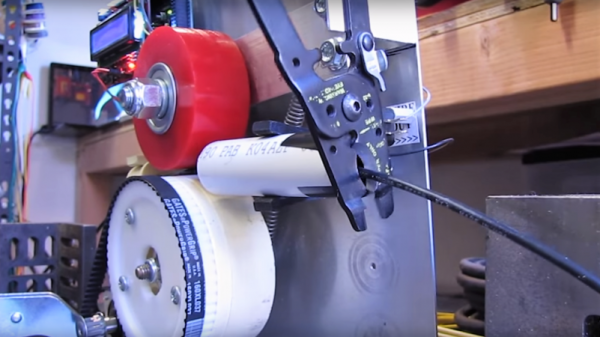
That [Edward Carlson] managed to stretch a twenty-minute session with wire cutters and a tape measure into four days of building and tweaking this machine is pretty impressive. The build process was jump-started by modifying an off-the-shelf wire measuring machine, of the kind one finds in the electrical aisle of The Big Orange Store. Stripped of the original mechanical totalizer and with a stepper added to drive the friction wheels, the machine can now measure cable by counting steps. A high-torque servo drives a stout pair of cable shears through a nifty linkage, or the machine can just measure the length of cable without cutting. [Edward]’s solution in search of a problem ends up bringing extra value, so maybe the time spent was worth it after all.

If the overall design looks familiar, you may be thinking of a similar of another cable-cutting bot we featured a while back. That one used a filament extruder and was for lighter gauge wires than this machine. Continue reading “Cable Cutting Machine Makes Fast Work Of A Tedious Job”