There’s a few open source options out there for creating electrical schematics. KiCad and Fritzing are two that will take you from schematic capture to PCB layout. However, there’s been limited options for creating wiring diagrams. Often these are created in Microsoft’s Visio, which is neither open source nor well suited for the task.
 QElectroTech is an open source tool for drawing these types of diagrams. It consists of two tools: an element editor for creating schematic symbols and a diagram editor for creating your drawings. Libraries of common symbols are also included, along with the IEC 60617 standardized symbols.
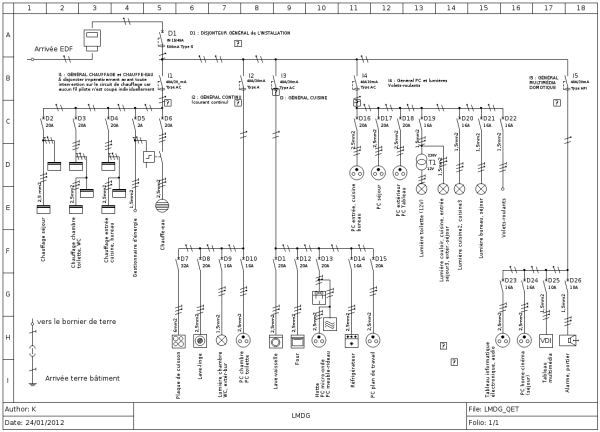
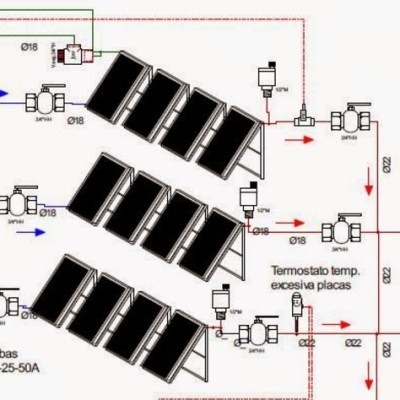
Being a schematic editor, QElectroTech does a good job of drawing clean connections between components. Connections are automatically routed at 90 degree angles and are easy to drag around. Systems made up of more than just electrical connections are also a good fit for the software. Here you can see piping and manual valves as well as electronic sensors and actuators all in the same diagram.
Next time you need to document the wiring of something, QElectroTech is a good option to try. It’s been around since 2008 it is under active development, and there are Windows, OSX and Linux version (including a PPA for nightly builds) available.