The Most Useless Tools You Can’t Seem To Part With

I’m a tool person. No matter how hard I try, I eventually end up with a bunch of tools that I just can’t bear to banish from my workshop. Why? I’m gonna keep it 100%: it’s the same emotion behind hoarding — fearing that you might need a thing later and not be able to have it.

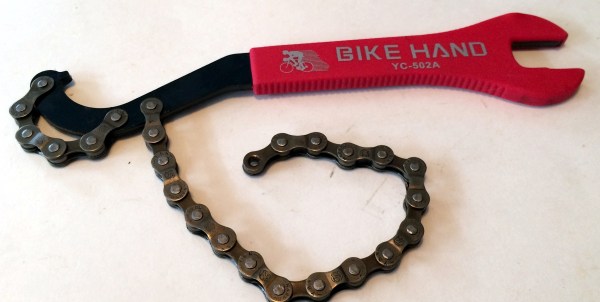
The stuff costs money, and if you have to script to buy a bunch of tools pertaining to Project X, you expect to still have and probably need those very same tools — even if they have to sit in a box on my shelf for 20 years, taunting me every time I have to move it to one side.  “Heat-bending element” the box’s label describes at tool I haven’t used in at least 5 years. I have a bunch of these white elephants. I’ll probably need to heat-bend acrylic real soon… yeah.

I’ve found that pretty much everyone in our crowd can relate. You buy a special tool for one project and it was expensive and tremendously helpful, and since then it’s been sitting around uselessly. You certainly couldn’t part with it, what if you needed it again? So you store it in your house for 20 years, occasionally coming across it when looking for something else, but it never actually gets used.

Join me now in a walk down our memory lane of useless tools.

Continue reading “The Most Useless Tools You Can’t Seem To Part With”

Low-Budget Hydroformer Puts The Squeeze On Sheet Metal Parts

Between manufacturing technologies like 3D-printing, CNC routers, lost-whatever metal casting, and laser and plasma cutters, professional quality parts are making their way into even the most modest of DIY projects. But stamping has largely eluded the home-gamer, what with the need for an enormous hydraulic press and massive machined dies. There’s more than one way to stamp parts, though, and the budget-conscious shop might want to check out this low-end hydroforming method for turning sheet metal into quality parts.

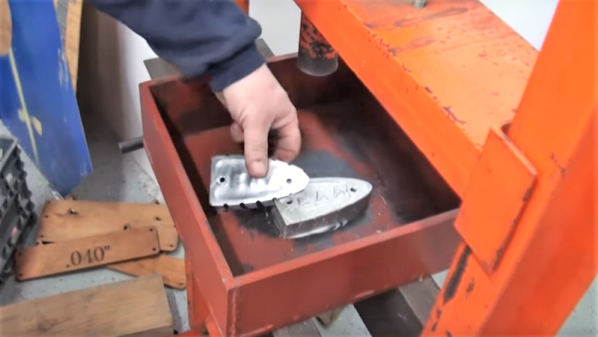
If hydroforming sounds familiar, it might be because we covered [Colin Furze]’s attempt, which used a cheap pressure washer to inflate sheet metal bubbles with high-pressure water. The video below shows a hydroformer that [Rainbow Aviation] uses (with considerably less screaming) to make stamped aluminum parts for home-brew aircraft. The kicker with this build is that there is no fluid — at least not until the 40,000-pound hydraulic press semi-liquifies the thick neoprene rubber pad placed over the sheet metal blank and die. The pressure squeezes the metal into and around the die, forming some pretty complex shapes in a single operation. We especially like the pro-tip of using Corian solid-surface countertop material offcuts to make the dies, since they’re available for a pittance from cabinet fabricators.

It’s always a treat to see hacks from the home-brew aviation world. They always seem to have plenty of tricks and tips to share, like this pressure-formed light cowling we saw a while back.

Continue reading “Low-Budget Hydroformer Puts The Squeeze On Sheet Metal Parts”

Rescuing An Antique Saw Set

Who doesn’t like old tools? Even if they aren’t practical to use for production, plenty of old tools still have a life to offer the hobbyist or home worker.  Some tools might seem a bit too far gone – due to age, rust, or practicality, to use. That’s where [Hand Tool Rescue] comes in. [HTR] finds rusty, dirty old tools, and brings them back to life. Sometimes they’re practical tools, other times, they’re a bit out there. In a recent video, he restored a BeMaCo automatic saw set from the 1940’s. Saw sets are tools which bend each tooth of a saw blade slightly. Typically they are pliers-like devices.

The slight bend of each tooth on the blade widens the saw’s kerf and prevents binding. Typically these tools are pliers-like devices. The BeMaCo set is something else — it pulls the blade through tooth by tooth, while a spring-loaded head pecks away, bending each tooth. It’s something Rube Goldberg would have loved.

[HTR’s] filming style borrows a lot from [Jimmy DiResta], who we’ve covered here before. There are no words, and most of the video is sped up. Even with the fast video, [HTR] probably has many hours of footage to pare down to a 20-minute video.

The restoration begins with tearing the saw set apart. Every nut and bolt is removed. All the parts are cleaned, chemically de-rusted, and wire-wheeled. Even the motor is torn down, cleaned, and wired up. Then come the re-assembly. [HTR] gets every piece back in its proper place. We’re wondering how many times he had to refer to the teardown video to get everything right. Finally, the saw set is complete — ready for another 70 years of work.

Testing Brushless Motors With A Scope (or A Meter)

Brushless motors have a lot of advantages over traditional brushed motors. However, testing them can be a bit of a pain. Because the resistance of the motor’s coils is usually very low, a standard resistance check isn’t likely to be useful. Some people use LC meters, but those aren’t as common as a multimeter or oscilloscope. [Nils Rohwer] put out two videos — one two years ago and one recently — showing how to test a brushless motor with a multimeter or scope. Oh, you do need one other thing: a drill.

You don’t have to drill into the motor, instead you use the drill to spin the motor’s shaft. Since a motor and a generator are about the same thing, you can read the voltages produced by the spinning motor and determine if it is good or not. The first video shows the technique and the second, more recent video shows a scope reading a bad motor. You can see both videos, below.

Continue reading “Testing Brushless Motors With A Scope (or A Meter)”

Not Your Typical ATX Bench PSU

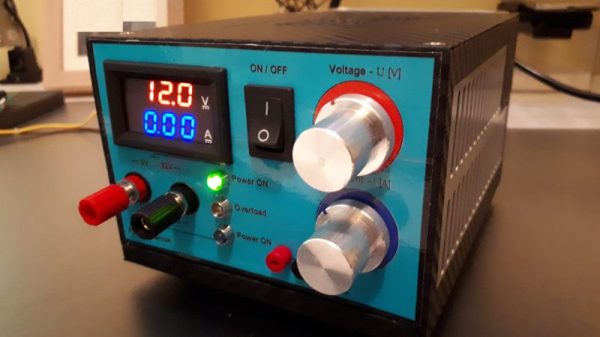
We know what you’re thinking — yet another scrap PC power supply turned into a bench PSU. But look a little closer and you’ll see a nicely designed linear bench supply that just fits inside a gutted ATX case.

A lot of the items on [Medzik]’s BOM for this build are straight from the scrap bin. The aforementioned ATX supply case is one, as is the power transformer donated by a friend. Modules such as the 30V/2A regulator, the digital volt/ammeter, and a thermostat module to control the fan at higher power settings were all sourced via the usual suspects. The PSU boasts two outputs — an adjustable 0-22 volt supply, and a fixed 12-volt output. An unusual design feature is a secondary input which uses the 22-VAC supply from a Weller soldering station to give the PSU a little more oomph. This boosts the maximum output to 30 volts; one wonders why [Medzik] didn’t just source a bigger transformer, but you work with what you have sometimes. There are some nice touches, too, like custom-printed vinyl overlays for the case.

It’s a good-looking and compact unit with a decent suite of features, and you could do a lot worse when building your next bench supply. If it’s not your cup of tea though, just take your pick — tiny and yellow, built to last, or ensconced in Ultrasuede.

Ask Hackaday: What Tools Do You Reach For First?

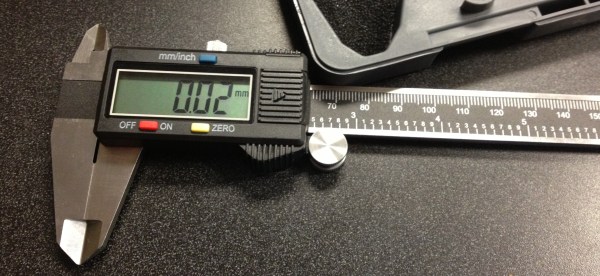
Let’s face it, in your workshop there are convenient tools, and there are quality tools, but so often they aren’t both. Think back to the tools you reach for first. Very often for me, speed and convenience win out. I don’t want to look too hard for that drill or saw, and want them to work as expected when I reach for them. At the same time, there are some tools that simply must be stored away, and can’t perch on my workbench forever or sit on a shelf.

It really is a balancing act sometimes. I don’t have a sure fire formula for when to break out the expensive tools, and what jobs are easy with the less expensive. I’ll lay out some of my most-often utilized tools in my arsenal, then I want to hear from you on your own faves.

Continue reading “Ask Hackaday: What Tools Do You Reach For First?”

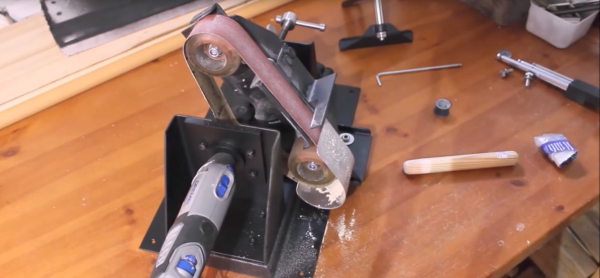
It’s A Wall-Mounted Dremel Workstation!

We’ve all seen Dremel drill presses, but [Tuomas Soikkeli] has created a full-fledged (albeit miniature) workstation using his Dremel as the motor. He has a gnome-sized belt sander with what appear to be skateboard wheels turning the belt, with the Dremel’s toolhead tensioning the belt and turning it as well. There’s a wee table saw, petite lathe, cute router, etc.

The Dremel attaches to the base via the 3/4-to-1/2 threaded end upon which specialized tool ends may be connected, and which DIY add-ons (like this light ring that we published previously) typical connect. Though in truth the threaded end varies in tensile strength from model to model — even the knockoffs have the same end, but is it strong enough to attach to the rig?

We like how [Tuomas] has his rig mounted to the wall. It looks like he has a couple of flexible shaft extenders nearby, allowing the rig to almost serve same role as a shop’s air tools.

Continue reading “It’s A Wall-Mounted Dremel Workstation!”