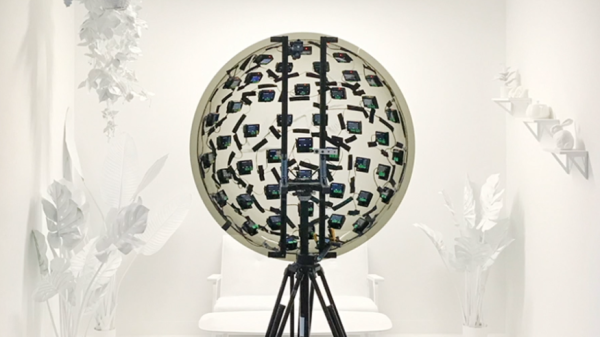
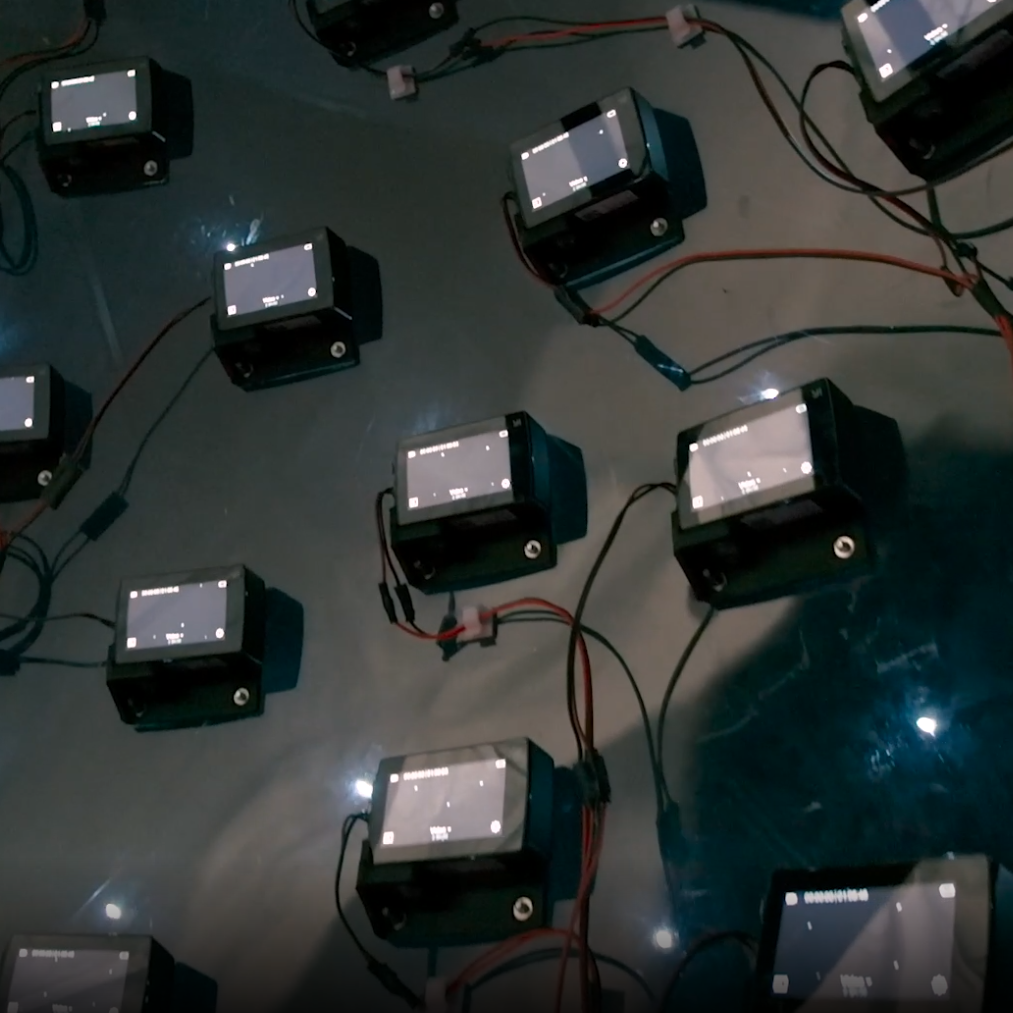
46 time-synchronized action cameras make up the guts of the capture device.
3D video content has a significant limitation, one that is not trivial to solve. Video captured by a camera — even one with high resolution and a very wide field of view — still records a scene as a flat plane, from a fixed point of view. The limitation this brings will be familiar to anyone who has watched a 3D video (or “360 video”) in VR and moved their head the wrong way. In these videos one is free to look around, but may not change the position of their head in the process. Put another way, pivoting one’s head to look up, down, left, or right is fine. Moving one’s head higher, lower, closer, further, or to the side? None of that works. Natural movements like trying to peek over an object, or moving slightly to the side for a better view simply do not work.
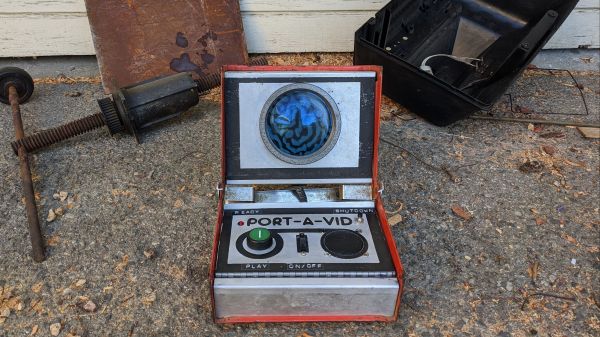
There was a time when only the most expensive televisions could boast crystal clear pixels on a wall-mountable thin screen. What used to be novelty from “High Definition Flat Screen Televisions“ are now just “TV” available everywhere. So as a change of pace from our modern pixel perfection, [Emily Velasco] built the Port-A-Vid as a relic from another timeline.
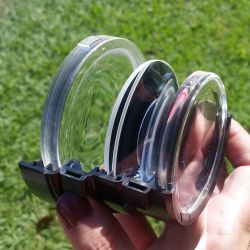
The centerpiece of any aesthetically focused video project is obviously the screen, and a CRT would be the first choice for a retro theme. Unfortunately, small CRTs have recently become scarce, and a real glass picture tube would not fit within the available space anyhow. Instead, we’re actually looking at a modern LCD sitting behind a big lens to give it an old school appearance.
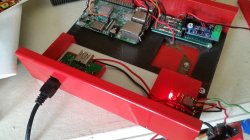
The lens, harvested from a rear-projection TV, was chosen because it was a good size to replace the dial of a vacuum gauge. This project enclosure started life as a Snap-On Tools MT425 but had become just another piece of broken equipment at a salvage yard. The bottom section, formerly a storage bin for hoses and adapters, is now home to the battery and electronics. All original markings on the hinged storage lid were removed and converted to the Port-A-Vid control panel.
Before: broken Snap-On MT425
After: An escape portal. Please stand by…
A single press of the big green button triggers a video to play, randomly chosen from a collection of content [Emily] curated to fit with the aesthetic. We may get a clip from an old educational film, or something shot with a composite video camera. If any computer graphics pop up, they will be primitive vector graphics. This is not the place to seek ultra high definition content.
As a final nod to common artifacts of electronics history, [Emily] wrote an user’s manual for the Port-A-Vid. Naturally it’s not a downloadable PDF, but a stack of paper stapled together. Each page written in the style of electronics manuals of yore, treated with the rough look of multiple generation photocopy rumpled with use.
If you have to ask “Why?” it is doubtful any explanation would suffice. This is a trait shared with many other eclectic projects from [Emily]. But if you are delighted by fantastical projects hailing from an imaginary past, [Emily] has also built an ASCII art cartridge for old parallel port printers.
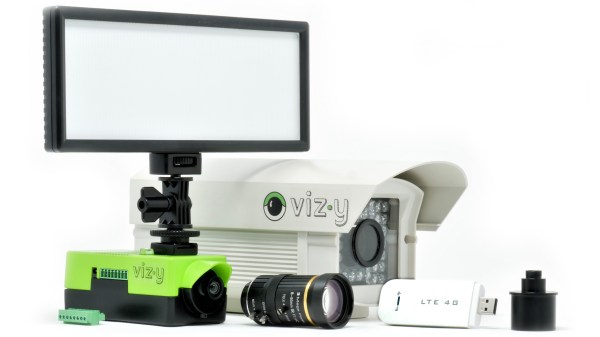
Vizy, a new machine vision camera from Charmed Labs, has blown through their crowdfunding goal on the promise of making machine vision projects both easier and simpler to deploy. The camera, which starts around $250, integrates a Raspberry Pi 4 with built-in power and shutdown management, and comes with a variety of pre-installed applications so one can dive right in.
The Sony IMX477 camera sensor is the same one found in the Raspberry Pi high quality camera, and supports capture rates of up to 300 frames per second (under the right conditions, anyway.) Unlike the usual situation faced by most people when a Raspberry Pi is involved, there’s no need to worry about adding a real-time clock, enclosure, or ensuring shutdowns happen properly; it’s all taken care of.
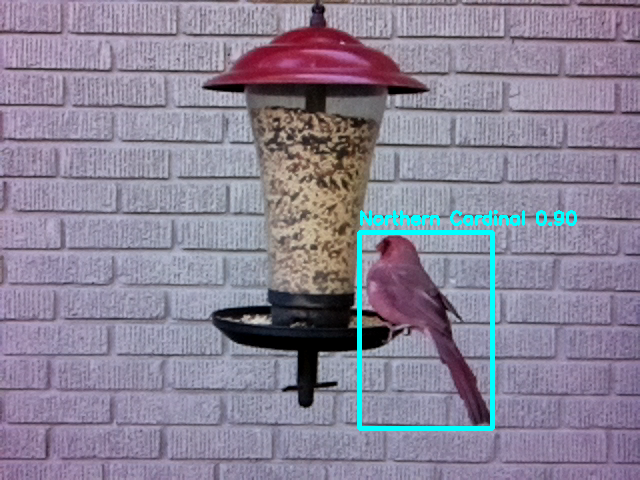
‘Birdfeeder’ application can automatically identify and upload images of visitors.
Charmed Labs are the same folks behind the Pixy and Pixy 2 cameras, and Vizy goes further in the sense that everything required for a machine vision project has been put onboard and made easy to use and deploy, even the vision processing functions work locally and have no need for a wireless data connection (though one is needed for things like automatic uploading or sharing.) For outdoor or remote applications, there’s a weatherproof enclosure option, and wireless connectivity in areas with no WiFi can be obtained by plugging in a USB cellular modem.
A few of the more hacker-friendly hardware features are things like a high-current I/O header and support for both C/CS and M12 lenses for maximum flexibility. The IR filter can also be enabled or disabled via software, so no more swapping camera modules for ones with the IR filter removed. On the software side, applications are all written in Python and use open software like Tensorflow and OpenCV for processing.
The feature list looks good, but Vizy also seems to have a clear focus. It looks best aimed at enabling projects with the following structure:
Detect Things (people, animals, cars, text, insects, and more) and/or Measure Things (size, speed, duration, color, count, angle, brightness, etc.)
Perform an Action (for example, push a notification or enable a high-current I/O) and/or Record (save images, video, or other data locally or remotely.)
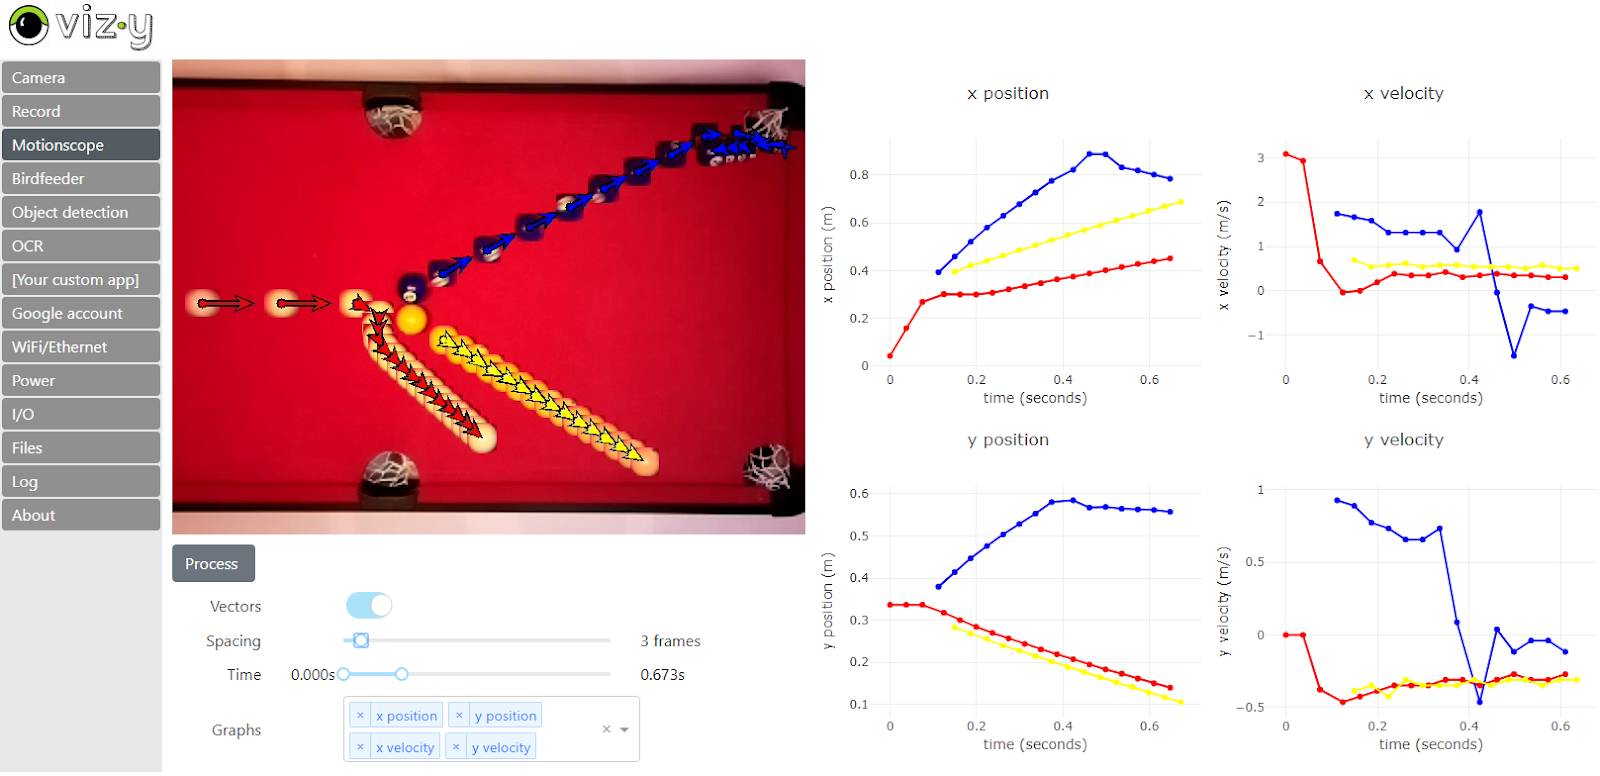
The Motionscope application tracking balls on a pool table. (Click to enlarge)
A good example of this structure is the Birdfeeder application which comes pre-installed. With the camera pointed toward a birdfeeder, animals coming for a snack are detected. If the visitor is a bird, Vizy identifies the species and uploads an image. If the animal is not a bird (for example, a squirrel) then Vizy can detect that as well and, using the I/O header, could briefly turn on a sprinkler to repel the hungry party-crasher. A sample Birdfeeder photo stream is here on Google Photos.
Motionscope is a more unusual but very interesting-looking application, and its purpose is to capture moving objects and measure the position, velocity, and acceleration of each. A picture does a far better job of explaining what Motionscope does, so here is a screenshot of the results of watching some billiard balls and showing what it can do.
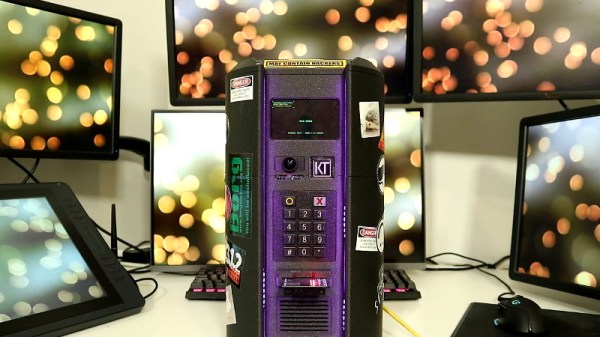
Created for the Disobey 2020 hacker conference in Finland, this Blade Runner inspired communications terminal isn’t just for decoration. It was part of an interactive game that required attendees to physically connect their conference badges up and “call” different characters with the functional keypad on the front of the unit.
[Purkkaviritys] was in charge of designing the 3D printed enclosure for the device, which he says takes an entire 2 kg roll of filament to print out. Unfortunately he wasn’t as involved in the electronics side of things, so we don’t have a whole lot of information about the internals beyond the fact that its powered by a Raspberry Pi 4, features a HyperPixel 4.0 display, and uses power over Ethernet so it could be easily set up at the con with just a single cable run.
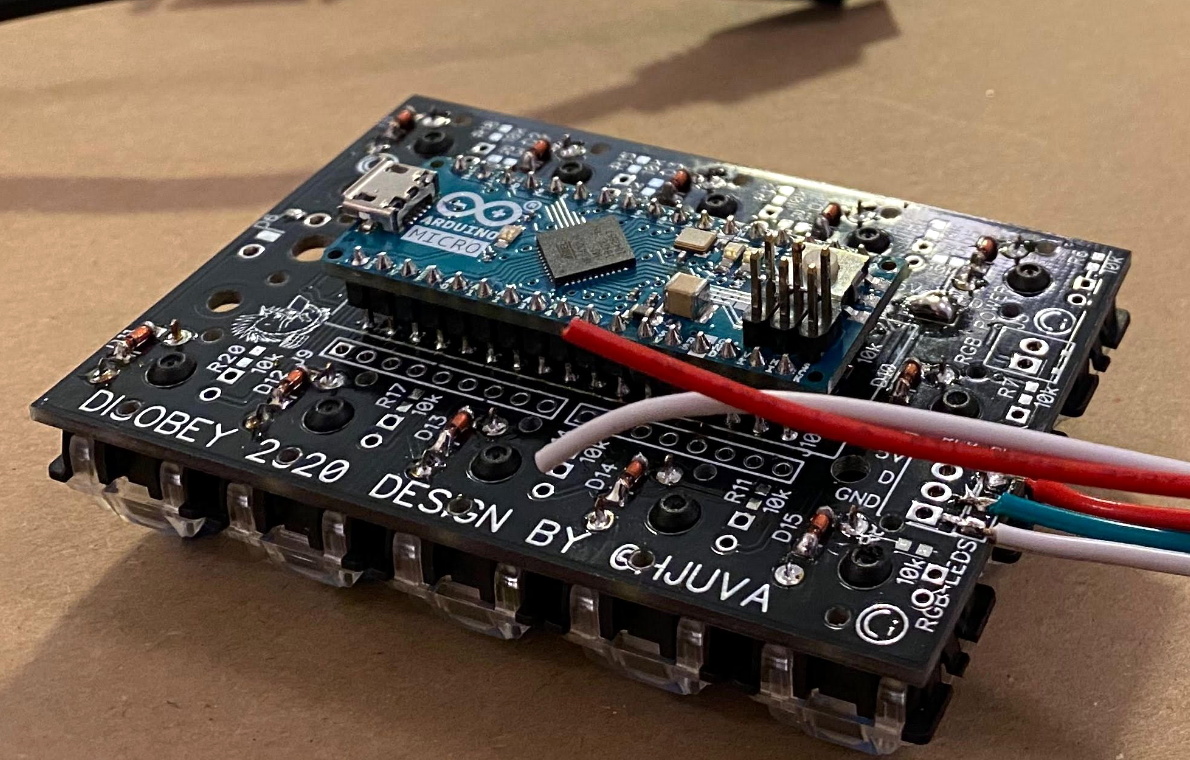
A look at the custom keypad PCB.
The keypad is a custom input device using the Arduino Micro and Cherry MX Blue switches with 3D printed keycaps to get that chunky payphone look and feel. [Purkkaviritys] mentions that the keypad is also responsible for controlling the RGB LED strips built into the sides of the terminal, and that the Raspberry Pi toggles the status of the Caps, Scroll Lock, and Num Lock keys to select the different lighting patterns.
Naturally we’d like to see more info on how this beauty was put together, but given that it was built for such a specific purpose, it’s not like you’d really need to duplicate the original configuration anyway. Thanks to [Purkkaviritys] you have the STL files to print off our own copy of the gloriously cyberpunk enclosure, all you’ve got to do now is figure out how to make video calls with it.
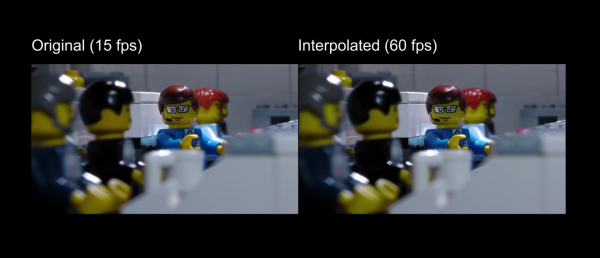
The uses of artificial intelligence and machine learning continue to expand, with one of the more recent implementations being video processing. A new method can “fill in” frames to smooth out the appearance of the video, which [LegoEddy] was able to use this in one of his animated LEGO movies with some astonishing results.
His original animation of LEGO figures and sets was created at 15 frames per second. As an animator, he notes that it’s orders of magnitude more difficult to get more frames than this with traditional methods, at least in his studio. This is where the artificial intelligence comes in. The program is able to interpolate between frames and create more frames to fill the spaces between the original. This allowed [LegoEddy] to increase his frame rate from 15 fps to 60 fps without having to actually create the additional frames.
While we’ve seen AI create art before, the improvement on traditionally produced video is a dramatic advancement. Especially since the AI is aware of depth and preserves information about the distance of objects from the camera. The software is also free, runs on any computer with an appropriate graphics card, and is available on GitHub.
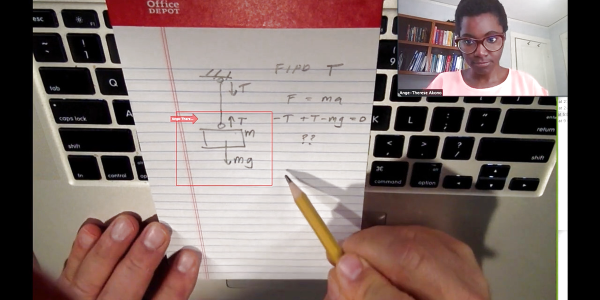
This is one of those so-simple-I-wish-I-invented-it hacks. Professor [Michael Peshkin] is teaching his engineering students remotely. While he has a nice second camera that he can use to transmit whatever he doodles on paper, most of his students just have the single webcam built into their laptops.
The trick is making a nice frame. [Michael] has bent one out of wire, but suggests that a mirror compact works about as well in a pinch. It’s super important that his students can ask him questions backed up by drawings, and this reduces the startup cost to nearly nothing, making it universally useful.
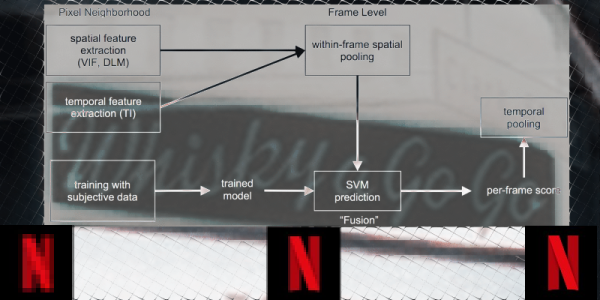
Netflix has recently announced that they now stream optimized shot-based encoding content for 4K. When I read that news title I though to myself: “Well, that’s great! Sounds good but… what exactly does that mean? And what’s shot-based encoding anyway?”