Date Clock Requires (Almost) No Interaction

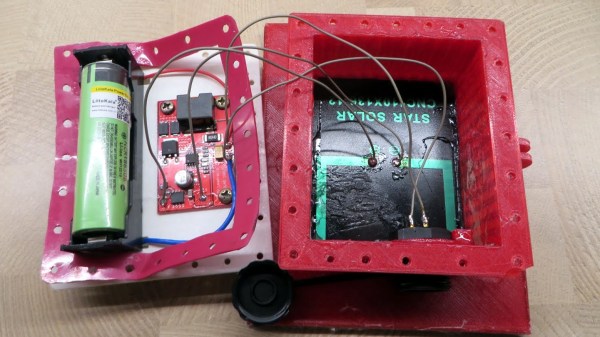
A lot of commercial offerings of technology aimed at helping the elderly seem to do a good job on the surface, but anything other than superficial interaction with them tends to be next to impossible for its intended users. Complicated user interfaces and poor design consideration reign in this space. [7402] noticed this and was able to design a better solution for an elderly relative’s digital day planner after a commercial offering he tried couldn’t automatically adjust for Daylight Savings.

Of course, the clock/day planner has a lot going on under the surface that the elderly relative may not be able to use, but the solution to all of that was to make it update over the network. This task [7402] plans to do remotely since the relative does not live anywhere nearby. It is based on a Raspberry Pi connected to a Uniroi screen which automatically dims but can be switched off by means of a large button in the front. The UI shows the date, time, and a number of messages or reminders in large font in order to improve [7402]’s relative’s life.

This is a great idea for anyone with their own elderly relative which might need something like this but won’t want to interact with the technology other than the cursory glance, but the project is also a great illustration of proper design for the intended users. Commercial offerings often had hidden buttons and complicated menus, but this has none of that, much like this well-designed walker for an elderly Swede.

Advanced Techniques For Realistic Baking Animations

Computer graphics have come a long way since the days of Dire Straits and their first computer animated music video in 1985. To move the state of the art forward has taken the labor of countless artists, developers and technicians. Working in just that field, a group from UCLA have developed an advanced system for simulating baking in computer graphics, and the results look absolutely delicious.

We propose a porous thermo-viscoelastoplastic mixture model.

The work is being presented at SIGGRPAH Asia, and being an academic paper, is dense in arcane terminology. To properly simulate baking, the team had to consider a multitude of interdependent processes. There’s heat transfer to consider, the release of carbon dioxide from leavening agents, the browning of dough due to evaporation of water, and all manner of other complicated chemical and physical interactions.

With a model that takes all of these factors into account, the results are amazingly realistic. The team have shown off renders of cookies in the oven, freshly baked loaves of bread being torn apart, and even muffins full of melted chocolate chips.

We imagine it would have been difficult not to work up an appetite during the research process. We’ve seen impressive work from SIGGRAPH before, like this method for printing photorealistic images on 3D surfaces. Video after the break.

Continue reading “Advanced Techniques For Realistic Baking Animations”

Improved Outdoor Solar Harvester Now Handles All The Parts

[Vadim Panov]’s 3D printed solar harvester is in effect a rechargeable outdoor battery, and the real challenge he faced when designing it was having it handle the outdoors reliably. The good news is that part is solved, and his newest design is now also flexible enough to handle a variety of common and economical components such as different battery connectors, charge controllers, and solar panel sizes. All that’s left is to set it up using the GoPro-style mounting clamp and let it soak up those solar rays.

We saw his first version earlier this year, which uses inventive and low-cost solutions for weatherproofing like coating the 3D print with epoxy (the new version makes this easier and less messy, by the way.) It was a fine design, but only worked with one specific solar panel size and one specific configuration of parts. His newest version makes a few mechanical improvements and accommodates a wide variety of different components and solar panel sizes. The CAD files are all available on the GitHub repository but he’s conveniently provided STL files for about a dozen common sizes.

When it comes to harvesting light, staying indoors offers less power but requires a far less rugged setup. If that interests you, be sure to check out the Tiny Solar Energy Module (TSEM) which can scrape up even indoor light.

DIY CNC Router Uses Chains The Right Way

There are a million and one ways to build your own CNC router, depending on your tastes, budget, and application, your design choices will differ accordingly. [Steve Tyng] was well aware of this when undertaking his project, and built the machine that made sense for him.

[Steve’s] build has a strong focus on keeping costs down, and that’s reflected in the hardware used. Wanting a large work area of 30″ x 60″, off-the-shelf linear rails in 6 foot lengths were prohibitively expensive. Instead, 1″ angle iron was sourced from the local garden centre, and used in conjunction with steel v-bearings. It’s a lot cheaper, and good enough for the application at hand, so why not? Other smart choices abound, such as using an IKEA cabinet as the base, and a fanless computer to run the show to avoid death by dust.

When it came time to build the axes, there was plenty of roller chain on hand. Chain is usually passed up for options such as timing belts or ballscrews in the CNC community, as it tends to stretch over time and offers poor accuracy. However, [Steve] took stock of the drawbacks of the method, and made efforts to overcome these weak points in the design. The Y and X axes were specially designed to keep the chain supported along its length. This helped avoid the problem of long drooping chains and poor tension.

While it’s not an industrial-strength build with world-beating accuracy, it’s a solid CNC machine that can carve out large workpieces without issue. Over the years, we’ve seen plenty of DIY CNCs, built with everything from PVC pipe to welded steel. Video after the break.

Continue reading “DIY CNC Router Uses Chains The Right Way”

A Scratch-built RISC-V CPU In An FPGA

“RISC architecture is going to change everything”, which is why [SHAOS] is building this cool RISC-V DIY retro-style computer.

The project took inspiration from another hacker’s work in building a RISC-V emulator; shared in the Hackaday FPGA chat. He took it a bit further and got it going on an UPDuino v2.0 board which features a iCE40 FPGA from Lattice.

The board passes all the tests for the RISC-V subset he’s aiming for and even run some Zephry RTOS examples. He’s done a really good job of documenting how he got the code to run as well as many of the experiments he’s run so far. All the project files for ICEcube2 software are posted. It’s not the only RISC-V CPU we’ve seen in an FPGA, but the code is actually very clear and worth a read if you’re into such things.

We think anyone interested in duplicating his work could do so somewhat easily and start playing around with this increasingly popular architecture. Or at least get some LED’s blinking in an arcane but meaningful way. Video after the break.

Continue reading “A Scratch-built RISC-V CPU In An FPGA”

KiCad Action Plugins

The last two years has been a particularly exciting time for KiCad, for users, casual contributors, and for the core developers too. Even so, there are many cool new features that are still in process. One bottleneck with open-source development of complex tools like KiCad is the limited amount of time that developers can devote for the project. Action plugins stand to both reduce developer load and increase the pace of development by making it easier to add your own functionality to the already extensible tool.

Sometime around version 4.0.7 (correct us if we’re wrong), it was decided to introduce “action plugins” for KiCad, with the intention that the larger community of contributors can add features that were not on the immediate road map or the core developers were not working on. The plugin system is a framework for extending the capabilities of KiCad using shared libraries. If you’re interested in creating action plugins, check out documentation at KiCad Plugin System and Python Plugin Development for Pcbnew. Then head over to this forum post for a roundup of Tutorials on python scripting in pcbnew, and figure out how to Register a python plugin inside pcbnew Tools menu. Continue reading “KiCad Action Plugins”

Behold A 3D Display, Thanks To A Speeding Foam Ball

We’ve seen 3D image projection tried in a variety of different ways, but this is a new one to us. This volumetric display by Interact Lab of the University of Sussex creates a 3D image by projecting light onto a tiny foam ball, which zips around in the air fast enough to create a persistence of vision effect. (Video, embedded below.) How is this achieved? With a large array of ultrasonic transducers, performing what researchers call ‘acoustic trapping’.

This is the same principle behind acoustic levitation devices which demonstrate how lightweight objects (like tiny polystyrene foam balls) can be made to defy gravity. But this 3D display is capable of not only moving the object in 3D space, but doing so at a high enough speed and with enough control to produce a persistence of vision effect. The abstract for their (as yet unreleased) paper claims the trapped ball can be moved at speeds of up to several meters per second.

It has a few other tricks up its sleeve, too. The array is capable of simultaneously creating sounds as well as providing a limited form of tactile feedback by letting a user touch areas of high and low air pressure created by the transducers. These areas can’t be the same ones being occupied by the speeding ball, of course, but it’s a neat trick. Check out the video below for a demonstration.
Continue reading “Behold A 3D Display, Thanks To A Speeding Foam Ball”