People unfamiliar with shooting sports sometimes fail to realize the physicality of getting a bullet to go where you want it to. In the brief but finite amount of time that the bullet is accelerating down the barrel, the tiniest movement of the gun can produce enormous changes in its trajectory, and the farther away your target is, the bigger the potential error introduced by anticipating recoil or jerking the trigger.
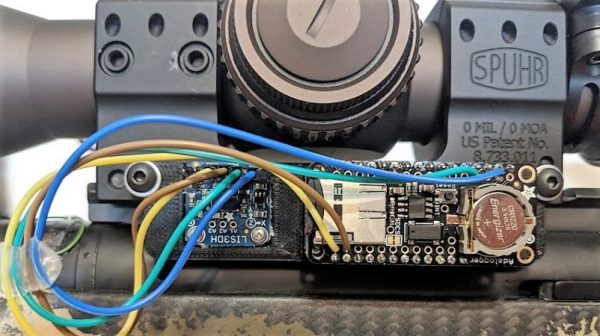
Like many problems this one is much easier to fix with what you can quantify, which is where this DIY rifle accelerometer can come in handy. There are commercial units designed to do the same thing that [Eric Higgins]’ device does but most are priced pretty dearly, so with 3-axis accelerometer boards going for $3, rolling his own was a good investment. Version 1, using an Arduino Uno and an accelerometer board for data capture with a Raspberry Pi for analysis, proved too unwieldy to be practical. The next version had a much-reduced footprint, with a Feather and the sensor mounted in a 3D-printed tray for mounting solidly on the rifle. The sensor captures data at about 140 Hz, which is enough to visualize any unintended movements imparted on the rifle while taking a shot. [Eric] was able to use the data to find at least one instance where he appeared to flinch.
We like real-world data logging applications like this, whether it’s grabbing ODB-II data from an autocross car or logging what happens to a football. We’ll be watching [Eric]’s planned improvements to this build, which should make it even more useful.