A Wrist-Mounted Flamethrower? Sure, Why Not?

There are three types of booths at Maker Faire. The first is the strange corporate booth, like Pepsi ‘revolutionizing fluid intake’ or some such nonsense. That one had the longest line of any booth, in case you’re wondering. The second type of booth is the people you would expect to be there – Atmel, TI, and Makerbot all came out in full force.

The third type of booth were a little hard to find. They’re the ‘show and tell’ spirit of Maker Faire, and [Stephen Hawes] was one of the best. Why? Wrist-mounted flamethrower, that’s why.

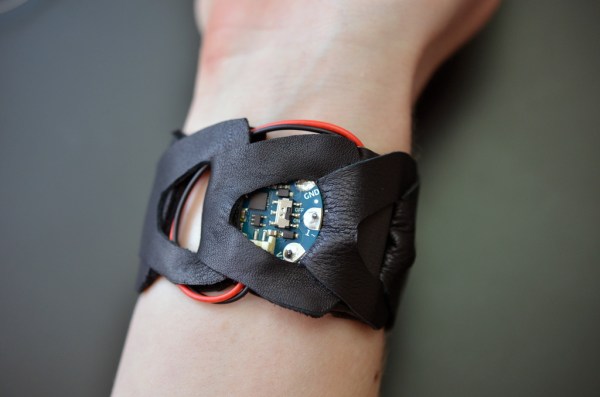
The flamethrower is fueled with a propane bottle originally meant for a camping stove, with a microcontroller and pot setup taking care of the height of the flame. Buttons underneath [Stephen]’s thumb takes care of the propane flow and tazer-based ignitor. The wrist measurement sensor can rescale to adjust the height of the flame to how far the wearer can move their wrist.

All in all, a great project for the Faire, although we did feel a little sorry for the NYC fire marshal that was assigned to [Stephen] for the entire faire. As an aside, we’re applauding [Stephen] for not referencing whatever comic book character has fire shooting out of his hand.

THP Semifinalist: B10N1C Yourself

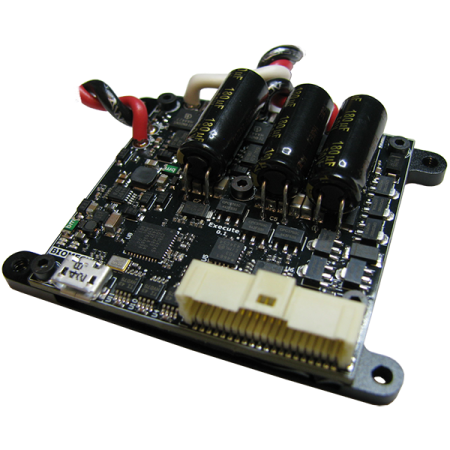
The Hackaday Prize has had a few medical devices make the semifinalist cut, and of course wearables are on the list. How about implantables? That’s what Bionic Yourself 2.0 (or B10N1C) is doing with an implantable microcontroller, battery, and sensor system.

The hardware in B10N1C includes a electromyography sensor for measuring muscle activity, an accelerometer, a vibration motor, RFID reader/writer, temperature sensor, and – get this – a LED bar graph that will shine a light through the skin. That’s something we’ve never seen before, and if you’re becoming a cyborg, it’s a nice feature to have.

As with anything you would implant in your body, safety is a prime consideration for Bionic.the Lithium battery can be overcharged (yes, through a wireless charging setup) to 10V without a risk of fire or explosion, can be hit with a hammer, and can even be punctured. The enclosure is medical grade silicone, the contacts are medical grade stainless steel, and there’s a humidity sensor inside that will radio a message saying its time to remove the device if the moisture level in the enclosure increases.

Because the device is implanted under the skin, being able to recharge and update the code without a physical connection is the name of the game. There’s a coil for wireless charging, and a lot of work is going into over the air firmware updating. It’s an astonishing project, and while most people probably won’t opt for a cyborg implant, it will look really cool.


SpaceWrencherThe project featured in this post is a quarterfinalist in The Hackaday Prize.

The Walltech Smartwatch

THP Quarterfinalist: WALLTECH Smartwatch

While there is lots of hype about a big company launching a new wearable product, we’re more interested in [Walltech]’s open source OLED Smartwatch. This entry into The Hackaday Prize merges a collection of sensors and an OLED screen into a wearable device that talks to your smartphone over Bluetooth Low Energy.

The device is based on the IMUduino BTLE development board. This tiny Arduino clone packs an inertial measurement unit (IMU), a Nordic nRF8001 Bluetooth radio, and an ATMEGA32u4 microcontroller.

The 1.5″ OLED display comes from [miker] who makes an OLED module based on the SSD1351. A STP200M 3D pedometer provides activity monitoring in a tiny package.

On the hardware side, packaging all these components into something that will fit on your wrist is quite difficult. The prototype hardware is built from mostly off the shelf components, but still manages to be watch sized.

At this point, it looks like the code is the main challenge remaining. There’s a lot of functionality that could be implemented, and [Walltech] even mentions that it’s designed to be very customizable. It even supports Android; the Apple Watch can’t do that.


SpaceWrencherThe project featured in this post is a quarterfinalist in The Hackaday Prize.

The badge from Queercon 11 at Defcon

The Queercon 11 Badge

DEFCON is known for its unique badge designs, which have featured displays, radios, and tons of LEDs in the past. This year, there was another digital badge at DEFCON. The Queercon 11 badge featured an MSP430, a LED display, an IR interface, and an ISM band radio.

Queercon started off as a DEFCON party for LGBT hackers. Over the past eleven years they’ve run events at DEFCON including parties, mixers, and networking events. Over time the group has grown, become a non-profit, and provided a social network for LGBT people in tech. We must admit that they throw quite a good pool party.

This badge gave you points for meeting other people. When held near another QC11 badge, the IR link sends the identifier for each person. Both badges light up and display the other person’s name, and store the event. This process became known by a variety of colloquialisms, and “badginal intercourse” was a common occurrence at events.

The reader for Queercon 11 badges
The QC11 Badge Reader

The RF radio, implemented using a HopeRF RF69 module, shows how many people with QC11 badges are near you. A base station at events sends out data to give badges points for attendance. As points are accumulated, the rainbow LEDs on either side of the display light up.

At Queercon parties, a reader connected to a dumb terminal read data off the badges. It then shows who the badge has paired with, and what events its been to.

The hardware design and source code have all been released on the Queercon website. The full functionality is discussed in the README.

Upgrading The Battery In A Wrist PDA

No, your eyes do not deceive you. That’s a wrist-mounted PDA. Specifically, a Fossil Wrist PDA, also known as an Abacus, that was sold from 2003 to about 2005. Yep, it’s running PalmOS. [mclien] has had this watch/PDA for a while now, and found the original 180mAh battery wasn’t cutting it anymore. He made a little modification to the watch to get a 650mAh battery in this PDA by molding a new back for it.

The original PDA used a round Lithium cell, but being ten years old, the battery technology in this smart watch is showing its years. [mclien] found two batteries (380mAh and 270mAh) that fit almost perfectly inside the battery.

The new batteries were about 3mm too thick for the existing case back, so [mclien] began by taking the old case, adding a few bits of aluminum and resin, and making a positive for a mold. Two or three layers of glass twill cloth were used to form the mold, resined up, and vacuum bagged.

After many, many attempts, [mclien] just about has the case back for this old smartwatch complete. The project build logs are actually a great read, showing exactly what doesn’t work, and are a great example of using hackaday.io as a build log, instead of just project presentation.

3D Printing A Daft Punk Helmet

Thanks to the awesome people over at Adafruit, you can now print your very own Daft Punk helmet! It is designed with a hollowed out shell and translucent material which allows for colorful LEDs to be inserted into the mask, which can light up just about any room. This makes the headset great for Maker Faire, household parties, and underground EDM raves.

The epic costume was inspired by the infamous electronic music duo from France who is known for hiding their identities behind intricate and complex masks. This version, however, is perfect for the Do-It-Youself builder on a budget assuming you have access to a Taz 3D printer through your hackerspace or a friend.

The entire helmet is 3D printed as one piece using a semi-transparent PLA filament with NeoPixel strips (144 pixel per meter) laid inside. It takes about 3 days to complete the printing job (assuming no errors arise during the process). After everything is finished, glossy gold paint is applied and the polished outcome is enough to turn some heads. Plus, this mask makes a great addition to any builder’s homemade ‘trophy’ collection.

A natural next step would be to add sensors that can detect bass vibrations. This could be used to change the colors of the display based on the music that is being played nearby. We’ve seen this sort of thing before on a few Daft Punk helmet builds that are far superior to this one. Of course the difference here is that the Adafruit version can be build in a reasonable amount of time by a mere mortal. Those other examples were life commitments as far as projects go!

Don’t forget to check out the video of this one in action after the break.

Continue reading “3D Printing A Daft Punk Helmet”

Homemade Activity Monitor

A group of developers have uploaded a tutorial on Instructables showing the steps needed to develop a homemade DIY fitness tracker. The design is the second iteration of an Arduino-based wearable smart watch project of theirs. This time around, they opted to focus more on the monitoring system rather than a visual display. It is called the ‘RetroBand’ and records steps taken and calories burned by the user.

The microcontroller used is an Arduino Pro mini 3.3v. Accelerometer and gyro sensors were integrated to capture the movement of the ‘RetroBand.’ A wireless bluetooth module connects to an Android phone which presents the data through a Play Store app complete with graphs included. An enclosure was 3D printed. Everything is powered by a one cell Lithum-Polymer battery. The code for the project can be found on Github, and additional information with a how-to manual is on their website (which is in Korean, but can easily be translated through the browser).