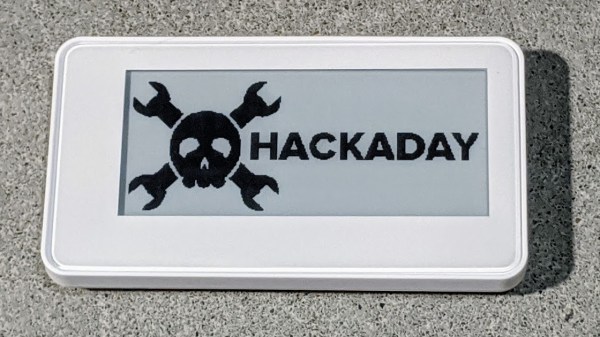
DIY ESP32 Alarm System Leverages 433 MHz Sensors

There’s a huge market for 433 MHz alarm system hardware out there, from PIR motion detectors to door and window sensors. If you want to put them to work, all you need is a receiver, a network-enabled microcontroller, and some code. In his latest video, [Aaron Christophel] shows how easy it can be.

In essence, you connect a common 433 MHz receiver module to an ESP32 or ESP8266 microcontroller, and have it wait until a specific device squawks out. From there, the code on the ESP can fire off using whatever API works for your purposes. In this case [Aaron] is using the Telegram API to send out messages that will pop up with a notification on his phone when a door or window is opened. But you could just as easily use something like MQTT, or if you want to go old-school, have it toggle a relay hooked up to a loud siren.

Even if you aren’t looking to make your own makeshift alarm system, the code and video after the break are a great example to follow if you want to get started with 433 MHz hardware. Specifically, [Aaron] walks the viewer through the process of scanning for new 433 MHz devices and adding their unique IDs to the list the code will listen out for. If you ever wondered how quickly you could get up and running with this stuff, now you’ve got your answer.

In the past we’ve seen the Raspberry Pi fill in as an RF to WiFi gateway for these type of sensors, as well as projects that pulled them all together into a complete home automation system on the cheap.

Continue reading “DIY ESP32 Alarm System Leverages 433 MHz Sensors”

Gyroscopic Wi-Fi LED Die Is Pretty Fly

As cool as sculptural LED cubes are, the only thing you can really do is look at them. They’re not going to stand up to a lot of handling, and as tedious as it is to bend all those leads when building them, you probably wouldn’t want to mess with them anyway.

LED dice on the other hand are robust, blinky playthings with many possibilities, especially if they have a gyroscope and wireless control like the one [moekoe] built. Inside this tiny 25cm³ die is the equally small ESP8285-01F, which lets [moekoe] control the rainbow light show with a Blynk app.

As you will see in the excellent build video that makes this build look challenging instead of impossible, the cube gets permanently sealed up with solder joints. Most but not all of these transfer power, ground, and data around the faces.

Once the cube is together, [moekoe] uses pogo pins to program it, and can charge the little LiPo inside through contact pads. We love the idea of using a cubical printed jig to help solder the PCB edges together, but not as much as we love [moekoe]’s home-brewed SMT soldering setup.

If you want an easier way to make sculptural LED cubes, build yourself a lead-formin’ machine.

Continue reading “Gyroscopic Wi-Fi LED Die Is Pretty Fly”

New Part Day: Battery-Less NFC E-Paper Display

Waveshare, known for e-ink components aimed at hobbyists among other cool parts, has recently released a very interesting addition to their product line. This is an enclosed e-ink display which gets updated over a wireless NFC connection. By that description, nothing head-turning, but the kicker is that there is no battery inside the device at all, as it harvests the energy needed from the wireless communication itself.

Just like wireless induction charging in certain smartphones, the communication waves involved in NFC can generate a small current when passing through a coil, located on this device’s PCB. Since microcontrollers and e-ink displays consume a very small amount of current compared to other components such as a backlit LCD or OLED display, this harvested passive energy is enough to allow the display to update. And because e-paper requires no power at all to retain its image, once the connection is ended, no further battery backup is needed.

The innovation here doesn’t come from Waveshare however, as in 2013 Intel had already demoed a very similar device to promising results. There’s some more details about the project, but it never left the proof of concept stage despite being awarded two best paper awards. We wonder why it hadn’t been made into a commercial product for 5 years, but we’re glad it’s finally here for us to tinker with it.

E-paper is notorious for having very low refresh rates when compared to more conventional screens, much more so when driven in this method, but there are ways to speed them up a bit. Nevertheless, even when used as designed, they’re perfectly suited for being used in clocks which are easy on the eyes without a glaring backlight.

[Thanks Steveww for the tip!]

Dog-Harnessing The Power Of Walkie Talkies

[javier.borquez] likes to take his dog to the hang out at the dog park around dusk. But once the sun goes down and [Rusio]’s off the leash, running amok with the other dogs, it’s almost impossible to keep track of him.

Sure, there are probably glow-in-the-dark or lighted collars out there, but if you go commercial, chances are good that someone else’s dog will be wearing the same thing. Besides, what’s the fun in buying something that you can do a better job making yourself? With this dog distance indicator harness, you don’t even have to program anything. Instead, it uses a cheap pair of modified walkie talkies to show green LEDs on the harness while the dog is in range, and red when it isn’t.

Although [javier]’s pupper is the best pupper yes he is, [Rusio] can’t be expected to hold down the button and bark his location. His walkie talkie uses a 555-based frequency generator and a glued-down button to speak at 1 kHz.

Over in [javier]’s walkie, there’s a resistor in place of the speaker to keep the talkie parts working. There’s also a half-wave bridge rectifier that charges a capacitor when [Rusio] is within range, and a resistor that drains it when he’s outside the 6-8 meter range. The rectifier’s output goes to a second 555 set up as a Schmitt trigger, which tells a transistor to turn the red LEDs on instead.

If you got stuck on the idea of hearing your dog talk to you over distances, here’s a Bluetooth Babelfish collar.

Adora-BLE Synth Wails Without Wires

Isn’t this the cutest little synth you ever saw? The matching sparkly half-stack amp really makes it, visually speaking. But the most interesting part? There’s not a wire in sight, ’cause [Blitz City DIY]’s futuristic rig sends the bleep boops over Bluetooth LE.

Hardware-wise, both the synth and the amp are fairly simple. Underneath each of those cute little printed keys is one of those clicky momentaries that usually come with bright button caps in primary colors — the keys themselves just press-fit over the tops. All twelve ebonies and ivories are connected up to an Adafruit Feather, which communicates over Bluetooth LE to a CircuitPlayground Bluefruit (CPB) in the amp. Each time a note is played on the synth, its corresponding color circles comet-like around the CPB’s NeoPixels, which shine through the amp’s speaker grille.

The super interesting part is that all the hard work is happening in the code. Both boards have the same array of colors in rainbow order, and the CPB has an array of tone frequencies that match up one for one with the colors. For every note played, the CPB looks up the color, swirls it, and plays the note. If you want to build one, this project is wide open — [Blitz City DIY] even made a learn guide with all the dirty details. Be sure to check out the demo and extended walk-through after the break.

More in the market for making a computer keyboard? Just grab the nearest ESP32.

Continue reading “Adora-BLE Synth Wails Without Wires”

LoRa Mesh Network With Off-the-Shelf Hardware

An ideal application for mesh networking is off-grid communication; when there’s no cellular reception and WiFi won’t reach, wide-area technologies like LoRa can be used to create ad hoc wireless networks. Whether you’re enjoying the outdoors with friends or conducting a rescue operation, a cheap and small gadget that will allow you to create such a network and communicate over it would be a very welcome addition to your pack.

That’s exactly the goal of the Meshtastic project, which aims to take off-the-shelf ESP32 LoRa development boards and turn them into affordable mesh network communicators. All you need to do is buy one of the supported boards, install the firmware, and starting meshing. An Android application that will allow you to use the mesh network to send basic text messages is now available as an alpha release, and eventually you’ll be able to run Signal over the LoRa link.

Navigating to another node in the network.

Developer [Kevin Hester] tells us that these are still the very early days, and there’s plenty of work yet to be done. In fact, he’s actively looking to bring a few like-minded individuals onto the project. So if you have experience with the ESP32 or mobile application development, and conducting private communications over long-range wireless networks sounds like your kind of party, this might be your lucky day.

From a user’s perspective, this project is extremely approachable. You don’t need to put any custom hardware together, outside of perhaps 3D printing a case for your particular board. The first time around you’ll need to flash the firmware with esptool.py, but after that, [Kevin] says future updates can be handled by the smartphone application.

Incidentally, the primary difference between the two boards is that the larger and more expensive one includes GPS. The mesh networking side of things will work with either board, but if everyone in your group has the GPS-equipped version, each user will be able to see the position of everyone else in the network.

This isn’t the first time we’ve seen LoRa used to establish off-grid communications, and it surely won’t be the last. The technology is perfect for getting devices talking where there isn’t any existing infrastructure, and we’re excited to see more examples of how it can be used in this capacity.

LoRa Tutorials For The DIY Masses

LoRa is the go-to tech for low power, long range wireless sensor networks. Designing with off-the-shelf modules can be a boon or a bane depending on the documentation and support. Luckily, [Renzo] has prepared a set of tutorials to get you started.
In his seven part series of write-ups, [Renzo] starts by connecting the E32 module from AliExpress to an Arduino as well as an ESP8266 to demonstrate essential communications. Then he discusses the configuration options and the library he created to make like a bit easier. Following that is a series of posts discussing transmission types as well as power saving methods including sleep modes and wake-on-radio.
The information will be extremely handy for someone starting off with the SX1276/SX1278 Wireless Modules which are relatively inexpensive as opposed to more standardized development kits. We love the abundance of fritzing diagrams, arduino code and helper library and hope someone will build on it. You can get the library from Github for your tinkering pleasure.
If you are looking for ideas for this newly discovered skill, have a look at LoRa Enabled Mailbox as well as Electric Fence Monitoring with The Things Network for a bit of IoT action.