Curtains are about as simple as household devices get, but they can be remarkably troublesome to automate. Everyone’s window treatments are slightly different, which frustrates a standardized solution. [dfrenkel] has a passion for DIY and wanted his mornings flooded with sunlight for more peaceful awakenings, so the MorningRod Smart Curtain Rod was born.
Replacing the curtain rod with aluminum extrusion and 3D printed fixtures goes a long way towards standardizing for automation.
MorningRod’s design takes advantage of affordable hardware like aluminum extrusions and 3D printed parts to create a system that attempts to allow users to keep their existing curtains as much as possible.
The curtain rod is replaced with aluminum extrusion. MorningRod borrows ideas from CNC projects to turn the curtain rod into a kind of double-ended linear actuator, upon which the curtains are just along for the ride. An ESP32 serves as the brains while a NEMA17 stepper motor provides the brawn. The result is a motorized curtain opening and closing with a wireless interface that can be easily integrated into home automation projects.
[dfrenkel] is offering a kit, but those who would prefer to roll their own should check out the project page on Thingiverse.
It’s interesting to peek into other scenes and niches and see how they intersect with things that one may find commonplace, like 3D printing. In this case, [NewToOldGuns] wrote a guest blog post for PyramydAir (a retailer, so be prepared for a lot of product links) about how 3D printing has completely transformed the experience of how he uses one of his favorite airguns, and allowed him to make changes and improvements that would not otherwise have been practical.
Not only are the 3D printed improvements thoughtful and useful, but it’s interesting to see familiar insights into the whole design process. After explaining some 3D printing basics, he points out that rapid iteration is key to effective prototyping, and a 3D printer can allow that to happen in a way not previously possible.
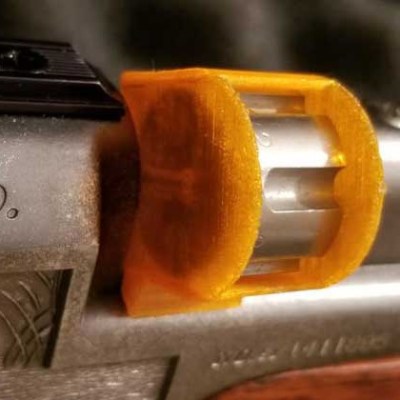
The pellets held inside the silver cylinder can no longer fall out, and the orange holder allows it to be simply pushed straight through into the gun’s receiver.
It all started with the small magazine which holds the rifle’s projectiles. It would be really handy to pre-load these for easier reloading, but there were practical problems preventing this. For one thing, there’s nothing to really hold the pellets in place and keep them from just falling out when it’s not loaded into the gun. Also, loading them into the gun without letting anything fall out was awkward at best. The solution was to design a simple holder that would cradle the magazine and cover the front and back to keep everything in place. [NewToOldGuns] also designed it so that it could mate directly to the gun, so the magazine could simply be pushed straight into the receiver while the action was held open.
Once this simple part was working, the floodgates of creativity were opened. Next was a belt attachment to hold multiple reloads, followed by a decision to mount the reloads directly onto the gun instead. An improved lever and sights quickly followed.
I also demonstrated the iterative approach to prototyping when I designed a simple alarm to detect when my 3D printer’s filament had run out. [NewToOldGuns] observes that the real power of 3D printing isn’t being able to make bottle openers or coat hooks on demand. It’s the ability to imagine a solution, then have that solution in hand in record time.
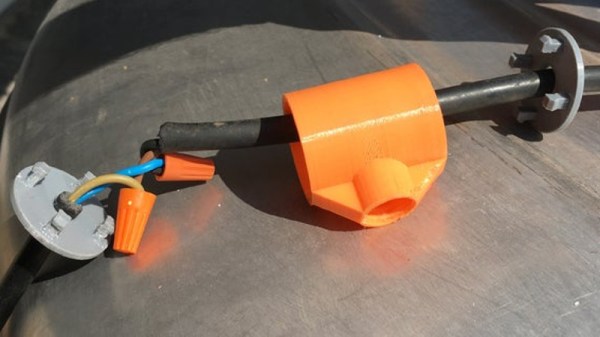
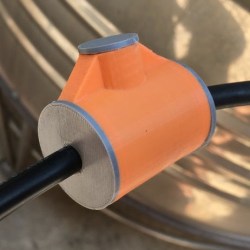
Thingiverse user [The-Mechanic] shared a design for 3D printed enclosures that are made to house wire and cable junctions, which can then be rendered weatherproof by injecting them with a suitable caulking compound and allowing it to cure. It’s a cross between an enclosure and potted electronics. It’s also a one-way trip, because the result is sealed up like a pharaoh’s tomb. On the upside, it’s cheap, accessible, and easily customized.
The way it works is this: wires go through end caps which snap onto the main body, holding the junction inside. Sealant is then pumped in via the hole on the side, then the hole is plugged. Afterwards, all there is to do is wait until the sealant cures. [The-Mechanic] has a couple of companion designs, as well. For tubes of sealant that have threaded tops, one can more effectively save the contents of the tube for later with this design for screw-on caps. There are also 3D printed nozzles in a variety of designs.
One thing to keep in mind about silicone-based sealants is that thick gobs of it can take a really, really long time to cure fully. A thick gob of the stuff will tend to firm up on the outside but leave the inside gooey. If that will be a problem, maybe take a cue from Oogoo and mix in a bit of corn starch with the silicone sealant. The resulting mixture will be thicker, but it’ll cure throughout with no problems.
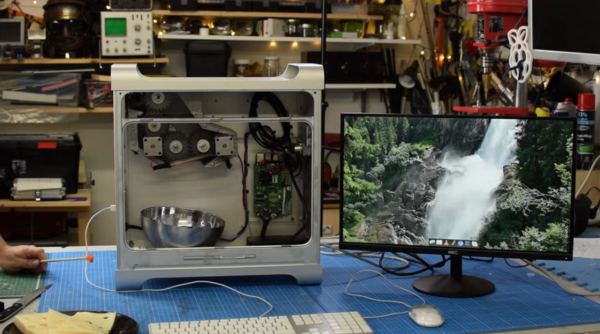
If you’ve been using Apple products since before they were cool, you might remember the Power Mac G5. This was a time before Apple was using Intel processors, so compatibility issues were high and Apple’s number of users was pretty low. They were still popular in some areas but didn’t have the wide appeal they have now. The high quality of the drilled aluminum design lived on into the Intel era and gained more popularity, but the case was still colloquially known as the “Cheese Grater”. Despite not originally being able to grate cheese though, this Power Mac actually does grate cheese.
Ungrated cheese is placed in the CD drive slot where it passes through a series of 3D printed gears which grate the cheese into small chunks. The cheese grating drive is automatically started when it detects cheese via a Raspberry Pi. The Pi 4 also functions as a working desktop computer within the old G5 case, complete with custom-built I/O ports for HDMI that integrate with the case to make it look like original hardware.
Funnily enough, the Pi 4 has more computing power and memory than Apple’s flagship Mac at the time, and consumes about 100 times less power. It’s a functional build that elaborates on an in-joke in the hardware community, which we can all appreciate. Perhaps the next build should be something that uses the blue smoke for a productive purpose. Meanwhile, regular readers will remember that this isn’t the first Apple related cheese grating episode we’ve shown you.
[Gzumwalt] did things a little differently with his Pink and Green Domino Machine II, a 3D printed device that drops dominoes in a neat row ready for toppling over. Unlike his earlier version, this one holds dominoes laying flat in a hopper that’s accessible from the top for easy loading. The previous unit had an elegance to it, but it was more limited with respect to how many dominoes it could hold at a time. This new version solves that problem while also showing off a slick mechanism that gracefully slides a domino from the bottom of the hopper, then gently positions it standing on end before opening a rear door to let it out as it moves to the next position. One of the interesting things [gzumwalt] discovered when designing this device was that there isn’t really a “standard” size of domino. That’s one of the reasons the demo uses 3D printed blocks.
Pulling this off with a single small DC motor is a remarkable achievement; the mechanism even stably ejects a positioned domino from the rear without halting its forward motion in the process. An animation of how the mechanism works is embedded below, be sure to check it out!
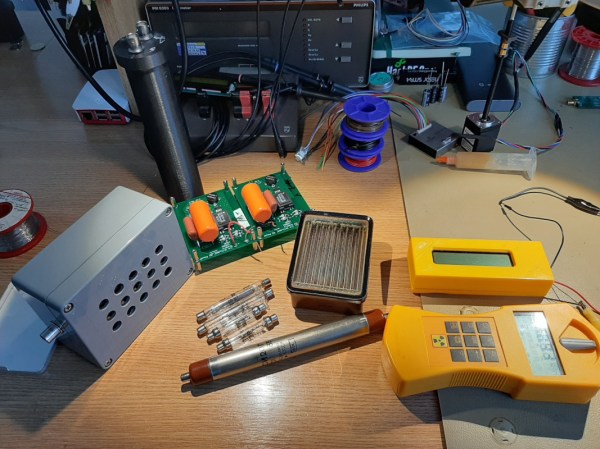
Even if you don’t work in a nuclear power plant, you might still want to use a Geiger counter simply out of curiosity. It turns out that there are a lot of things around which emit ionizing radiation naturally, for example granite, the sun, or bananas. If you’ve ever wondered about any of these objects, or just the space you live in, it turns out that putting together a simple Geiger counter is pretty straightforward as [Alex] shows us.
The core of the Geiger counter is the tube that detects the radiation. That’s not something you’ll be able to make on your own (probably) but once you have it the rest of the build comes together quickly. A few circuit boards to provide the tube with the high voltage it needs, a power source, and a 3D printed case make this Geiger counter look like it was ordered from a Fluke catalog.
The project isn’t quite finished ([Alex] is still waiting on a BNC connector to arrive) but seems to work great and isn’t too complicated to put together, as far as Geiger counters go. He did use a lathe for some parts which not everyone will have on hand, but a quick trip to a makerspace or machinist will get you that part too. We’ve seen some other parts bin Geiger counters too, so there’s always a way around things like this.
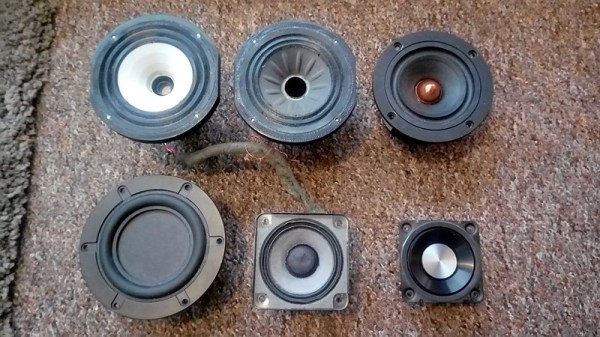
Over the years, we’ve seen numerous projects that attempted to 3D print speaker enclosures that deliver not only a bit of custom flair, but hopefully halfway decent sound. Though as you’d probably expect, the drivers themselves are always standard run-of-the mill hardware mounted into the plastic enclosure. But given the research being conducted by [Paul Ellis], that might not be a safe assumption for much longer.
His quest to develop a full-range 3D speaker has taken him through several design revisions over the last two years, with each one being put through testing procedure that compared its frequency response to “real” speakers from manufacturers like Dayton and Bose. The project is very much ongoing, but a recently completed iteration of the driver design managed to exceed 80 dB at 1 W. In terms of audio quality, [Paul] reports they can hold their own against commercially available drivers. You can hear for yourself in the video after the break.
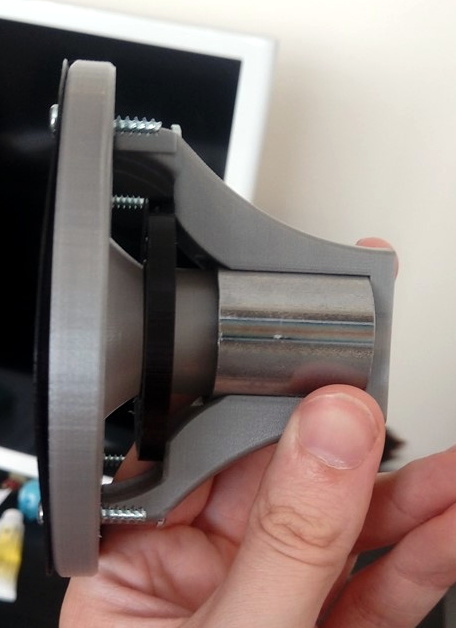
Ultimately, he hopes to be able to sell his 3D printed speakers in kit form to anyone who’s looking for the last word in bespoke audio hardware. The idea being that the drivers and enclosure will be completely modular, allowing the user to swap out individual components for ones printed (or not) in different materials so they can tune the in-person sound to their exact specifications. To facilitate this rapid reconfiguring of the drivers, the designs use some neat tricks like having the magnets be removable rather than glued in so they could be swapped out non-destructively.