Speaking The Same Language As A Wireless Thermometer

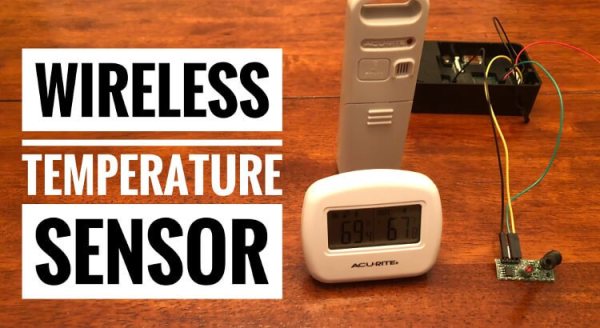
Temperature is a delicate thing. Our bodies have acclimated to a tight comfort band, so it is no wonder that we want to measure and control it accurately. Plus, heating and cooling are expensive. Measuring a single point in a dwelling may not be enough, especially if there are multiple controlled environments like a terrarium, pet enclosure, food storage, or just the garage in case the car needs to warm up. [Tim Leland] wanted to monitor commercially available sensors in several rooms of his house to track and send alerts.

The sensors of choice in this project are weather resistant and linked in his project page. Instead of connecting them to a black box, they are linked to a Raspberry Pi so your elaborate home automation schemes can commence. [Tim] learned how to speak the thermometer’s language from [Ray] who posted about it a few years ago.

The system worked well, but range from the receiver was only 10 feet. Thanks to some suggestions from his comments section, [Tim] switched the original 433MHz receiver for a superheterodyne version. Now the sensors can be a hundred feet from the hub. The upgraded receiver is also linked on his page.

We’ve delved into thermocouple reading recently, and we’ve featured [Tim Leland] and his 433MHz radios before.

Radio Decoding Swiss Army Knife In A NES Controller

If you wanted to name a few things that hackers love, you couldn’t go wrong by listing off vintage console controllers, the ESP system-on-chip platform, and pocket tools for signal capture and analysis. Combine all of these, and you get the ESP32Thang.

At its heart, the ESP32Thang is based around a simple concept – take an ESP32, wire up a bunch of interesting sensors and modules, add an LCD, and cram it all in a NES controller which helpfully provides some buttons for input. [Mighty Breadboard] shows off the device’s basic functionality by using an RFM69HW module to allow the recording and replay of simple OOK signals on the 433 MHz band. This is a band typically used by all sorts of unlicenced radio gear – think home IoT devices, wireless doorbells and the like. If you want to debug these systems when you’re out and about, this is the tool for you.

This is a fairly straightforward build at the lower end of complexity, but it gets the job done with style. The next natural step up is a Raspberry Pi with a full software defined radio attached, built into a Nintendo DS. If you build one, be sure to let us know. This project might serve as some inspiration.

With the wide availability of SPI and I2C modules these days, combined with the ease of programming provided by the Arduino environment, this is a project that just about any hacker could tackle after passing the blinking LED stage. The fact that integrating such hardware is so simple these days is truly a testament to the fact that we are standing on the shoulders of giants.

Converting A TP Link Router To Mission Control For Cheap 433MHz Home Automation

[Jean-Christophe Rona] found himself with some free time and decided to finish a project he started two years ago, reverse engineering cheap 433MHz home automation equipment. He hopes to control his space heaters remotely, in preparation for a cold and, now, robotic winter.

In a previous life, he had reverse engineered the protocol these cheap wireless plugs, garage doors, and electric window shutters all use. This eventually resulted in a little library called rf-ctrl that can toggle and read GPIO pins in the correct way to control these objects. He has a few of the more popular protocols built into the library and even wrote a guide on how to do the reverse engineering yourself if you have need.

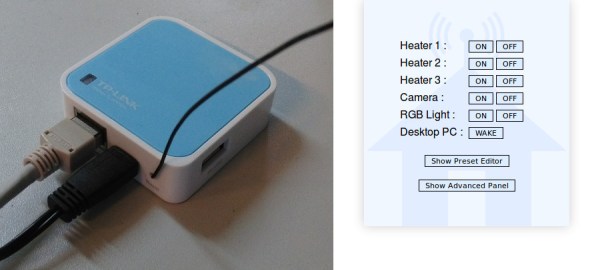
Having successfully interfaced with the plugs to use with his space heaters, [Jean-Christophe] went about converting a cheap TP Link router into a command center for them. Since TP Link never expected anyone to hammer their square peg into a mismatched hole, it takes a careful hand at soldering and some enamel wire to break out the GPIO pins, but it’s well within the average skill set.

The end result is a nicely contained blue box with a little antenna hanging out of it, and we hope, a warm abode for the coming winter.

Hackaday Prize Entry: A 400MHz Modem

The Internet of Things has been presented as the future of consumer electronics for the better part of a decade now. Billions have been invested, despite no one actually knowing what the Internet of Things will do. Those billions need to go somewhere, and in the case of Texas Instruments, it’s gone straight into the next generation of microcontrollers with integrated sub-GHz radios. [M.daSilva]’s entry to the 2016 Hackaday Prize turns these small, cheap, radios into a portable communicator.

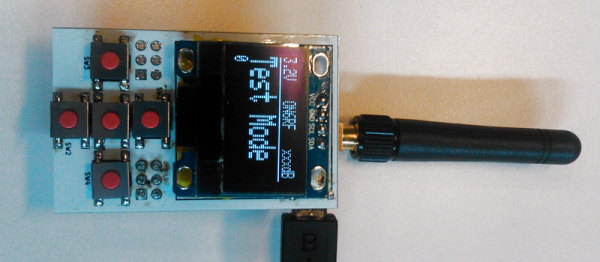
This ‘modem for the 400 MHz band’ consists simply of an ATmega microcontroller, TI’s CC1101 sub-GHz transceiver, an OLED display, and a UHF power amplifier. As far as radios radios go, this is as bare bones as it gets, but with the addition of a USB to serial chip and a small program this radio can send messages to anyone or anything in range. It’s a DIY pager with a couple chips and some firmware, and already the system works.

[M.daSilva] has two use cases in mind for this device. The first is an amateur radio paging system, where a base station with a big power amp transmits messages to many small modules. The second use is a flexible mdoule that links PCs together, using Ham radio’s data modes. With so many possibilities, this is one of the best radio builds we’ve seen in this year’s Hackaday Prize.

The HackadayPrize2016 is Sponsored by:

Saving An Alarm System Remote And $100

[Simon] has been using his home alarm system for over six years now. The system originally came with a small RF remote control, but after years of use and abuse it was finally falling apart. After searching for replacement parts online, he found that his alarm system is the “old” model and remotes are no longer available for purchase. The new system had similar RF remotes, but supposedly they were not compatible. He decided to dig in and fix his remote himself.

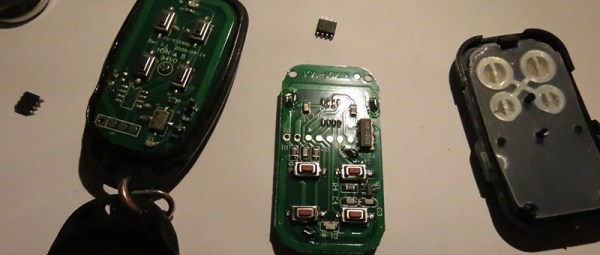
He cracked open the remote’s case and found an 8-pin chip labeled HCS300. This chip handles all of the remote’s functions, including reading the buttons, flashing the LED, and providing encoded output to the 433MHz transmitter. The HCS300 also uses KeeLoq technology to protect the data transmission with a rolling code. [Simon] did some research online and found the thew new alarm system’s remotes also use the same KeeLoq technology. On a hunch, he went ahead and ordered two of the newer model remotes.

He tried pairing them up with his receiver but of course it couldn’t be that simple. After opening up the new remote he found that it also used the HCS300 chip. That was a good sign. The manufacturer states that each remote is programmed with a secret 64-bit manufacturer’s code. This acts as the encryption key, so [Simon] would have to somehow crack the key on his original chip and re-program the new chip with the old key. Or he could take the simpler path and swap chips.

A hot air gun made short work of the de-soldering and soon enough the chips were in place. Unfortunately, the chips have different pinouts, so [Simon] had to cut a few traces and fix them with jumper wire. With the case back together and the buttons in place, he gave it a test. It worked. Who needs to upgrade their entire alarm system when you can just hack the remote?

Wireless Weather Station

High schooler [Vlad] spent about a year building up his battery-operated, wireless weather station. Along the way, not only has he learnt a lot and picked up useful skills, but also managed to blog his progress.

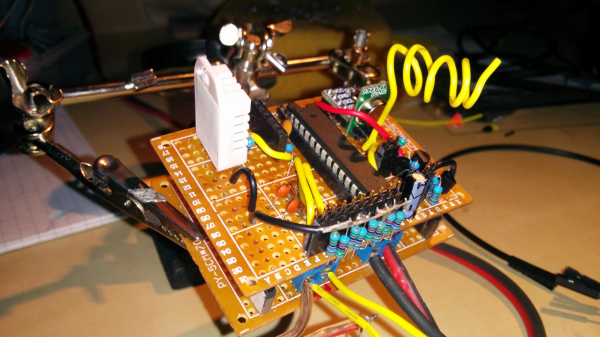
The station measures temperature, humidity, pressure and battery voltage, and he plans to add sensors for wind speed, wind direction and rainfall soon. It is powered via a solar panel and can run on a charged battery for a full month. The sensor module transmits data to a remote receiver connected to a computer from where it is published to the internet. Barometric pressure is measured using the BMP180 and the DHT22 provides temperature and humidity values. The link between the transmit and receive sections uses a 433MHz Superhetrodyne RF Kit which gives [Vlad] a range of 50m. There’s an ATMega328 on the transmitter and receiver side. He’s taking measurements once every 12 minutes, and putting the micro controller in low power mode using the Rocket Scream Low Power Library. A 5W, 12V solar panel charges the 6V Lead Acid battery via a LM317 based charge circuit. This ensures the battery gets charged even when the solar panel is not receiving optimal radiation. One hour of sunlight provides enough charge to keep it going for 2 days. And a fully charged battery will keep it running for a full month even when there’s no sunlight.

The server software consists of two parts. The first pushes serial data to a mySQL database. This is written in Visual Studio C# using help from Oracle mySQL connector. The second part publishes the entries in the mySQL database to the web server. This is written in php, and uses  Libchart for graphing. He’s got the code, schematics, parts list and a lot of other information available for download on his blog. There’s a couple of items pending on his to-do list, so if you have any tips to offer post your comments below.

Hacking A Wireless AC Power Outlet

It’s always nice to see hackers pick up stuff headed for the landfill and put it back in action with a quick repair and upgrade. [Septillion] found a wireless remote controlled AC outlet in the junk bin and decided to do just that. A nice spin-off of such hacks is that we end up learning a lot about how things work.

His initial tests showed that the AC outlet and its remote could be revived, so he set about exploring its guts. These remote AC outlets consist of an encoder chip on the remote and a corresponding decoder chip on the outlet, working at 433MHz.  Since the various brands in use have a slightly different logic, it needed some rework to make them compatible. The transmit remote was a quick fix – changing the DIP switch selected address bits from being pulled low to high and swapping the On and Off buttons to make it compatible with the other outlets.

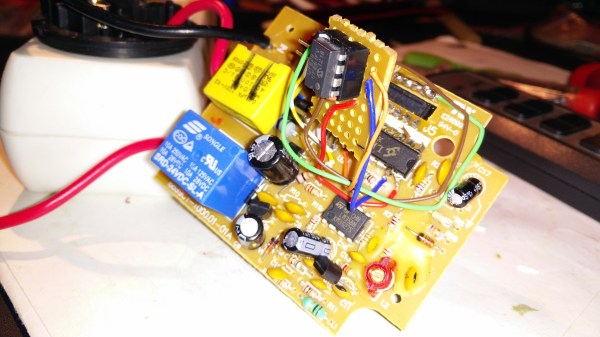
Working on the AC outlet requires far more care and safety. The 230V AC is dropped down using a series capacitor, so the circuit is “hot” to touch. Working on it when it is powered up requires extreme caution. A quick fix would have been to make the changes to the address bits and the On/Off buttons to reflect the changes already made in the remote transmitter. Instead, he breadboarded a small circuit around the PIC12F629 microcontroller to take care of the data and address control. Besides, he wanted to be able to manually switch the AC outlet. The relay control from the decoder was routed via the microcontroller. This allowed either the decoder or the local manual switch from controlling the relay. Adding the PIC also allowed him to program in a few additional modes of operation, including one which doubled the number of outlets he could switch with one remote.