Whiteboard Clock

Whiteboard Clock Draws The Time

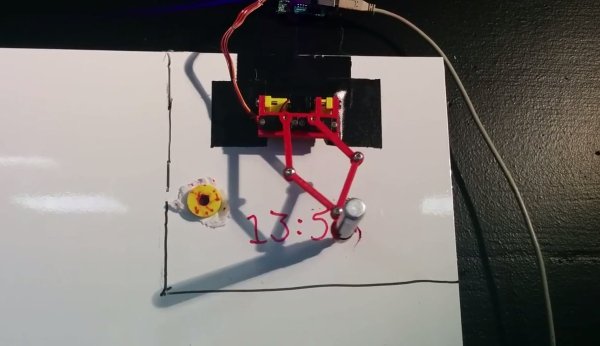
[Maurice] recently built a clock that draws the time (Google Doc) on a white board. We’ve seen plenty of clock hacks in the past, and even a very similar one. It’s always fun to see the different creative solutions people can come up with to solve the same problem.

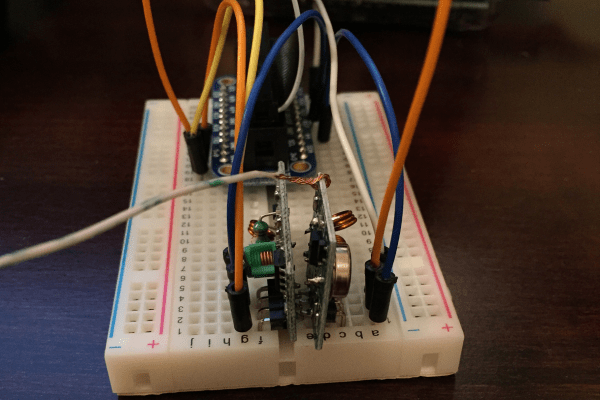
This device runs on a PIC16F1454 microcontroller. The code for the project is available on GitHub. The micro is also connected to a 433MHz receiver. This allows a PC to keep track of the time, instead of having to include a real-time clock in the circuit. The USB connector is only used for power. All of the mounting pieces were designed in OpenSCAD and printed on a 3D printer. Two servos control the drawing arms. A third servo can raise and lower the marker to the whiteboard. This also has the added benefit of being able to place the marker tip inside of an eraser head. That way the same two servos can also erase the writing.

The communication protocol for this systems is interesting. The transmitter shows up on [Maurice’s] PC as a modem. All he needs to do to update the time is “echo 12:00 > /dev/whiteboard”. In this case, the command is run by a cron job every 5 minutes. This makes it easy to tweak the rate at which the time updates on the whiteboard. All communication is done one-way. The drawing circuit will verify the checksum each time it receives a message. If the check fails, the circuit simply waits for another message. The computer transmits the message multiple times, just in case there is a problem during transmission.

Using MATLAB And SDR To Reverse Engineer 433MHz Messages

Hackers everywhere are having a lot of fun with SDR – as is obvious from the amount of related posts here on Hackaday. And why not, the hardware is cheap and easily available. There are all kinds of software tools you can use to dig in and explore, such as SDR# , Audacity, HDSDR and so on. [illias] has been following SDR projects for a while, which piqued his interest enough for him to start playing with it. He didn’t have any real project in mind so he focused on studying the methodology and the tools available for analyzing 433MHz RF transmission. He describes the process of using MATLAB to recover the transmissions being received by the SDR

He started off by studying the existing tools available to uncover the details of the protocol. The test rig uses an Arduino UNO with the rc-switch library to transmit via a common and inexpensive 433MHz module. SDR# is used to record the transmissions and Audacity allows [illias] to visualize the resulting .wav files. But the really interesting part is where he documents the signal analysis using MATLAB.

He used the RTL-SDR package in conjunction with the Communications System Toolbox to perform spectrum analysis, noise filtering and envelope extraction. MATLAB may not be the easiest to work with, nor the cheapest, but its powerful features and the fact that it can easily read data coming from the SDR makes it an interesting tool. For the full skinny on what this SDR thing is all about, check out Why you should care about Software Defined Radio.

RasPi Power Controller

WiFi Controlled Power Outlets With Raspberry Pi

[Tim] was looking for a way to control his power outlets using WiFi. He looked into purchasing a WeMo but he realized that he could build something even better with more bang for his buck. He started out by purchasing a five pack of Etekcity wireless remote control outlet switches. These are kind of like the WeMo, only they aren’t controlled via WiFi. Instead, they come with an RF controller. [Tim] just needed to find a way to bridge the gap between the RF remote and WiFi.

[Tim] decided to use a Raspberry Pi as the brains of the controller. He also purchased a SMAKN 433MHz RF receiver and transmitter for communicating with the wireless outlet switches. The wiring for the modules is pretty simple. There are only four wires. There are power and ground wires for each module. Then the transmitter needs two GPIO pins while the receiver only needs one.

[Tim] began with a fresh installation of Raspbian. He then installed Wiring Pi, which gives you the ability to interface with the GPIO pins in a way that is similar to Arduino. He also installed Apache and PHP to create a web interface for switching the outlets. The last step was to write some custom software. The software included a script that allowed [Tim] to sniff out the controls of his RF remote. The correct codes are entered into the “toggle.php” file, and everything is set. All [Tim] has to do now is browse to his Pi’s web server and click a button. All of the custom code is available via git.

Binary Clock

Binary Clock Would Make Doc Brown Proud

[Brett] was looking for a way to improve on an old binary clock project from 1996. His original clock used green LEDs to denote between a one or a zero. If the LED was lit up, that indicated a one. The problem was that the LEDs were too dim to be able to read them accurately from afar. He’s been wanting to improve on his project using seven segment displays, but until recently it has been cost prohibitive.

[Brett] wanted his new project to use 24 seven segment displays. Three rows of eight displays. To build something like this from basic components would require the ability to switch many different LEDs for each of the seven segment displays. [Brett] instead decided to make things easier by using seven segment display modules available from Tindie. These modules each contain eight displays and are controllable via a single serial line.

The clock’s brain is an ATmega328 running Arduino. The controller keeps accurate time using a DCF77 receiver module and a DCF77 Arduino library. The clock comes with three display modes. [Brett] didn’t want and physical buttons on his beautiful new clock, so he opted to use remote control instead. The Arduino is connected to a 433MHz receiver, which came paired with a small remote. Now [Brett] can change display modes using a remote control.

A secondary monochrome LCD display is used to display debugging information. It displays the time and date in a more easily readable format, as well as time sync information, signal quality, and other useful information. The whole thing is housed in a sleek black case, giving it a professional look.

A Better Way To Hack The Wink

If you’re looking for Home Automation appliances, you might want to check out the Wink Hub. It’s fifty bucks, and has six radios on board: WiFi, Bluetooth, Z-Wave, Zigbee, and 433MHz Lutron and Kidde. That’s an insane amount of connectivity in a very cheap package. It’s been pwnzor3d before, but dinnovative has a much better solution for getting root on this device.

Earlier methods of rooting the Wink involved passing commands via URLs – something that’s not exactly secure. The new method leverages what’s already installed on the Wink, specifically Dropbear, to generate public keys on the Wink hub and getting that key onto another computer securely. The complete exploit is just a few lines in a terminal, but once that’s done you’ll have a rooted Wink hub.

Even though the Wink hub has been rooted a few times before, we haven’t seen anything that leverages the capabilities of this hardware. There isn’t another device with a bunch of IoT radios on the market for $50, and we’re dying to see what people can come up with. If you’ve done something with your Wink, send it in on the tip line.

THP Entry: A 433MHz Packet Cloner

ooklone
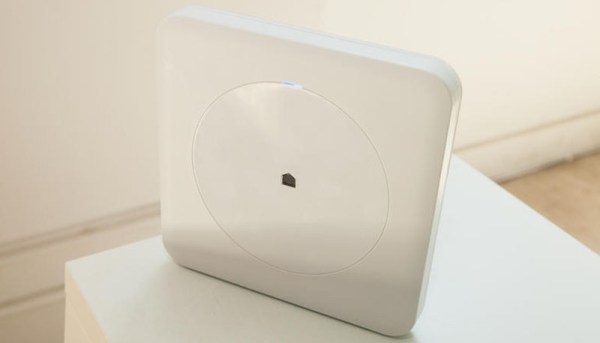
The first generation of The Internet Of Things™ and Home Automation devices are out in the wild, and if there’s one question we can ask it’s, “why hasn’t anyone built a simple cracking device for them”. Never fear, because [texane] has your back with his cheap 433MHz OOK frame cloner.

A surprising number of the IoT and Home Automation devices on the market today use 433MHz radios, and for simplicity’s sake, most of them use OOK encoding. [Texane]’s entry for THP is a simple device with two buttons: one to record OOK frames, and a second to play them back.

Yes, this project can be replicated with fancy software defined radios, but [Texane]’s OOKlone costs an order of magnitude less than the (actually very awesome) HackRF SDR. He says he can build it for less than $20, and with further refinements to the project it could serve as a record and play swiss army knife for anything around 433MHz. Video demo of the device in action below.

Continue reading “THP Entry: A 433MHz Packet Cloner”

Verifying A Wireless Protocol With RTLSDR

rtlsdr_nrf905_rtlizer

[Texane] is developing a system to monitor his garage door from his apartment. Being seven floors apart, running wires between the door and apartment wasn’t an option, so he turned to a wireless solution. Testing this wireless hardware in an apartment is no problem, but testing it in situ is a little more difficult. For that, he turned to software defined radio with an RTLSDR dongle.

The hardware for this project is based around a TI Stellaris board and a PTR8000 radio module. All the code for this project was written from scratch (Github here), making it questionable if the code worked on the first try. To test his code, [Texane] picked up one of those USB TV tuner dongles based around the RTL2832U chipset. This allowed him to monitor the frequencies around 433MHz for the packets his hardware should be sending.

After that, the only thing left to do was to write a frame decoder for his radio module. Luckily, the datasheet for the module made this task easy.

[Texane] has a frame decoder for the NRF905 radio module available in his Git. It’s not quite ready for serious applications, but for testing a simple radio link it’s more than enough.