While it would have been considered science-fiction just a few decades ago, the ability to watch virtually any movie or TV show on a little slab that fits in your pocket is today no big deal. But for an electronics beginner, being able to put together a pocketable video player like this one would be quite exciting, and might even serve as a gateway into the larger world of electronics design.
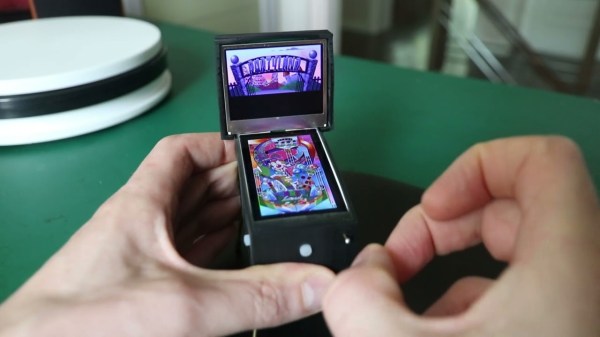
For inspiration, [Alex] from Super Make Something on YouTube looked to the Rickrolling keychain media players we featured back in January. His player is quite a bit larger and more capable, with a PCB design that allows the player to be built in multiple configurations, from audio-only to full video and a LiPo battery. The guts of the player center around an ESP32 module, with an audio amp and speakers plus a 1.8″ LCD screen with SD card reader for storing media files. Add in a few controls and switches and a little code, and you’ll be playing back media files in a snap. Build info and demo in the video below.
It may be a simple design, but we feel like that’s the whole point. [Alex] has taken pains to make this as approachable a build as possible. All the parts are cheap and easily available, and the skills needed to put it together are minimal — with the possible exception of soldering down the ESP32 module, which lacks castellated edge terminals. For a beginner, getting a usable media player by mixing together just a few modules would be magical, and the fact that it’s still pretty hackable afterward is just icing on the cake.
Continue reading “This Simple Media Player Will Inspire Beginners And Invite Experimentation”