Simple Ethereum Vending Machines With NodeMCU

Recently, we covered how to use the Etherscan API to query data (a wallet balance) from the Ethereum blockchain with NodeMCU. It’s a very useful method for retrieving information from a blockchain on embedded systems where storage and memory are an issue.

It has some limitations though. Most notably, it’s polling the API at some interval to retrieve information whether it has changed or not. I would like to be able to receive data more efficiently than this, and quickly enough to make simple vending machines possible. While we’ve seen videos of Bitcoin-based Red Bull vending machines before, they required an NFC card to use.

If we could receive information about Ethereum transactions quickly and reliably enough, we could build a similar vending machine without requiring an NFC card as an intermediary. Simply send to an address via some method, and receive goods!

It turns out we can do exactly that with NodeMCU using WebSocket. Like HTTP, WebSocket is a communications protocol that uses TCP connections (typically over port 80), but it allows full-duplex communication. In other words, you can establish a connection to a server, and send/receive messages without needing to poll the server.

As in the previous example, we’ll use a NodeMCU running Lua. You may wish to refer to it for compile options and information about the screen, which will be the same in this case. Unlike the previous article, you will not need an API key from Etherscan to use this service (not yet, anyway). As usual, we’ll start off by connecting to WiFi:

wifi.setmode(wifi.STATION)
wifi.setphymode(wifi.PHYMODE_B)
station_cfg={}
station_cfg.ssid="Your SSID"
station_cfg.pwd="Your Password"
station_cfg.save=true
wifi.sta.config(station_cfg)

Connecting to a server with WebSockets is easy, but since we’re not using HTTP, we’ll have to remove the https:// and replace that with ws://. (Note: not wss:// because we’ve not enabled encryption yet.)

ws:connect(‘ws://socket.etherscan.io/wshandler’)

Next, we need to report back when the connection is established as the trigger to run additional code. It will return an error code if the connection fails to be established. Handling these error codes in a sensible way is an excellent feature, but we’ll handle that later:

ws:on("connection", function(ws)
    print('got ws connection')
    end)

Now, we need to extend the above to subscribe to an Eth address, and add some new code to do something when a transaction occurs. Note that the API requires that you subscribe to an address within 60 seconds of connecting. It also states that you have to send a ping event to the server every 20 seconds to keep the connection alive, so we’ll need to set a recurring timer for that.

If you’re using ESPlorer, you can send the ping request manually by entering =ws:send('{"event": "ping"}') and pressing Send. This is a useful way to test the connection status.

The address I used seems to have frequent transactions so is reasonable for testing. Be advised though that sitting and waiting for a transaction to happen to test the code creates a slow development cycle so some patience is necessary here.

ws = websocket.createClient()
ws:on("connection", function(ws)
    print('got ws connection')
    ws:send('{"event": "txlist", "address": "0x2a65aca4d5fc5b5c859090a6c34d164135398226"}')
    end)

ws:on("receive", function(_, msg, opcode)
    print('got message:', msg, opcode)
    end)

You should see something like what follows below. The first message is a simple confirmation of connection, the second confirms your subscription to an address, and the third is what you get sent when a transaction occurs. You can subscribe to up to 30 addresses with a single connected device! Note that the data is all in JSON format, which is something we’ll take advantage of later.

got message: {"event":"welcome"} 1
got message: {"event":"subscribe-txlist", "status":"1", "message":"OK, 0x2a65aca4d5fc5b5c859090a6c34d164135398226"} 1
got message: {"event":"txlist","address":"0x2a65aca4d5fc5b5c859090a6c34d164135398226","result":[{"blockNumber":"5532531","timeStamp":"1525098009","hash":"0xe5ec497cb5b38811e8bf5db67a056a2bdd4aa9b68df5c8e8225cb300cbcfa413","nonce":"3363391","blockHash":"0xf446f77d92ed29c221e8451b8048113969ed305a7dd49177e10b422e8e2c4bda","transactionIndex":"172","from":"0x2a65aca4d5fc5b5c859090a6c34d164135398226","to":"0xec5fdfba35c01c6ad7a00085e70e8f30cd121597","value":"24418350000000000","gas":"50000","gasPrice":"4000000000","input":"0x","contractAddress":"","cumulativeGasUsed":"7896403","gasUsed":"21000","confirmations":"1"}]} 1

That’s quite a mess of transaction data, and unfortunately the datum of interest is in the ‘result’ field – which is nested JSON. In the last article, we converted simple JSON to a Lua table using the excellent sjson module. We’ll do the same here after verifying the message type is a transaction (txlist).

ws:on("receive", function(_, msg, opcode)
    print('got message:', msg, opcode)
    ok, ethdata = pcall(sjson.decode, msg)
    if ok then
        msgtype = (ethdata["event"])
        if msgtype == "txlist" then
...

The NodeMCU documentation specifically notes that nested JSON can cause out-of-memory errors. For that reason we use pcall (protected call) to contain any such errors when decoding our JSON message. Next, we extract the contents of the ‘value’ field, nested within the ‘result’ field:

if msgtype == "txlist" then
    wei = ethdata.result[1].value
    print (wei)
    eth = wei/1000000000000000000
    print (eth)
    end

It took me a few hours to figure out how to deal with nested tables, but in the end it was actually quite clean and easy — I was just being dense. Now, we need to add a basic provision to handle errors when the websocket is closed:

ws:on("close", function(_, status)
    print('connection closed', status)
    print('Reconnecting...')
    ws = nil -- required to Lua gc the websocket client
    tmr.alarm(0,4000,tmr.ALARM_SINGLE,transact) -- This reconnects after 4 seconds
end)

To wrap it all up, we encase the code in a couple of functions — first, one to establish a connection, subscribe to the right address, and notify when there is a transaction. Next we need one to display the amount of Eth transferred. Finally, we need a ‘ping’ function to call every 20 seconds or less to keep the connection alive. Overall this turned out to be more robust than expected and has yet to encounter an error. Check out the full code listing here. Note that I’ve also added a little code above to interface with a 128×32 OLED screen, the same one we used previously.

Now that it works, let’s consider im/practical applications. It’s a neat way to display Ethereum transactions in real-time, say if you do livestreaming and accept Eth donations and want them to trigger something fancy. Or, you could make a somewhat insecure vending machine. Clearly, getting a secure WebSocket up and running is the next order of business.

You could also set a timer where the length depends on the amount of Eth received. This would allow for things like public advertisements that go away for a while if someone pays a fee. (Please don’t do this!) Maybe a conference room for rent with the power controlled this way? Hackerspace membership payment? An electric bicycle that charges you for power used?

In any case, it’s not legal to use cryptocurrency as a form of payment in my country so I can’t implement any of the above examples at this time. If you’ve got a better application, please share it in the comments!

A Mobile Terminal For Guerrilla Communications

We use the Internet to do everything from filing our taxes to finding good pizza, but most critically it fulfills nearly all of our communication needs. Unfortunately, this reliance can be exploited by those pulling the strings; if your government is trying to do something shady, the first step is likely to be effecting how you can communicate with the outside world. The Internet is heavily censored and monitored in China, and in North Korea the entire country is effectively running on an intranet that’s cutoff from the wider Internet. The need for decentralized information services and communication is very real.

While it might not solve all the world’s communication problems, [::vtol::] writes in to tell us about a very interesting communication device he’s been working on that he calls “Hot Ninja”. Operating on the principle that users might be searching for accessible Wi-Fi networks in a situation where the Internet has been taken down, Hot Ninja allows the user to send simple messages through Wi-Fi SSIDs.

We’ve all seen creatively named Wi-Fi networks before, and the idea here is very much the same. Hot Ninja creates a Wi-Fi network with the user’s message as the SSID in hopes that somebody on a mobile device will see it. The SSID alone could be enough depending on the situation, but Hot Ninja is also able to serve up a basic web page to devices which actually connect. In the video after the break, [::vtol::] even demonstrates some rudimentary BBS-style functionality by presenting the client devices with a text field, the contents of which are saved to a log file.

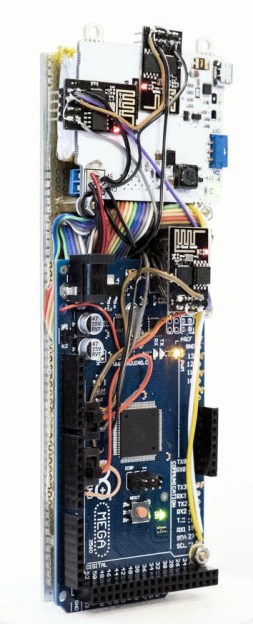
In terms of hardware, Hot Ninja is made up of an Arduino Mega coupled to three ESP8266 boards, and a battery to keep it all running for up to eight hours so you can subvert a dictatorship while on the move. The user interface is provided by a small OLED screen and a keyboard made entirely of through-hole tactile switches, further reinforcing the trope that touch-typing will be a must have skill in the dystopian future. It might not be the most ergonomic device we’ve ever seen, but the fact it looks like something out of a Neal Stephenson novel more than makes up for it in our book.

This is not the first time we’ve seen Wi-Fi SSIDs used as a method of communication, thanks largely to how easy the ESP8266 makes it. For his part, [::vtol::] has previously experimented with using them to culturally enrich the masses.

Continue reading “A Mobile Terminal For Guerrilla Communications”

Accessing Blockchain On ESP8266 Using The NodeMCU Board

Blockchains claim to be public, distributed, effectively immutable ledgers. Unfortunately, they also tend to get a little bit huge – presently the Bitcoin blockchain is 194GB and Ethereum weighs in at 444GB. That poses quite an inconvenience for me, as I was looking at making some fun ‘Ethereum blockchain aware’ gadgets and that’s several orders of magnitude too much data to deal with on a microcontroller, not to mention the bandwidth cost if using 3G.

Having imagined a thin device that I could integrate into my mobile phone cover (or perhaps… a wallet?) dealing with the whole blockchain was clearly not a possibility. I could use a VPS or router to efficiently download the necessary data and respond to queries, but even that seemed like a lot of overhead, so I investigated available APIs.

As it turns out, several blockchain explorers offer APIs that do what I want. My efforts get an ESP8266 involved with the blockchain began with two of the available APIs: Ethplorer and Etherscan.

Continue reading “Accessing Blockchain On ESP8266 Using The NodeMCU Board”

Checking The Weather Without A Window

Making a weather display is great because it’s a simple project that shows off some skills and has an obvious daily use. So [ACROBOTIC Industries] decided to make an easy kit for the Hackaday Prize to make weather displays even more accessible.

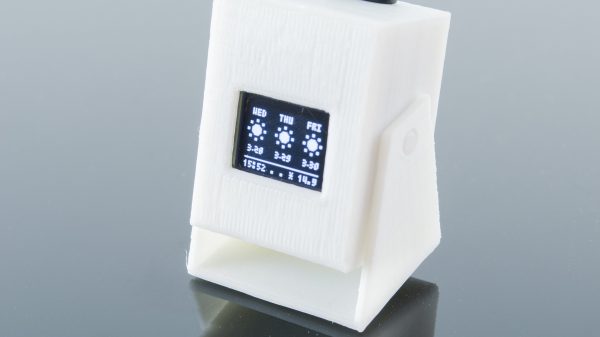
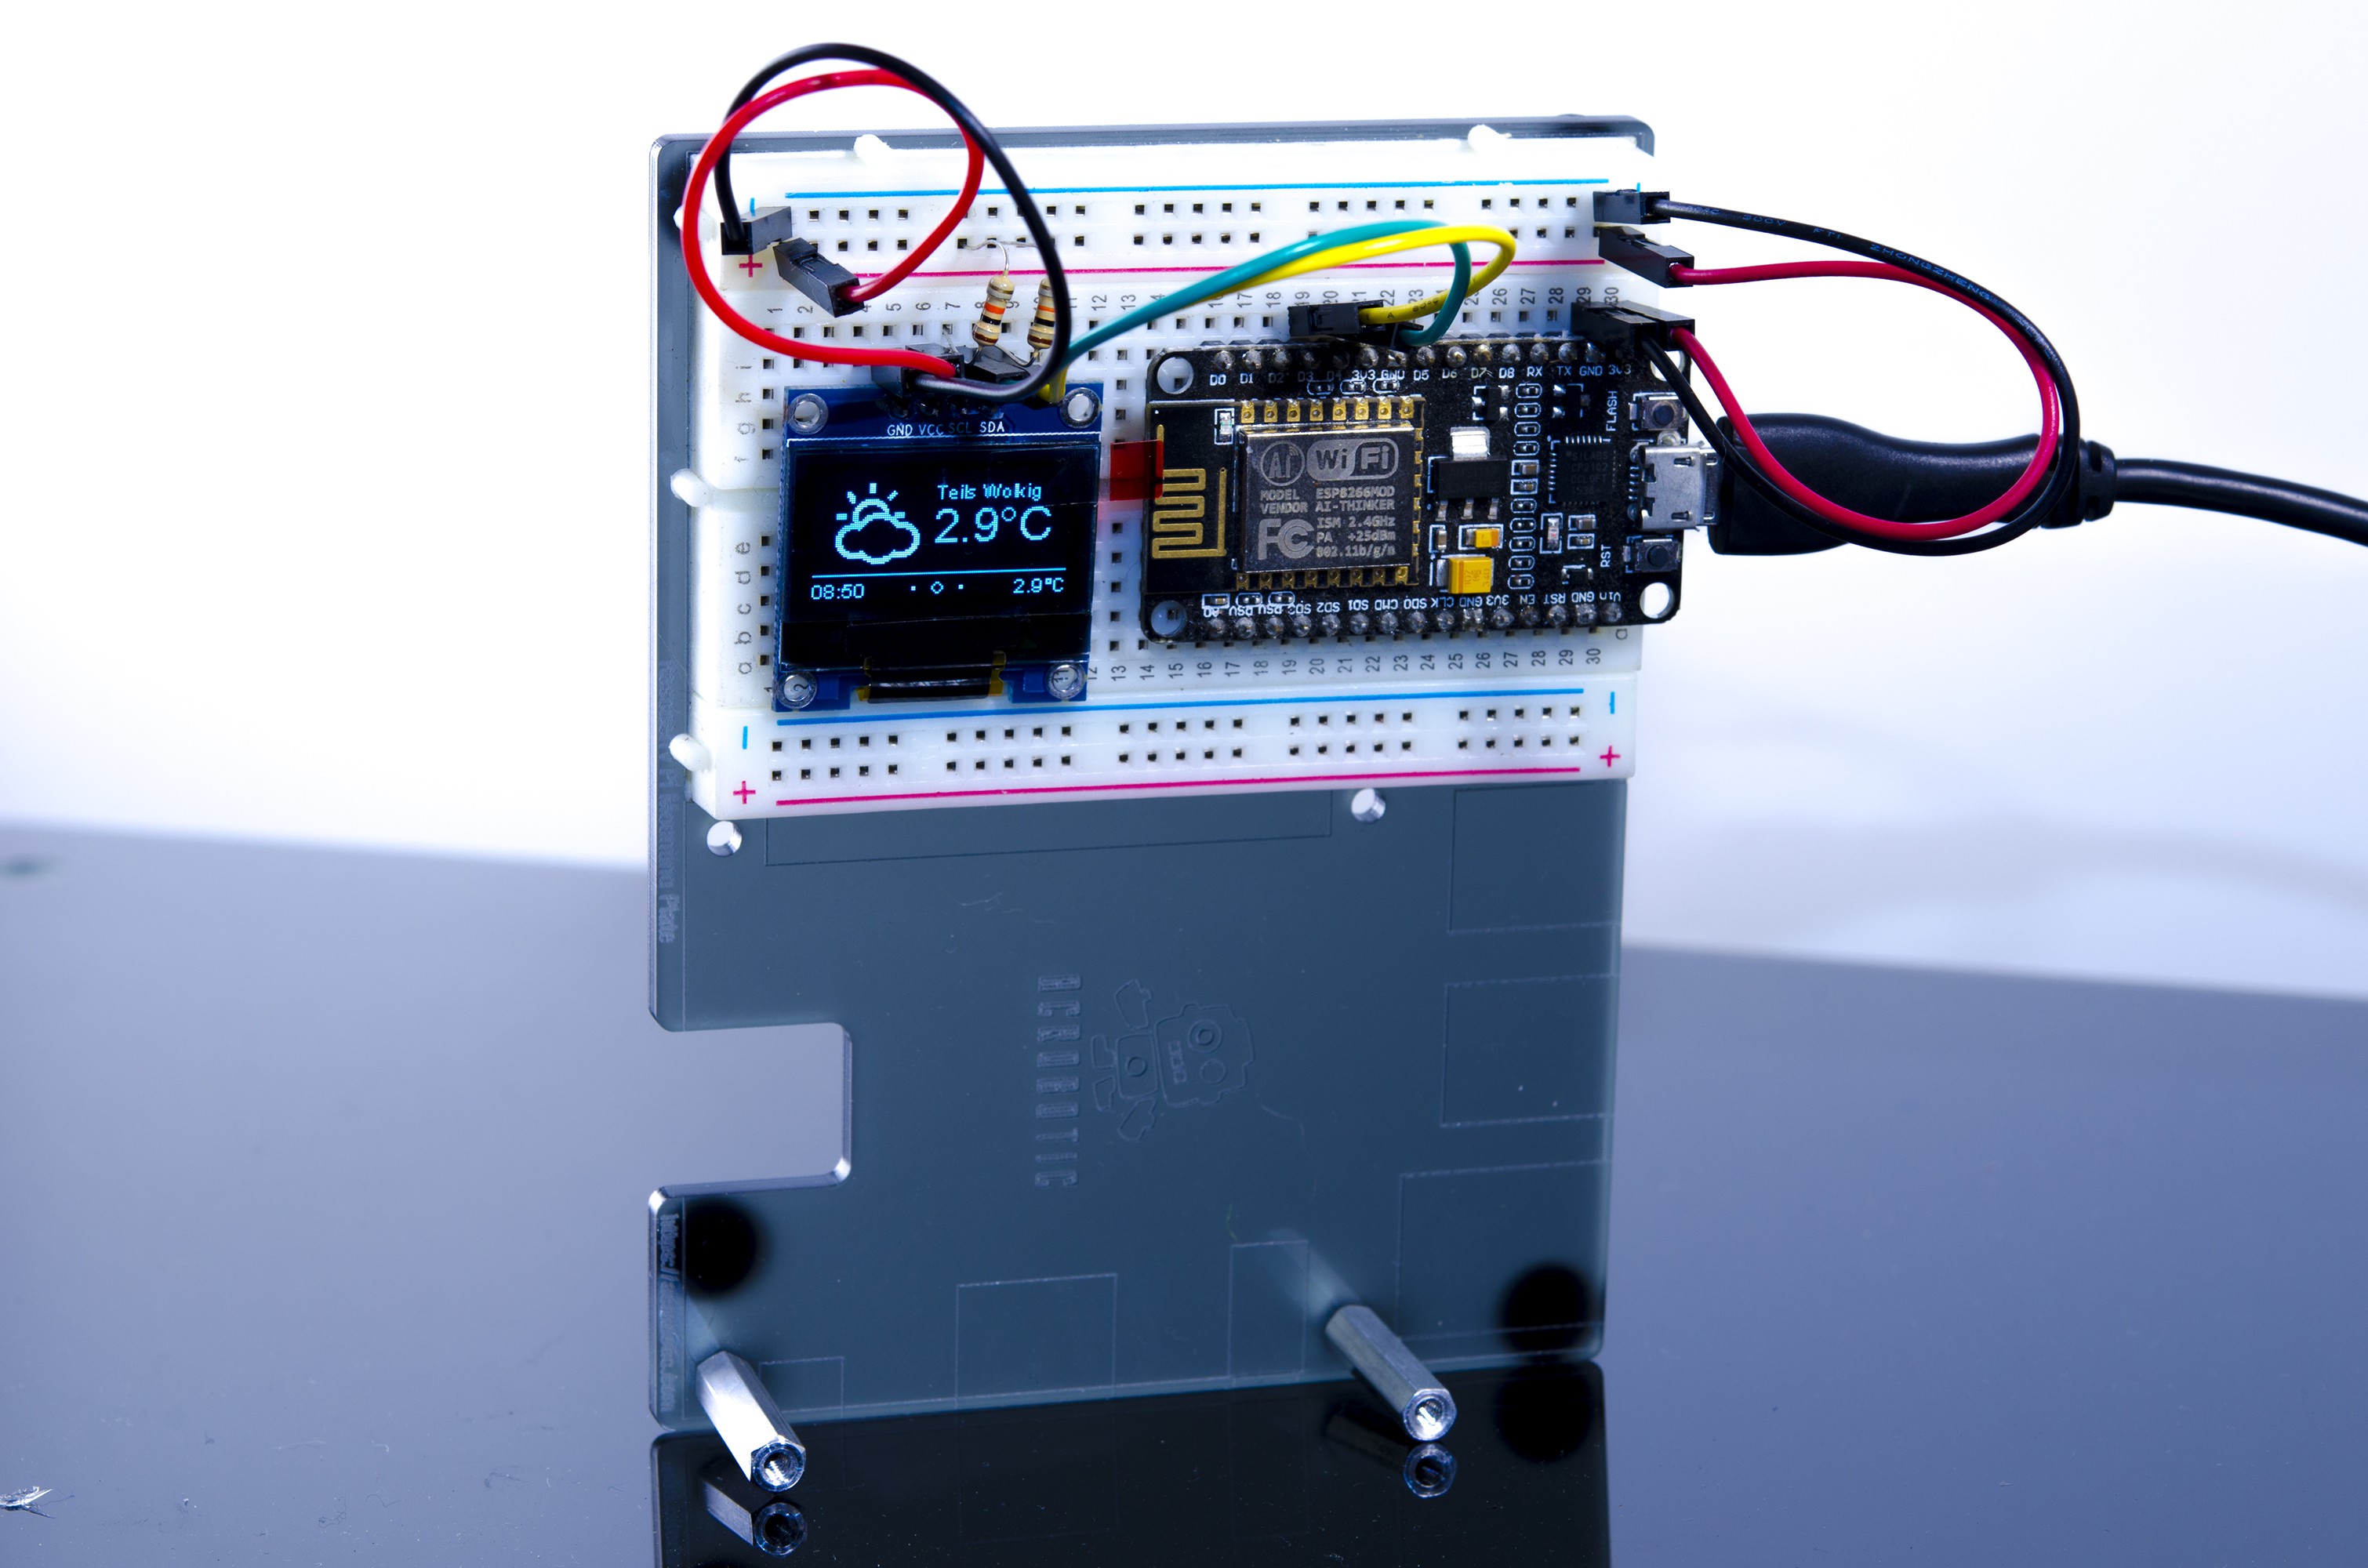
Calling it the ESPecter, [ACROBOTIC Industries] wanted to make this a simple project for anyone, regardless of skill with a soldering iron or Arduino toolkit. So they decided to base the guts on common components that can be put together easily, specifically a Wemos Mini D1 with an OLED shield as a bright display. They also designed a cool tiltable 3D-printed enclosure for this small device so that you can orient it to your eye level.

ESPecter breadboarded prototype.

While they already have a breadboarded prototype, and a 3D printed case, some software work remains to make the project really shine. They plan to add nice features like a web interface to configure location and network information, alerts, additional locations, and historical weather data. They also want to create a weather library to display well on a low-resolution screen and add battery operation.

We look forward to seeing the final version later in the Hackaday Prize!

This isn’t the first weather project we’ve seen around here. Other variants include mirror weather displays, an ESP8266-based weather monitoring station, a very low-power weather station, and this roundup of weather displays which might give you some inspiration.

Reprogramming Cheap WiFi Outlets

If you want to retrofit your home with smart outlets and lightbulbs, bust out your wallet. You can easily spend forty dollars for a smart light bulb at your local home supply store, and strips of smart sockets could cost sixty. When [coogle] found a WiFi-enabled four-outlet power strip on Amazon, he couldn’t resist. Sure, the no-name strip would be locked down behind a stupid iPhone interface and will probably turn your house into a botnet, but never mind that: you can easily reprogram these power strips to be whatever you want.

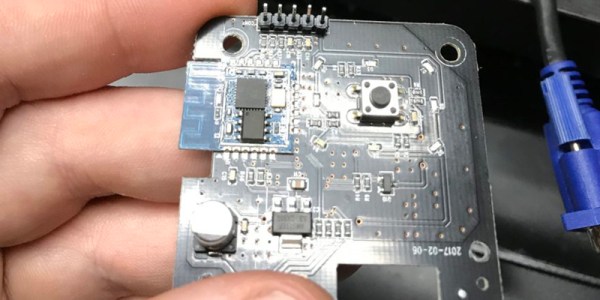
After receiving these power strips and tearing them open, [coogle] found exactly what you would expect from a no-name white goods manufacturer. There’s a board with an Espressif chip and a WiFi antenna, and a second board with a few relays, with a few wires connecting the two. You only need to browse AliExpress for a few minutes to figure out what’s going on here. The brains of the outfit are in the ESP8266, and if you can control that, you have your own Internet of Power Strips.

The problem, then, was reprogramming the ESP8266. This was a version of the chip [coogle] hadn’t seen before, but a quick query with the Google Mother Brain revealed it was a WT8266-S1 module, with all the pins required for programming easily accessible on a convenient header. After connecting this header up to an ESP programming board, [coogle] had all the relevant information including the capacity of the Flash. There’s still a bit more work to make this a functional WiFi power outlet, namely figuring out which GPIOs and wires connect to which relays, but this is effectively a completely Open IoT device right now. All you have to do is bring your own firmware.

Mc Lighting Takes The Pain Out Of Blinking

If you want to blink a ton of WS2812-alike LED pixels over WiFi, the hardware side of things is easy enough: an LED strip, and ESP8266 unit, and a beefy enough power supply to feed them. But the software side — that’s where it can be a bit of a pain.

Enter Mc Lighting. It makes the software side of things idiot-proof. Flash the firmware onto the ESP8266, and you’ve got your choice of REST, WebSockets, or MQTT to get the data in. This means that it’ll work with Homekit, NodeRed, or an ESP-hosted web interface that you can pull up from any smartphone.

The web interface is particularly swell, and has a bunch of animations built in. (Check out the video below.) This means that you can solder some wires, flash an ESP, and your least computer-savvy relatives can be controlling the system in no time. And speaking of videos, Mc Lighting’s author [Tobias] has compiled a playlist of projects that use the library, also just below. The docs on GitHub are great, and also check out the wiki.

So what are you waiting for? Do you or your loved ones need some blink in your life? And while you’re ordering LED strips, get two. You’re going to want to build TWANG! as well.

Continue reading “Mc Lighting Takes The Pain Out Of Blinking”

Audio Hacking With The ESP8266

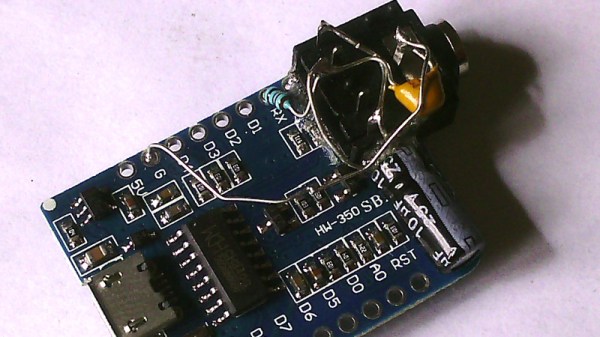
If you study the specifications of the ESP8266 WiFi-enabled microcontroller, you will notice that it features an I2S audio interface. This is a high-speed serial port designed to deliver 16-bit audio data in a standard format, and has its origins in consumer audio products such as CD players. It would be usual to attach a dedicated DAC to an I2S interface to produce audio, but [Jan Ostman]’s synthesiser projects eschew that approach, and instead do the job in software. His I2S interface pushes out a pulse density modulated data stream in the same manner as a 1-bit DAC, meaning that the only external components required to produce audio are a simple low-pass filter. He’s posted a video of the synth in action, which we’ve placed below the break.

The example he gives us is a basic clone of a Roland 909 drum machine, and he takes us through the code with extensive examples including MIDI. He’s using the Wemos D1 Mini board, but the same could be replicated with many other ESP8266 platforms.

We’ve featured [Jan]’s work many times before, from his minimalist Atmel-based devices through to small but perfectly-formed complete instruments.

Continue reading “Audio Hacking With The ESP8266”