Barcaderator Is Coin-Op Arcade Up Top And Kegerator Down Below

It’s a common sight in our community for a life-expired arcade cabinet to be repurposed as a MAME cabinet with an up-to-date screen and other internals. Many of us have had some fun pursuing high scores in a hackerspace somewhere, and even if they don’t have the screen burn and annoying need for cash of the originals they still deliver plenty of fun.

But if there’s one pleasure an adult can pursue that a kid in a 1980s arcade couldn’t, it’s a cool glass of beer. [Marcus Young] has brought together the two with his Barcaderator, a custom MAME cabinet with a beer tap on the side and a fridge for a keg in its base.

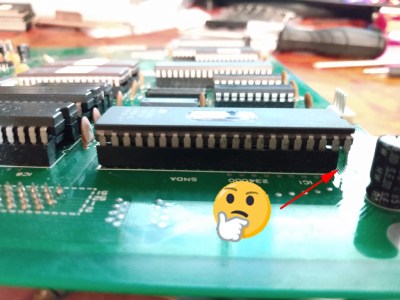
The MAME internals include a Lattepanda Alpha and an LED controller for those illuminated buttons. Where this build shines is in its custom cabinet, which instead of being an all-in-one unit takes the form of a base and top half that are detatchable. It appears to take its inspiration and build techniques from the world of flight cases. You can see the detail where the two halves come together in this image. The result should be of great interest to anyone who has struggled with moving an unwieldy traditional arcade cabinet.

This is we think the first beer/arcade combo to grace these pages. But we’ve had more than one arcade cabinet, and definitely quite a few kegs along the way.

Building A DIY Desktop-Sized Arcade Machine

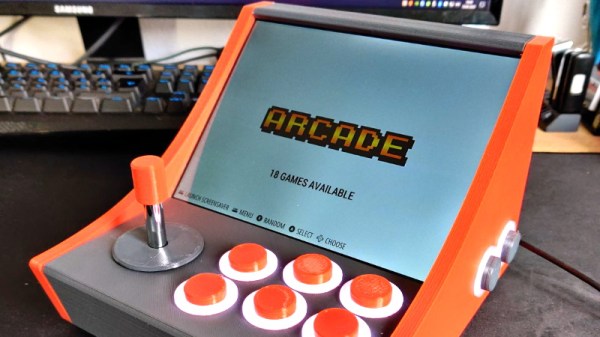
Full-sized arcade cabinets are undeniably cool, but take up a lot of space and can be somewhat of a handful. [PleaseNoFisticuffs] desired something a little more fun-sized, and so built a desktop arcade machine that has some serious style.

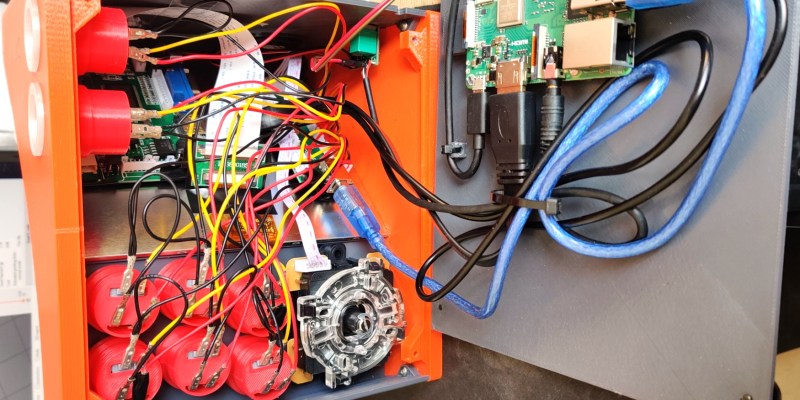
It’s a build that’s remarkably accessible for even the inexperienced builder. Paper templates are used to cut out the plywood parts for the cabinet, and the electronic components are all off-the-shelf items. Assembly is readily achievable with high-school level woodworking and soldering skills. Like most similar builds, it relies on the Raspberry Pi running RetroPie, meaning you’ll never run out of games to play.

Where this project really shines, however, is the graphics. Cribbed from Mortal Kombat II and looking resplendent in purple, they’re key to making this cabinet a truly stunning piece. The attention to detail is excellent, too, with the marquee and screen getting acrylic overlays for that classic shine, as well as proper T-moulding being used to finish the edges.

We’d love to have something like this on our desk, though we’d likely get far less work done in such an event. For another take on an arcade build, check out this impressive Undertale pinball cabinet.


LEDSpicer Is An Open Source Light Controller For Your Arcade Machine

In this day and age of cheap and easy emulation, it’s more tempting than ever to undertake a home arcade cabinet build. If you want to show off, it’s got to have a light show to really pull the crowds in. To make that easier, [Patricio] put together a software package by the name of LEDSpicer.

The project came about when [Patricio] was working on his Linux-based MAME cabinet, and realised there were limited software options to control his Ultimarc LED board. As the existing solutions lacked features, it was time to get coding.

LEDSpicer runs on Linux only, and requires compilation, but that’s not a huge hurdle for the average MAME fanatic. It comes with a wide variety of animations, as well as tools for creating attract modes and managing LEDs during gameplay. There are even audio-reactive modes available for your gaming pleasure. It’s open source too, so it’s easy to tinker with if there’s something you’d like to add yourself.

It’s a great package that should help many arcade builders out there. LEDs can be used to great effect on a cabinet build; this marquee is a particularly good example. Video after the break.

[Thanks to Guillermo for the tip!]

Continue reading “LEDSpicer Is An Open Source Light Controller For Your Arcade Machine”

Arcade With LED Marquee Shows Off Your Game

We’ve seen a lot of arcade machine builds here on Hackaday. Seriously, a lot. Even more so since the Raspberry Pi took over the world and made it so you didn’t have to cannibalize an old laptop to build one anymore. It’s one of those projects with huge appeal: either you’re somebody who’s built their own arcade, or you’re somebody who wishes they had. But even after seeing all these builds, we occasionally come across a specimen that deserves special recognition.

LED display controller

[Al Linke] recently wrote in to tell us about his arcade build, which we think you’ll agree is worth a closer look. The core build is actually a modification of a previously published design, but what makes this one unique is the addition of a programmable LED matrix in the top that actually shows the logo and artwork for whatever game you’re currently playing. This display really helps sell the overall look, and instantly makes the experience that much more authentic. Sure you don’t need the marquee of your home arcade machine to show era-appropriate artwork…but we know you want it to.

So how does one interface their Raspberry Pi with this beautiful 64×32 LED marquee display? Well it just so happens that [Al] is in the business of making cool LED displays, and even has a couple successful Kickstarter campaigns under his belt to prove it. He’s developed a board that lets you easily connect up to low-cost HUB75 LED panels such as the one used in the arcade. It’s been a few years since we’ve last seen a project that tackled these specific LED displays, and it’s encouraging to see how far things have come since then.

Even if you’re somehow not in love with the LED marquee, this build really does stand on its own as a fantastic example of a desktop arcade machine. [Al] went to great length to document his build, including putting together several videos during different phases of construction. If you’re curious about the start of the art for home arcade builds, this project would be a pretty good one to use as a barometer.

Whether it’s a full-size replica of the machine you spent your youth standing in front of, or an entirely new design made to your exacting specifications, there’s few projects that are a better conversation starter than one of these beauties blinking away in your living room.

Continue reading “Arcade With LED Marquee Shows Off Your Game”

Gorgeous Bartop Arcade Build Is A Cut Above

At this point we’ve seen a good number of desktop-sized arcade cabinets, and while they’ve naturally all been impressive in their own ways, they do tend to follow a pretty familiar formula. Cut the side panels out of MDF (or just buy a frame kit), stick a Raspberry Pi and an old LCD monitor in there, and then figure out how to control the thing. Maybe a couple strategically placed stickers and blinking LEDs to add a few extra horsepower, but nothing too surprising.

[Andy Riley] had seen plenty of builds like that, and he wasn’t having any of it. With the heart of an old laptop and bones made of IKEA cutting boards, his build is proof positive that there’s always more than one way to approach a problem that most would consider “solved” already. From the start, he set out to design and build a miniature arcade cabinet that didn’t look and feel like all the other ones he’d seen floating around online, and we think you’ll agree he delivered in a big way.

Powering the arcade with an old laptop is really a brilliant idea, especially since you can pick up older models for a song now that they’re considered nearly disposable by many users. As long as it doesn’t have a cracked display, you’ll get a nice sized LCD panel and potentially a rather powerful computer to drive it. Certainly the graphical capabilities of even the crustiest of used laptops will run circles around the Raspberry Pi, and of course it opens the possibility of playing contemporary PC games. As [Andy] shows in his detailed write-up, using a laptop does take more custom work than settling for the Pi, but we think the advantages make a compelling case for putting in the effort.

Of course, that’s only half the equation. Arguably the most impressive aspect of this build is the cabinet itself, which is made out of a couple IKEA bamboo cutting boards. [Andy] used his not inconsiderable woodworking skills, in addition to some pretty serious power tools, to turn the affordable kitchen accessories into a furniture-grade piece that really stands out from the norm. Even if you aren’t normally too keen on working with dead trees, his step-by-step explanations and pictures are a fascinating look at true craftsman at work.

If you’re more concerned with playing Galaga than the finer points of varnish application, you can always just turbocharge the old iCade and be done with it. But we think there’s something to be said for an arcade cabinet that could legitimately pass as a family heirloom.

FPGA Jacked Into Pinball Machine Masters High Scores

How do you preserve high scores in an old arcade cabinet when disconnecting the power? Is it possible to inject new high scores into a pinball machine? It was the b-plot of an episode of Seinfield, so it has to be worth doing, leading [matthew venn] down the rabbit hole of FPGAs and memory maps to create new high scores in a pinball machine.

The machine in question for this experiment is Doctor Who from Williams, which, despite being a Doctor Who pinball machine isn’t that great of a machine. Still, daleks. This machine is powered by a Motorola 68B09E running at 2MHz, with 8kB of RAM at address 0x0000. This RAM backed up with a few AA batteries, and luckily is in a DIP socket, allowing [matthew] to fab a board loaded up with an FPGA development board that goes between the CPU and RAM.

The basic technique for intercepting and writing a new high score for this pinball machine comes from the incredible [sprite_tm] who is tweeting high scores from a 1943 cabinet. The idea is simple: just have an FPGA look at one specific memory address, and send some data to a computer when the data at that address is updated. For the Doctor Who pinball machine, this is slightly harder than it sounds: the data isn’t stored in hex, but packed BCD. After a little bit of work, though, [matthew] was able to write new high scores from a Python script running on a laptop. All the code (and a few more details) are over on a Github

Extending arcade games by tapping into address and data lines isn’t something we see a lot of, but it has been done, most famously with the Church of Robotron. Here, a few MAME hacks turn a game of Robotron into a Church for the faithful to fully commit themselves to the savior of the world, due to arrive in 66 years and save the remaining humans from the robot apocalypse. This hack of a Doctor Who pinball machine goes beyond a modded version of MAME, and if we’re ever going to make a real chapel with a real game of Robotron, these are the techniques we’re going to use.

Better Than Original Pong Using Arduino

Games like Pong are legendary, not only in the sense that they are classic hours fun but also that they have a great potential for makers in stretching their learning legs. In an attempt at recreating the original paddle games like Pong and Tennis etc, [Grant Searle] has gone into the depths of emulating the AY-2-8500 chip using an Arduino.

For the uninitiated, the AY-3-8500 chip was the original game silicon that powered Ball & Paddle that could be played on the domestic television. Running at 2 MHz, it presented a 500 ns pixel width and operated to a maximum of 12 Volts. The equivalent of the AY-3-8500 is the TMS1965NLA manufactured by Texas Instruments for those who would be interested.

[Grant Searle] does a brilliant job of going into the details of the original chip as well as the PAL and NTSC versions of the device. This analysis will come in handy should anyone choose to make a better version. He talks about the intricacies of redrawing the screen for the static elements as well as the ball that bounces around the screen. The author presents details on ball traversal, resolution, 2K memory limit and its workarounds.

Then there are details on the sound and the breadboard version of the prototype that makes the whole write-up worth one’s time. If you don’t fancy the analog paddles and would rather use a wireless modern-day touch, check out Playing Pong with Micro:bits

Thanks [Keith O] for the tip.